
Recently, HP finally ceased its activities in Russia. However, when visiting the hp.ru or hp.com sites, users are redirected to the Russian-language section of the site for Kazakhstan, where they can find all the necessary information — from product descriptions to drivers and instructions in Russian.
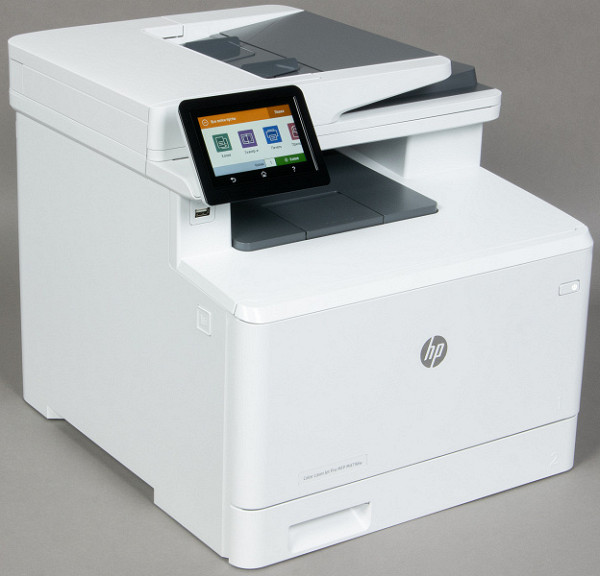
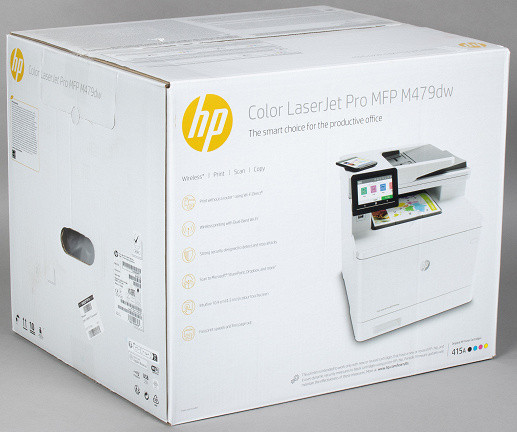
We did not miss the opportunity to test the HP Color LaserJet Pro MFP M479dw W1A77A color laser MFP, which combines the functions of a printer, scanner and copier, and is equipped with an automatic two-sided printing device (duplex).
This line also includes the M479fnw (W1A78A) model with fax function, but without duplex, as well as the M479fdw (W1A80A), which includes both fax and duplex.
Characteristics, equipment, consumables, options
As usual, we start with the characteristics declared by the manufacturer:
| General characteristics | |
|---|---|
| Functions | color and monochrome: printing, scanning, copying |
| Printing technology | color laser |
| Dimensions (W×D×H), mm | minimum 416×472×400 maximum 426×652×414 |
| Net weight, kg | 23.3 |
| Power supply | 220—240 V AC, 50/60 Hz |
| Power Consumption: Off in Sleep Mode, Print Ready Mode | ≤ 0.06 W ≤ 0.7 W ≤ 20 W ≤ 550 W |
| Screen | color touchscreen LCD, 10.92 cm (4.3 inches) diagonal |
| CPU | 1200 MHz |
| Memory | 512 MB NAND flash, 512 MB RAM |
| HDD | no (you can use a USB drive to store jobs) |
| Standard ports | USB 2.0 (Type B) Ethernet 10/100/1000 Mbps Wi-Fi 802.3az (EEE) and 802.11b/g/n 2.4/5 GHz host port USB 2.0 (Type A) on the front panel of the host USB 2.0 port (type A) on the rear panel |
| Monthly load: recommended maximum | 750—4000 50,000 |
| terms of Use | temperature: from +10 to +32.5 °C; Humidity: 10%-80% (non-condensing) |
| Acoustic noise level when printing | 49 dBA |
| Manufacturer's warranty | 1 year (what will happen to the manufacturer’s warranty in the Russian Federation is unknown) |
| Paper handling devices | |
| Standard trays (capacity at 80 g/m²) | feeding: retractable (up to 250 sheets) and universal (up to 50 sheets) receiving: up to 150 sheets |
| Additional input/output trays | yes (550 sheets) / no |
| Built-in two-sided printing (duplex) | There is |
| Media Size | min: 76×127 mm max: 216×356 mm |
| Supported media | paper, envelopes, postcards, labels, films |
| Supported paper weight | Drawer: 60 — 163 gsm, MP tray: 60 — 176 gsm, HP Glossy: up to 200 gsm, Duplex: 60 — 163 gsm |
| Seal | |
| Permission | 600×600 dpi (up to 38400×600 dpi enhanced) |
| Warm-up time after power on | 45 s (information from third party sources) |
| First page print time (mono/color) | ≤ 9.5 s / 11 s |
| Print speed (A4, color and monochrome): single-sided double-sided | up to 27 ppm up to 24 ipm |
| Minimum margins when printing | 4 mm |
| Scanner | |
| Type | tablet CIS |
| Automatic Document Feeder | yes, single-sided, capacity up to 50 sheets (80 g/m²) |
| Scan Resolution | 1200×1200 dpi (optical) |
| Scan speed (mono/color) | up to 29 / 20 ppm |
| Maximum document width | 216 mm |
| Copying | |
| Max. number of copies per cycle | 999 |
| Changing the scale | 25%—400% in 1% increments |
| Speed (A4, mono and color): | up to 27 ppm |
| Copying time 1st page (A4, mono/color) | 9.5 / 11.1 s |
| Other parameters | |
| Supported Operating Systems | Windows 7, 8, 8.1, 10 Mac OS Sierra v10.12 and v10.13, macOS Mojave v10.14 |
| Network security, Infrastructure mode | WEP, WPA/WPA2, WPA Enterprise; AES or TKIP encryption; WPS |
| Printing from mobile devices | Yes |
The device comes with cartridges already installed, which, according to the information on the website, are designed for 2400 black and white A4 prints and 2100 color prints (according to the ISO/IEC 19798 standard).
The kit includes:
- power cable (in our case there were two: with an IEC C13 Schuko Euro plug and a BS 1363 British plug),
- a set of paper documentation, including a guide to getting started in several languages, including Russian,
- USB-A — USB-B cable for connecting to a computer.
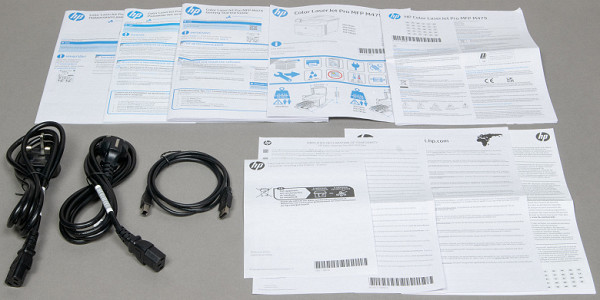
There is no thick book with detailed instructions, but it can be downloaded in PDF format, including a Russian version.
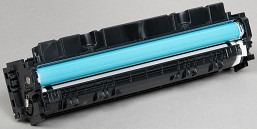
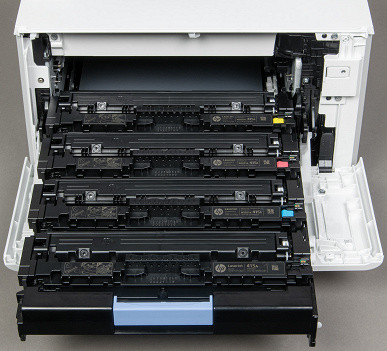
Consumables are officially called «toner cartridges», although devices in this series do not have separate drum cartridges — the cartridges used include photoconductors. Therefore, replacing consumables is very simple and comes down to only four items for purchase. Although this may not be the most economical option in terms of cost per print.
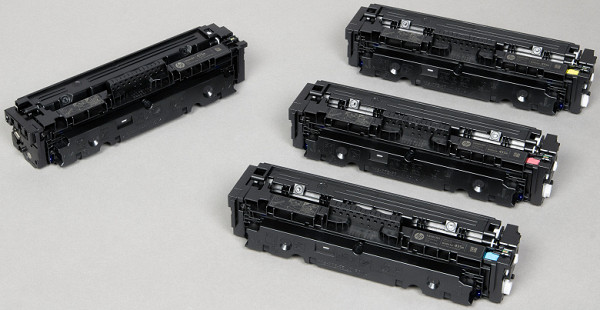
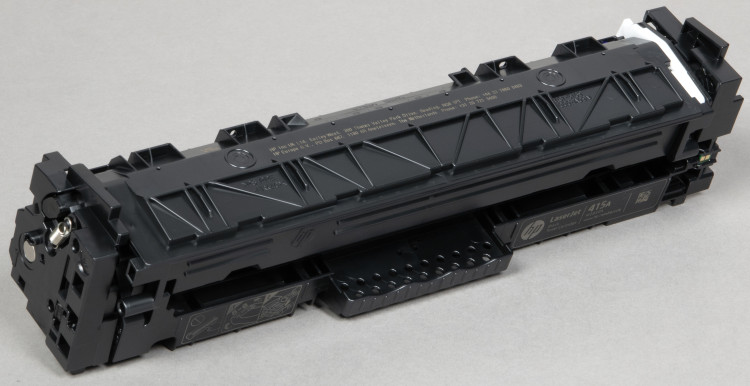
Cartridges can be purchased in two types with different resources:
- HP LaserJet 415A with added color: Black W2030A for 2400 prints, as well as Cyan W2031A, Magenta W2033A and Yellow W2032A for 2100 prints each (such cartridges are supplied with the MFP);
- HP LaserJet 415X with added color: Black W2030X for 7,300 prints, as well as Cyan W2031X, Magenta W2033X and Yellow W2032X for 6,000 prints each.
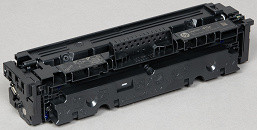
The cartridges contain chips that determine their originality and type. There are two protective functions, combined under the name «Dynamic Security». The first of these, “Cartridge Protection,” binds cartridges to a specific printer or group of printers, making them impossible to use on other devices if they are stolen. This function is somewhat strange: if the cartridges are stolen, then if they are useless, they will simply be thrown away, but will not be returned to the rightful owner, who can only receive moral satisfaction from the disappointment of the thief.
The second feature, Cartridge Policy, protects manufacturer revenue by allowing only original HP cartridges to be installed. This is presented as customer care: “Only genuine HP cartridges provide the best print quality.”
Both features should be disabled by default, but it's best to check through the printer menu or embedded web server. If your printer/MFP works with compatible cartridges, even if it warns that they are not original, you should not update the firmware, as the new version may block this feature.
It is worth noting that both the MFP itself and the cartridges are tied to certain regions of the world (North and Latin America, Europe-Russia-CIS-Africa, Asia-Pacific). If the regions do not match, the cartridge may be rejected, but there is an option to reset the region for the cartridge, which we will mention in the section on the web interface (although we did not try this ourselves).
In addition, the MFP has other replaceable parts that require replacement after a certain operating time, but such operations are not within the user's competence, so they are not listed in the instructions, with the exception of the pull-out tray for replacement (RM2-6377-000CN). I wonder if these trays really break often?
The only option is an optional 550-sheet capacity CF404A (probably for 80gsm office paper), with a media weight range of 60-163gsm. It weighs 4.8 kg (excluding paper) and measures 407 x 447 x 154.6 mm, which increases the height of the device by approximately 15 cm.
The MFP is packaged in a well-designed box with hand-grip cutouts on the sides.
Appearance, design features
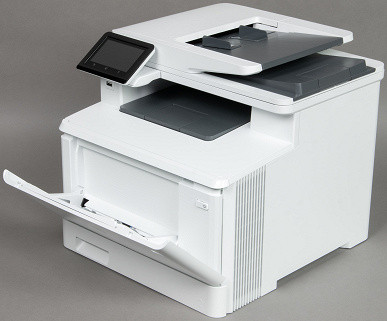
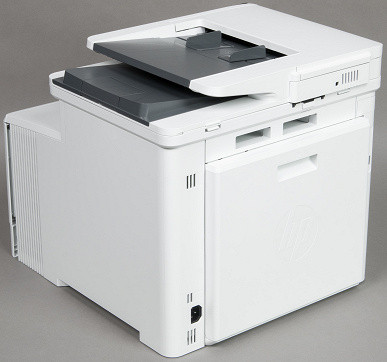
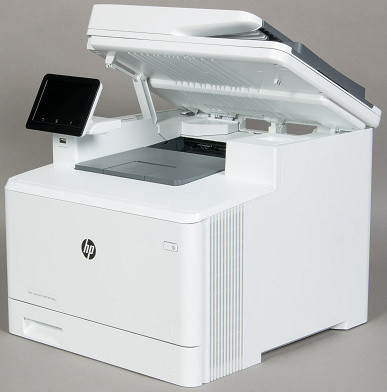
The layout of the device is the most common: at the bottom is the printing unit, at the top is the scanner, between them is a receiving tray with a capacity of 150 sheets (usually indicated for paper with a density of 80 g/m²).
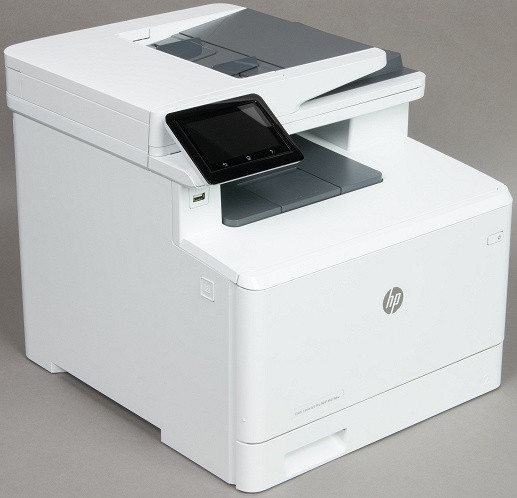
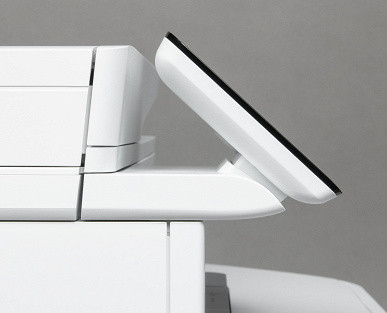
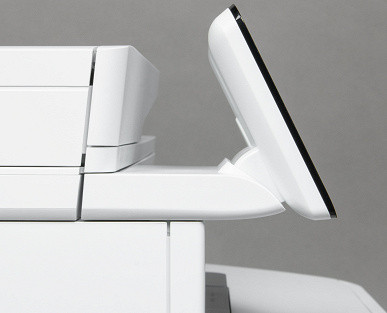
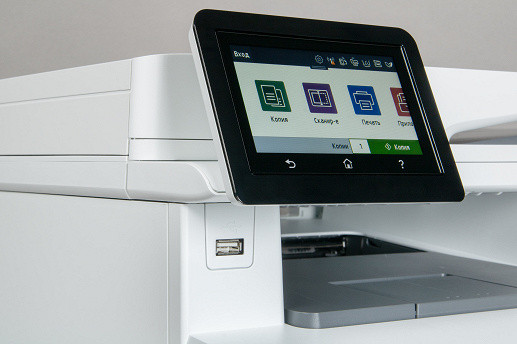
To the left of the receiving tray there is a control panel, which is equipped with a hinge for changing the angle of inclination. This hinge allows the panel to be tilted 25-30 degrees, which greatly improves comfort for operators of any height and in any position, whether standing or sitting.
There is a USB port under the control panel for connecting removable media.
At the bottom of the printing unit there is a sliding paper feed tray (Tray No. 2) with a capacity of up to 250 sheets. Above it there is a second input tray, a folding universal one (tray No. 1), designed for 50 sheets.
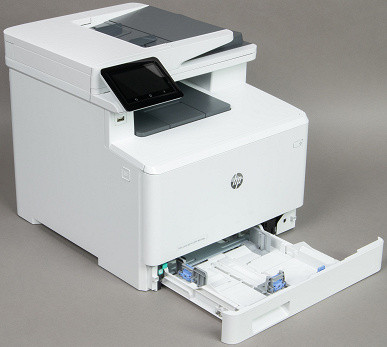
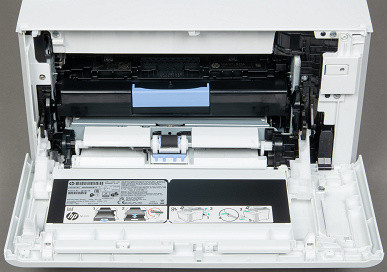
The multi-purpose tray is attached to another hinged lid that provides access to the internal parts of the printer, including the slide-out cartridge cassette.
On the front panel, on the right, there is a power switch.
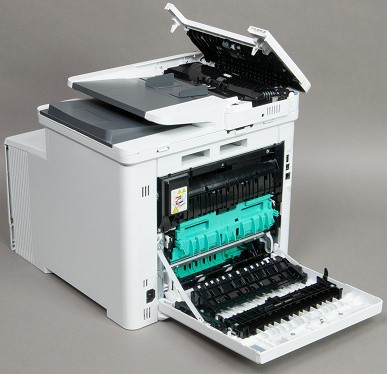
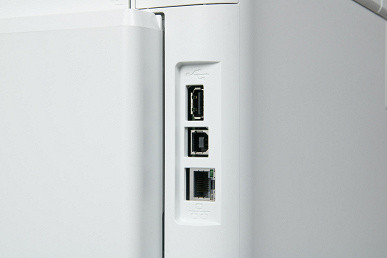
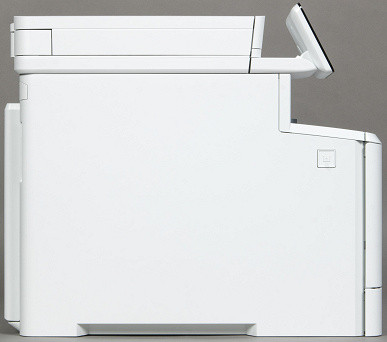
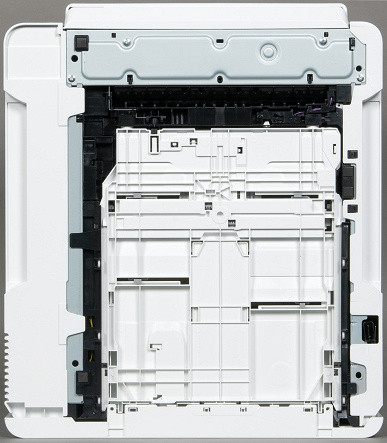
Almost the entire rear wall is occupied by a hinged cover of the paper feed path, and around it there are various connectors.
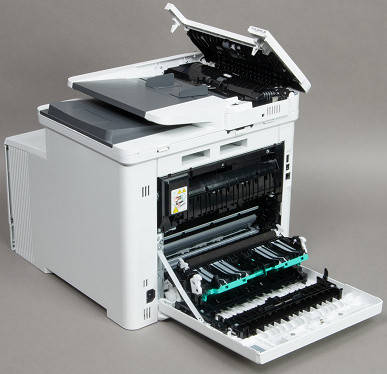
Closer to the left side there is a set of ports: Ethernet and two USB 2.0 — type B for connecting to a computer and type A (the instructions explain that it is intended “for storing tasks”, this will be discussed below).
Near the right side wall there is a socket for the power cable.
The scanner is equipped with a single-sided automatic feeder with a capacity of up to 50 originals. To work with glass, the automatic document feeder tilts almost 90 degrees, increasing the height of the device to 65 cm, which must be taken into account when choosing a place to place it. The hinges prevent the rear edge of the document feeder from being raised when working with thick originals (books, magazines, binders) to minimize edge flare.
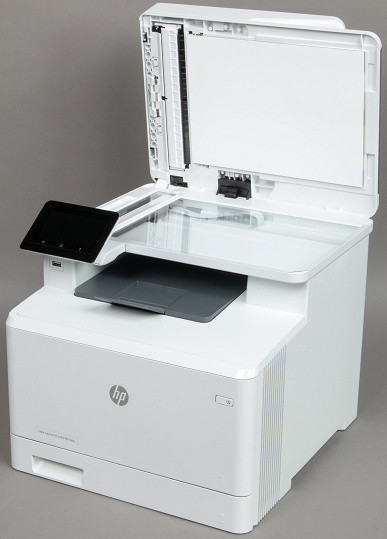
The entire scanner structure (including the ADF) also tilts up about 25 degrees, giving easy access to the output tray.
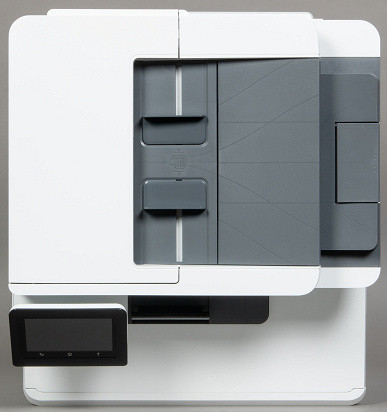
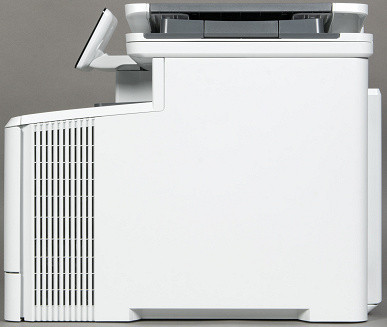
For meticulous readers, here are a few more angles:
First power-up, control panel, OSD menu features
Since the device comes with pre-installed cartridges, preparation takes a minimum of time: unpack, remove a considerable amount of orange shipping strips and stickers, connect to AC power, press the Power button and wait until the home menu page appears on the screen.
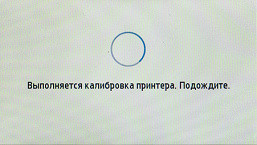
You may be asked to confirm the paper size and type, and to calibrate (no paper is wasted during this procedure). To ensure proper operation, you can print a demo page from the OSD menu.
This whole process takes about ten minutes, the most inconvenient thing is removing the MFP from the packaging; it’s better to do this together: it’s both difficult and inconvenient for one.
On Screen Display
On the control panel, in addition to the LCD touch screen, there are only three buttons: a button to return to the previous page, a button to go to the “home” menu page and a help button, all of which are touch sensitive. There is no separate “Cancel” button, but it appears on the screen while performing the corresponding operations. There are no LED indicators on the panel.

The surface of the panel, as usual, is glossy — both the screen area and the area with three buttons. We have already talked about glare and clearly visible fingerprints on this “beauty” so many times that there is no point in repeating it.
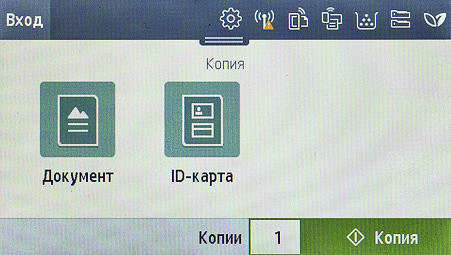
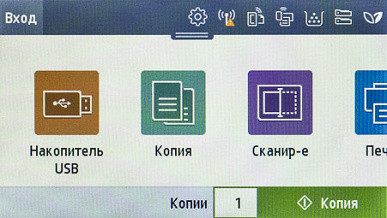
The standard OSD home page consists of three parts. The largest is the middle one, with horizontal scrolling, it contains icons of the main modes: copying, scanning, printing, as well as some “Applications”. When you connect a flash drive to the front connector, another corresponding icon appears. The M479fnw and M479fdw modifications add an icon for working with fax messages. This field can be scrolled horizontally.
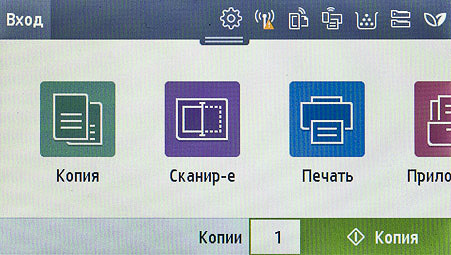
The narrow bottom bar can also contain buttons and display some parameters: for example, for copying, it will display the specified number of copies.
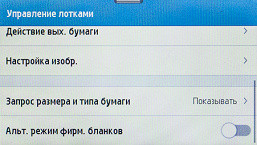
An equally narrow top bar with several icons can be pulled down to access information, settings and advanced mode controls.
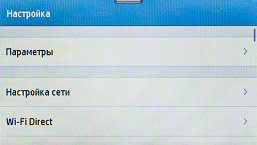
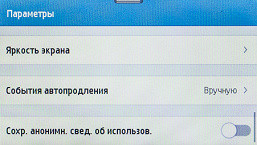
Some printing options can be set:

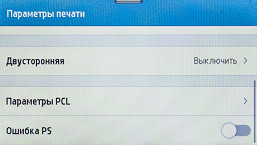
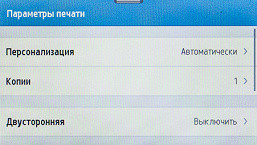
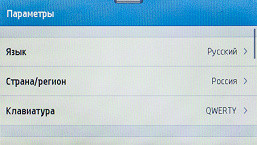
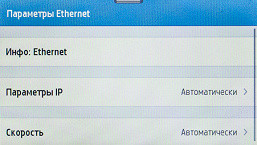
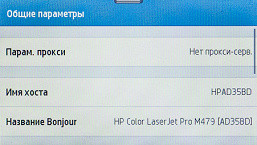
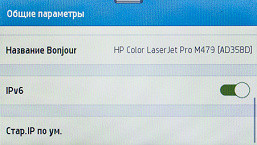
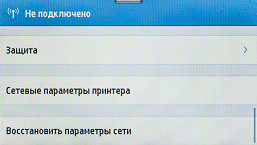
You can select a language for menus and messages, including Russian. Network settings are also located here.

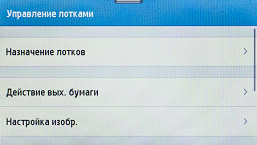
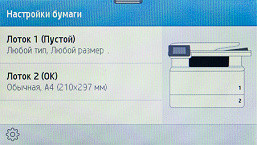
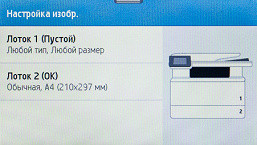
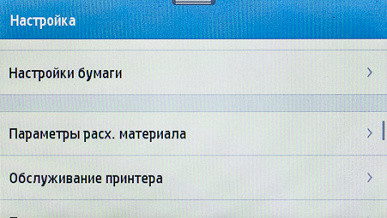
A considerable number of settings are related to trays and paper.
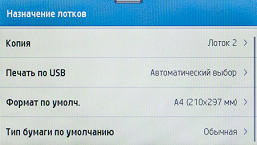

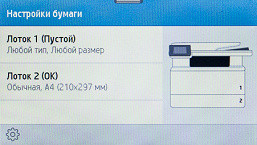
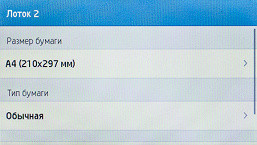
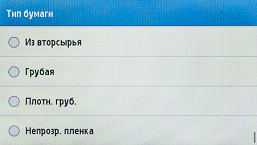
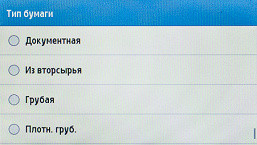
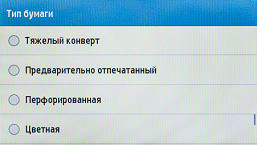
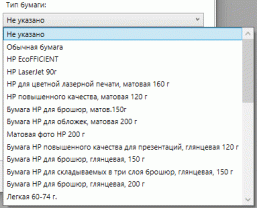
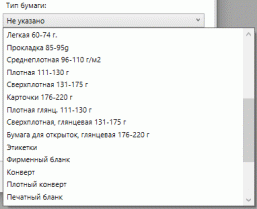
In particular, there is a wide selection of media types (as usual, a fair portion comes under the HP brand):
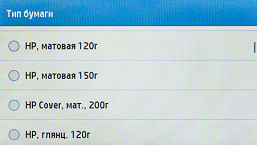
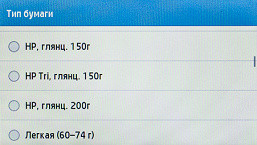
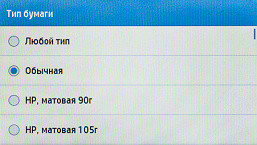
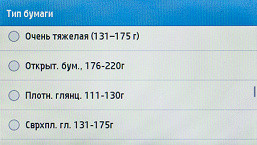
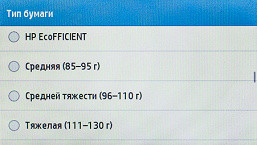
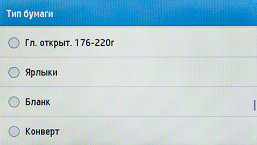
In addition to paper, postcards, forms, envelopes, labels, and films are also available.
The sensitivity of the touch screen evokes only positive reviews: you can work either with your finger or with a handy tool, for example, with the blunt tip of a pencil (but abuse of this should be avoided: the screen requires careful handling). Sometimes taps or gestures (such as scrolling) are not recognized, but this happens very rarely. The sizes of icons and other elements intended to be pressed are usually sufficient for confident finger work. The font used for the inscriptions is readable, the screen contrast and viewing angles are acceptable, and the brightness can be adjusted in the settings.
The arrangement of icons on the “home” page can be configured via the web interface in accordance with your preferences. However, in our case, the number of icons is limited (four or five with a flash drive installed in the front connector), so this function is of limited usefulness.
Autonomous operation
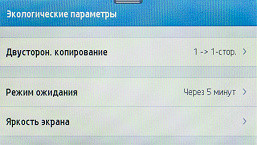
By default, the sleep time is set to a very short time of one minute. Sometimes this gets in the way, and then you can choose a longer interval, up to 60 minutes.
Copying
After selecting this mode, you are prompted to clarify: we will copy a document or ID card.
Document
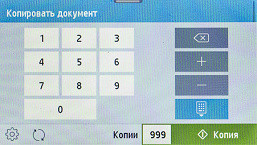
The number of copies is set by touching the corresponding field in the bottom bar, after which the on-screen numeric keypad appears. The upper limit is set at 999 copies, although even with the optional tray, the paper supply will not exceed 550 + 250 + 50 = 850 sheets, and the output tray will not fit more than 150 copies.
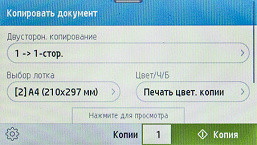
Tapping the gear in the lower left corner of the screen will bring up a window with a full list of settings, including those already mentioned and additional ones:
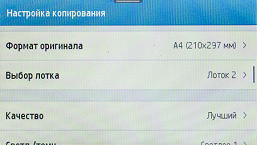
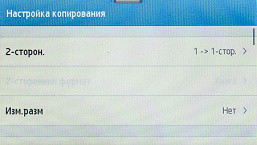
- selection of original format (including auto-detection);
- changing the size, that is, scaling — both by setting percentages directly (from 25 to 400 in steps of 1%), and fixed values, including placing two pages of the original on one page of the copy;
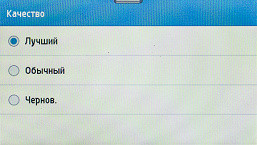
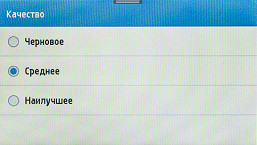
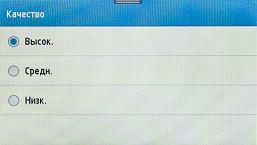
- three grades of quality — normal, best and draft;
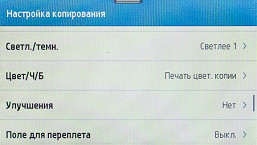
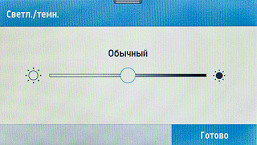
- density adjustment (lighter-darker);
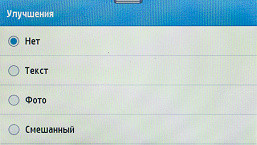
- selecting the type of original (called “Improvement”): text, photo, mixed and “none” (that is, without improvement).

You can then save the current settings as defaults or restore them to factory defaults.
As you can see, the set of settings is typical for such MFPs. However, you can discuss the convenience of the location of this or that option — for example, it is advisable to see the quality and type of the original among the operational settings, and not in the list accessible through the gear.
There is no direct choice between scanning from the glass and from the ADF; priority is given to originals placed in the ADF.
Copying is started by pressing the «Copy» screen button in the lower right corner.
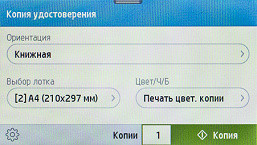
ID card
This mode is designed to work with small originals that have two sides or two spreads (for example, a passport), which can be placed on one copy page.
Instead of the number of sides, the orientation is set in the operational settings: portrait or landscape. The remaining parameters are the same as for documents, with the exception of «Enhancement» (that is, the type of original).
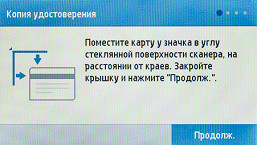
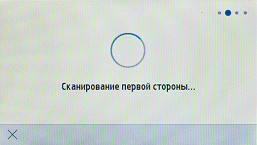
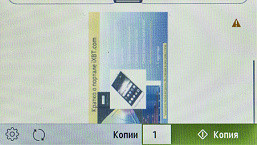
Press the “Copy” button and follow the instructions on the screen: first, one side (spread) of the original is scanned, then, at the on-screen command, we turn it over (flipped) and click “Continue,” after which the second scanning and printing occurs.

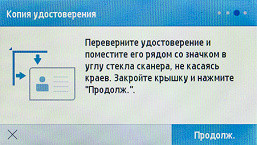
The process can be canceled by clicking the cross in the lower left corner.
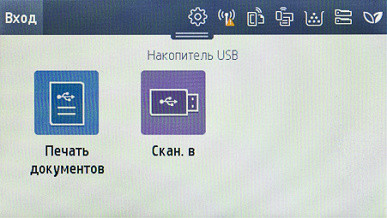
Working with removable media
For some reason, the instructions do not mention restrictions on the use of USB media, such as maximum capacity and file system. So far we have been using 16GB flash drives formatted in FAT32, connecting them to the front USB port. After connecting, a page for selecting a function appears on the screen: printing from a drive or scanning and saving to it. However, these operations can also be accessed using the corresponding icons on the “home” page or from the additional “USB storage” icon that appears after connecting the media.
There is no special button for safely removing the flash drive.
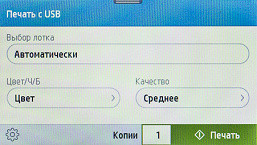
Printing from removable media
The instructions claim that JPG, PDF, DOC/DOCX and PPT/PPTX file formats are supported, as well as the less common PRN, PCL and PS.
After selecting the print mode, the contents of the flash drive are displayed, including folders. Unsupported file formats are not displayed (which makes it easier to find what you need if you have a lot of different files), and you can't navigate to a folder if it doesn't contain supported files. Long names and Cyrillic characters are displayed correctly, but additional information such as creation date-time or size is not provided.
During testing, it turned out that the list of supported formats is wider than indicated in the instructions: you can also print PNG and TIF files.
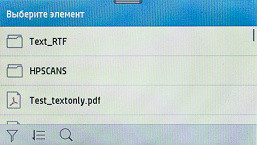
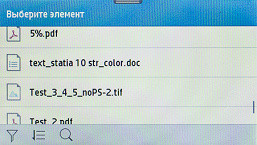
You can select the type of files displayed (all or just one of the supported ones), as well as the sorting order (by name, date, size or type). There is also a search function by name using the on-screen keyboard, which is alphanumeric, but without Cyrillic support.
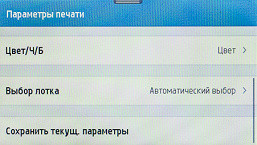
After selecting a file (you cannot select several, even of the same type), by touching the corresponding line, you get to the settings. Online settings include tray selection, color mode, and print quality (draft, medium, best). By clicking on the gear in the lower left corner, analysis is added into sets of prints, the number of which is set in the same way as when copying.
There are no adjustments for density or scale (including the ability to print two pages of a document on one sheet of printout). However, the most disappointing thing is the inability to set duplex printing directly from the operational settings, and also the fact that even the duplex setting from the general settings is not active.

For PNG, JPG and TIF formats, a preview with the contents of the file is displayed (for multi-page TIFs, only the first page, and only this will be printed). Page selection for multi-page DOC(X), PPT(X) and PDF documents is not provided — all pages are printed; Russian-language files are printed correctly.
Printing is started by clicking the «Print» button in the lower right corner of the screen. You can interrupt the process by clicking on the cross in the red circle in the upper right corner.
Scan to removable media
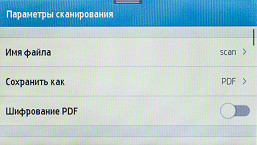
Before starting scanning, you also need to set the basic settings:
- Saving format: PDF, PDF/A, JPEG, TIFF and XPS.
- Template for the file name: Latin letters, numbers and some symbols.
When working from glass, a preview is possible.


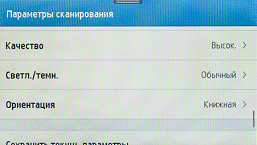
Additionally, after clicking the gear symbol, the following are specified:
- PDF encryption;
- color mode — color, halftone (grayscale), monochrome (black and white);
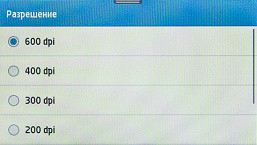
- resolution — in steps from 75 to 600 dpi (although the declared optical resolution of the scanner is 1200 × 1200 dpi);
- quality — low, medium, high (it is not clear how it differs from resolution);
- brightness (lighter-darker);
- orientation — portrait or landscape.

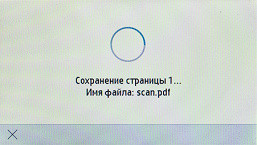
Having specified all the necessary parameters, click “Save” in the lower right corner. The default values can be changed using the Embedded Web Server, as discussed below.
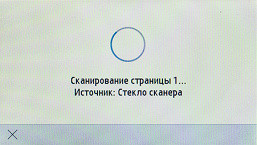
A folder «HPSCANS» is automatically created on the flash drive, into which the scans are saved. When saving several scans, the current date and time will be added to the name template (they must be set via the web interface, since there is no such option in the MFP settings).
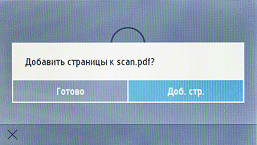
When working with the ADF and selecting the PDF, TIFF or XPS format, multi-page files will be automatically created; for JPEG, a set of files will be created according to the number of originals in the automatic feeder.
Templates
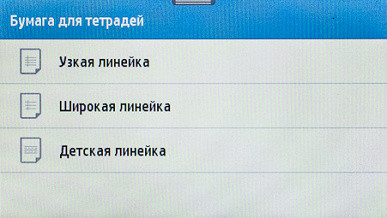
A set of templates is provided — the following pages can be printed:
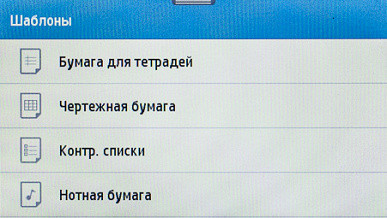
- paper for notebooks with rulers: narrow, wide, children's,
- drawing paper (graph paper) with a 1/8 inch or 5 mm grid,
- checklists with one or two columns,
- music paper in landscape or portrait orientation.
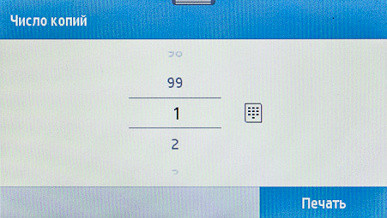
The number of prints is set from 1 to 99.
It is unlikely that this will be widely used, but some consumers may find it useful.
Service
The built-in menu of the MFP contains a small set of procedures for adjusting image quality and maintenance available to the user. Among them:
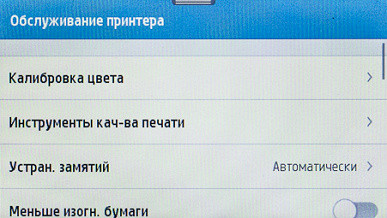
- Calibration starts manually when problems with print quality occur, or automatically after turning on at a configurable interval (without printing any page), and lasts about 30 seconds.
- Cleaning is designed to remove paper, toner, and dust particles that have accumulated inside the printer and may cause smudges, dots, smears, lines, streaks, or repeating patterns. This procedure takes approximately 2.5 minutes and requires a sheet of paper in the flip tray.
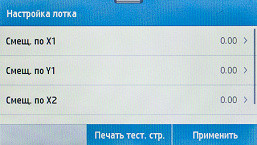
- Registration settings ensure that prints are aligned if they are not centered and are adjusted on a tray-by-tray basis.
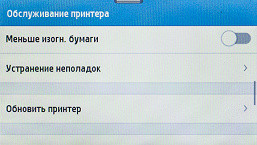
This is where another type of consumables arises — the Image Transfer Belt, which is not mentioned in the instructions. The user can only start cleaning it if the print quality deteriorates (which is also not commented on in the instructions), but most likely after a certain period of use it will need to be replaced. However, this procedure falls within the competence of the service center.
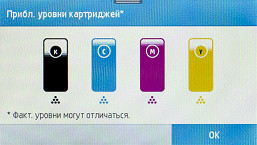
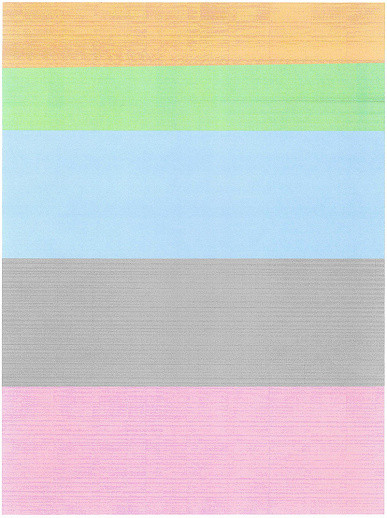
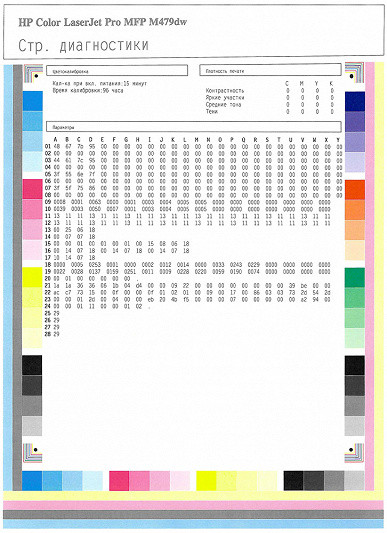
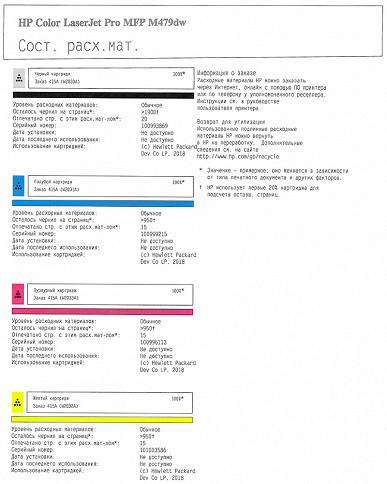
You can print a print quality page with five color bars, which can help you determine which cartridge is causing which quality degradation (see instructions for details). You can also print the diagnostic page, but its contents are not explained.
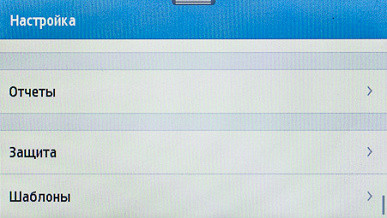
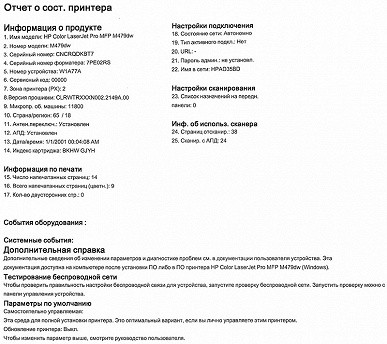
It is possible to print reports:
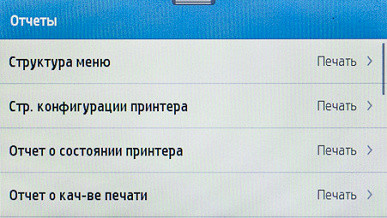
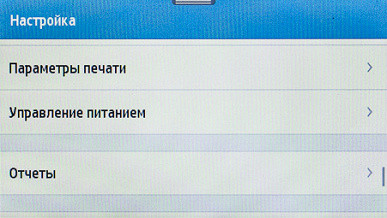
With their help, you can obtain information about the status of the printer and consumables, including information about operating hours. These are general counters for MFPs and separate print counters for each installed cartridge (information may vary when using compatible cartridges).
Local USB connection
A computer with Windows 10 was used for testing. Western analysts claim that at the beginning of 2024 the number of its users was more than double the number of Windows 11 users.
Software installation
For installation, we used a file downloaded from the official website. The procedure is standard: first install the software, then physically connect the turned on MFP to the computer with a USB cable (for example, at the request of the installation program, if it appears).
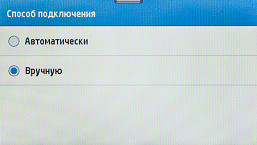
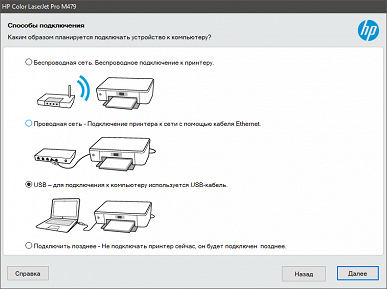
After running the installer, we choose whether to participate in the HP Product Improvement Program and other ways to track printer usage. Then we select the connection method — auto-detection or manual setup (we chose manual setup and specified a USB connection).
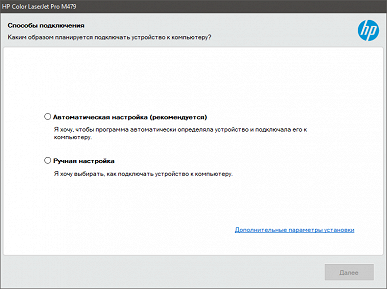
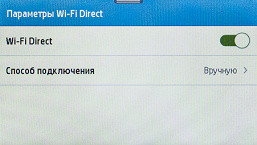
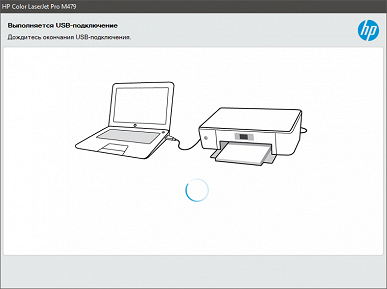
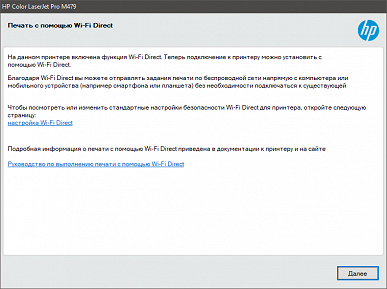
Next comes a connection request, after which we connect the MFP and computer with a USB cable and wait a little. The installer detects the enabled Wi-Fi Direct feature in our device and notifies us about it.
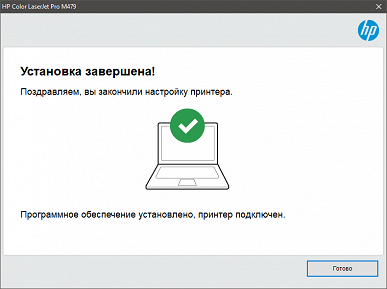
HP still does not miss the opportunity to collect at least some data from us — this time it offers to indicate the scope of use of the MFP: home or corporate, but you can simply continue by clicking “Next”. After a short wait, we are congratulated on our successful connection.

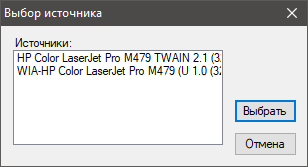
We get installed drivers: PCL6 print and two for scanning — TWAIN and USB.
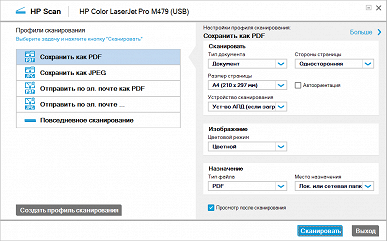
And some more utilities — “HP Printer Assistant” and “HP Scan”.
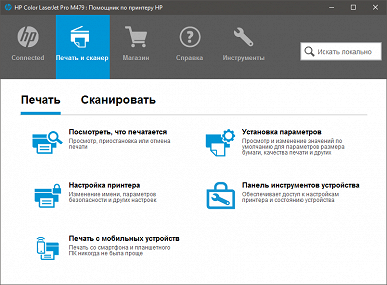
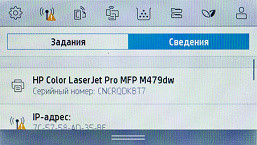
We'll talk about scanning a little later, but the real benefit of the Assistant is access to the built-in web server (accessible by clicking the Device Toolbar button), even when connected locally. The remaining links in the utility window either open standard Windows tools (for example, viewing the print queue), or the interface of the print driver or printer properties, and also redirect to Internet resources (for example, for ordering consumables).
Print and Scan Driver Settings
There is nothing special in the driver interfaces — everything is quite familiar
Seal
The main print driver window looks like this:
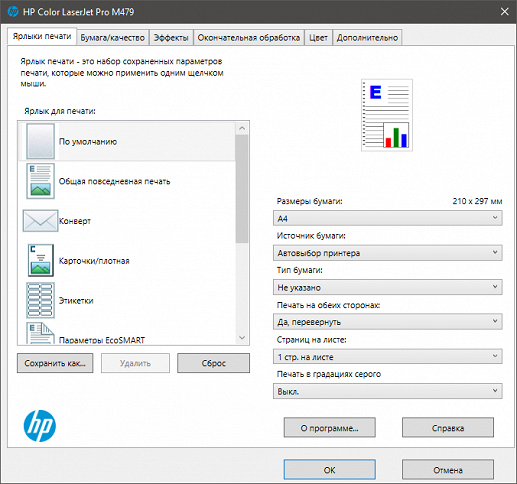
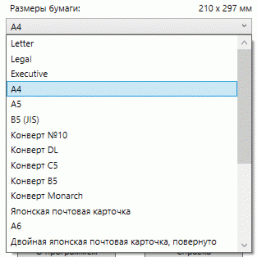
There is a set of paper and envelope formats, a large list of paper types:
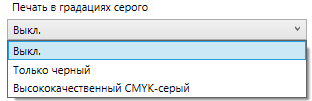
You can choose to print up to 16 pages per sheet and booklet printing. The color mode is designated unconventionally — as “Printing in grayscale”. Selecting «Off» means color printing, and for grayscale you can use only the black cartridge or increase the quality by using all four cartridges.
Some settings are repeated on the Paper/Quality tab.
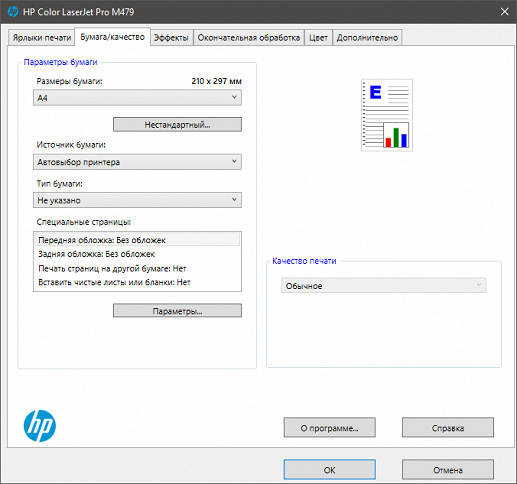
Here you can add your own paper size and give it a clear name for future use.

The existing “Print Quality” field is inactive — you cannot select anything, regardless of the installed paper type.
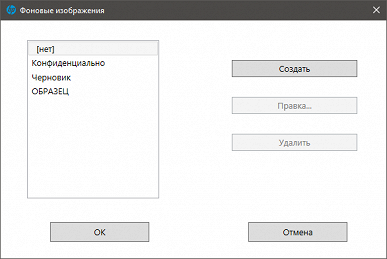
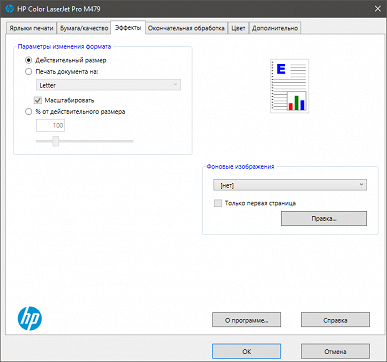
The “Effects” tab allows you to set the scale and introduce background inscriptions (although the corresponding field is called “Background Images”, but we are talking about inscriptions, not pictures).
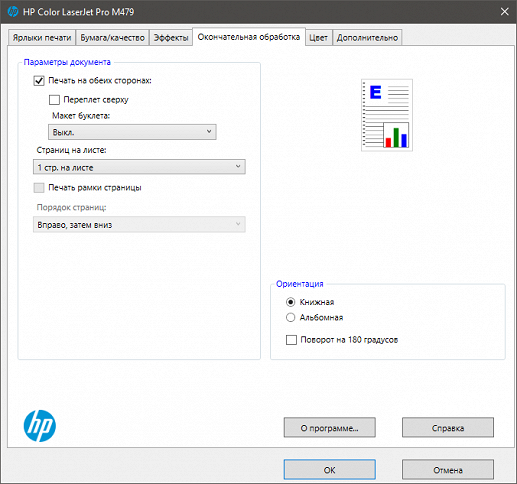
“Final Processing” also partially repeats what we saw on the first tab — single- or double-sided printing and placing several pages of a document on a sheet, but adds orientation: portrait or landscape, as well as a 180° rotation.
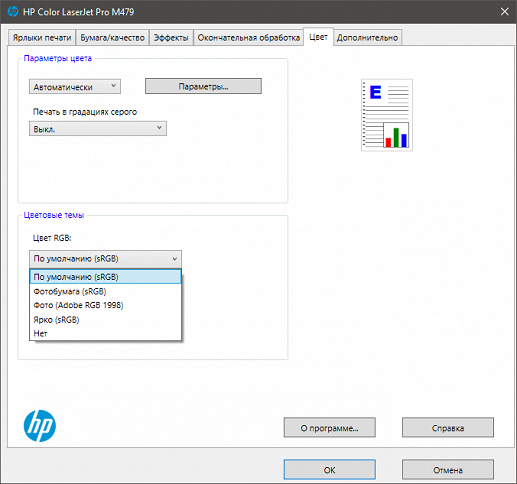
The penultimate tab controls color and provides “fine” settings for it.
“Advanced” sets the number of copies (sets of prints) and sort order, and also contains some other settings that optimize print quality.

We did not find a toner saving mode for printing, although the instructions mention EconoMode for the PCL6 driver we installed. There is only the “Draft” setting, which, as we found out in practice, only applies to offline printing from a USB drive.
There is an interesting note: «HP does not recommend using EconoMode all the time. If EconoMode is used all the time, wear on the print cartridge's mechanical parts may occur before the toner powder is used up.» We can conclude: the resource of the wearing parts of the cartridge is minimal and is designed for the number of prints provided by the filled toner when the quality is set to “Normal”, so even a small increase from enabling saving leads to a deterioration in print quality even before the toner runs out. Perhaps the absence of EconoMode in the print driver settings is beneficial for the manufacturer, since it forces users to purchase new cartridges more often.
The specification mentions improved print resolution up to 38400×600 dpi. Nothing similar was found in the settings, but perhaps this value is “named” in such a way that it is not obvious. We found a comment on HP's site that talks about HP REt (Resolution Enhancement technology) for creating colors with reduced need for dithering, resulting in the specified effective resolution.
Scanning
The TWAIN driver interface for scanning looks normal, allows you to select the scanning source: flatbed or automatic document feeder, and set the resolution for the ADF to 300 dpi, and for the flatbed to 1200 dpi (not exceeding optical resolution). The TWAIN driver window is similar in many ways to the HP Scan utility, except that there is no option to send scanned documents by email. A preview is possible, and after it you can change the scanning area by dragging the boundaries.
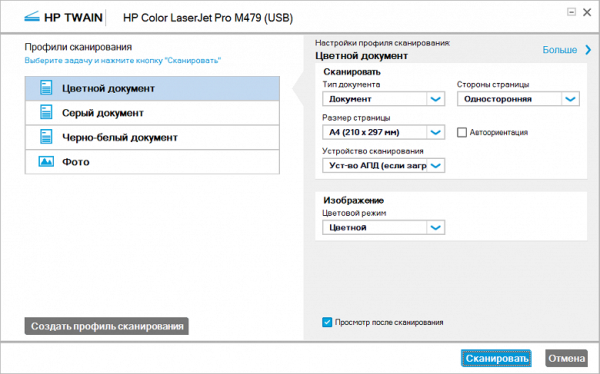
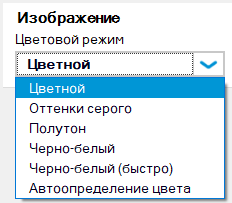
When you select the type of original, you are given the opportunity to define it as a document or photograph, specify the size, select the scanning source (flatbed or automatic document feeder), and the number of pages (with the clarification that duplex scanning requires manual processing). The color scanning mode offers a wide range of options, although they are not always intuitive.
By clicking “More” in the upper right corner of the window, we change the presentation of the set of scanning parameters: