
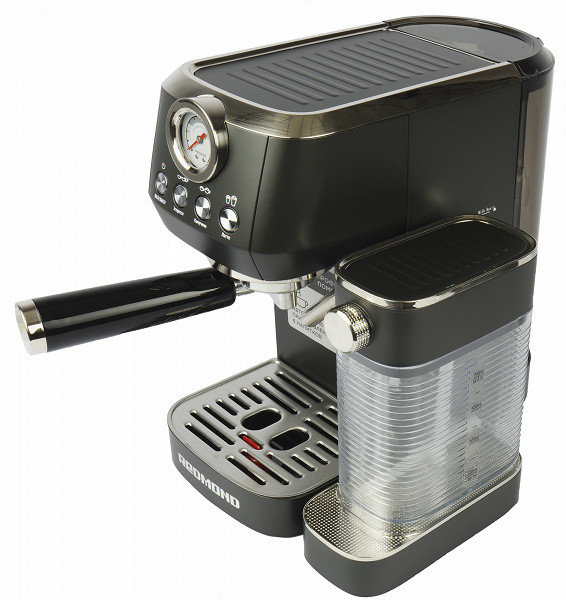
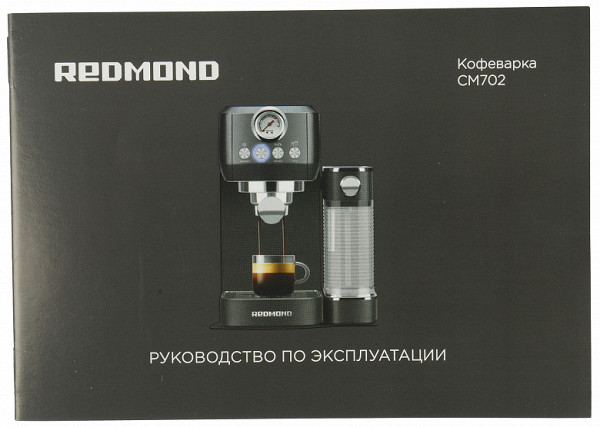
The Redmond CM702 coffee maker is a semi-automatic solution for lovers of espresso and drinks based on it. In this context, «semi-automatic» means that the user will have to grind the coffee themselves and form the coffee tablet in the cone, while the coffee maker automatically heats and froths the milk using a special cappuccino jug. Redmond CM702 is positioned in the upper budget segment, providing more features compared to simple budget models. The developers claim that the device uses two types of heaters: instantaneous and boiler, which certainly affects the price of the device.

Well, let's try it out and see what kind of coffee we can make.
Characteristics
| Manufacturer | Redmond |
|---|---|
| Model | CM702 |
| Type | carob coffee maker |
| Country of Origin | China |
| Guarantee | 1 year |
| Life time * | 3 years |
| Declared power | 1350 W |
| Housing material | plastic, metal |
| Tank capacity | 1.35 l (1.2 l to Max mark) |
| Milk jug capacity | 0.7 l |
| Pressure | 20 bar |
| Control | electromechanical |
| Weight | 5 kg |
| Dimensions (W×H×D) | 221×308×430 mm |
| Network cable length | 0.8 m |
Equipment
The coffee maker comes in an elegant box, made in a simple style. This design is more typical for semi-professional coffee makers than for ordinary home machines. The Redmond company is likely positioning its product at the “above average” level.
The box is pleasant to look at, pleasant to hold, and attractive on store shelves. The packaging design is recognizable, as we have already seen similar boxes from this brand.
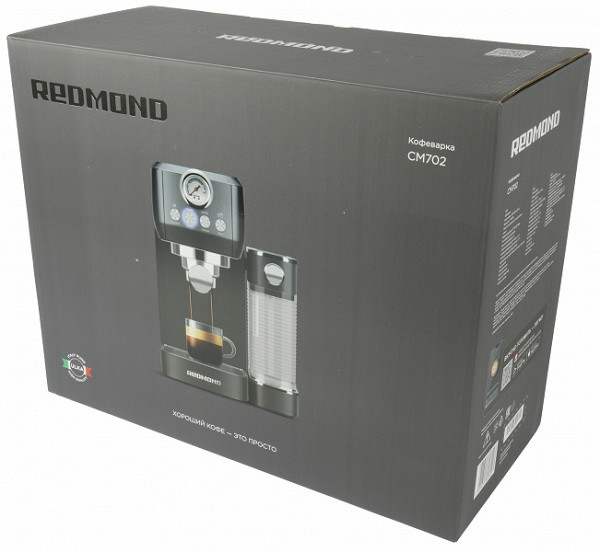
After examining the box, you can see a photograph of the device (on the front side), as well as its main technical characteristics (on the side edges).
Opening the box, we found inside:
- the coffee maker itself
- horn with two filters
- plastic tamper spoon
- milk jug and stand
- instructions
- warranty card and promotional materials
The equipment, therefore, turned out to be ordinary. We didn't find any surprises or unusual accessories in the box.
At first sight
At first glance, the coffee maker gives the impression of high quality. Despite the fact that we see a familiar “home” horn, the device looks stylish, the assembly is of high quality, and the design gives it austerity. Let's take a closer look at all the elements.
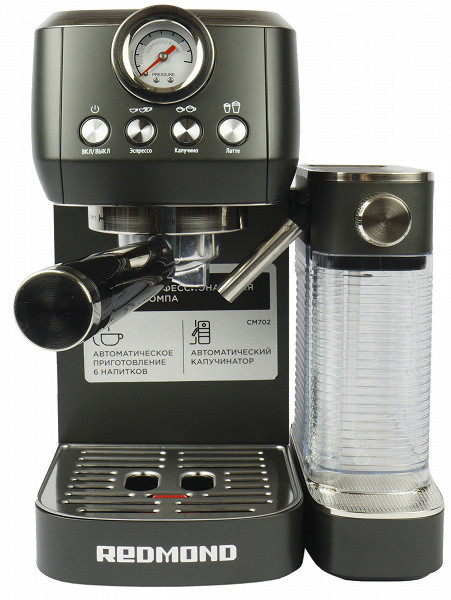
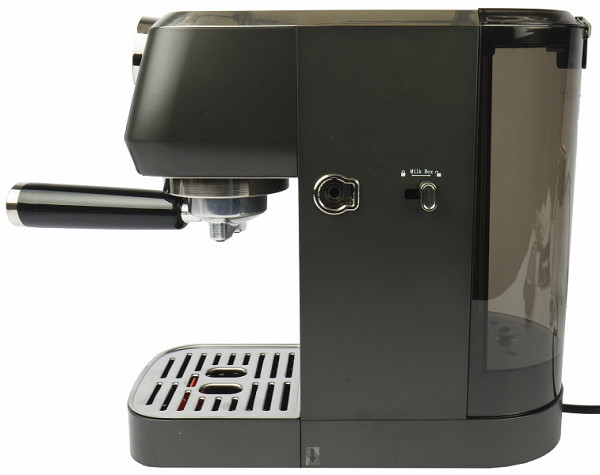
The body of our coffee maker is covered with metal sheets painted with matte paint. It looks more than good, fingerprints on it will not be noticeable. Additional elements are plastic, mostly painted to look like metal. Most of them look quite organic.
The control panel, consisting of four LED-backlit buttons, is traditionally located at the top of the case. Above the buttons we see a pressure gauge, which should show the pressure in the system when water is spilled. It looks stylish, however, upon closer inspection, we notice that there are no digital values on it. Here we note those that are not the most successful in terms of font choice. Although, of course, during everyday use they will not attract such close attention.

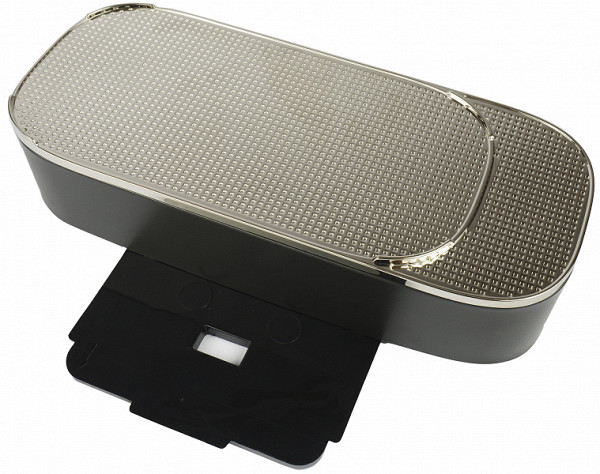
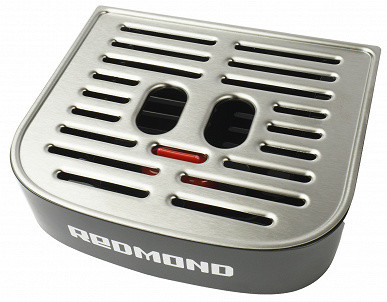
The metal stand for storing cups is also designed for heating. Although there appears to be no dedicated heating system, some heat from the heating elements will still be transferred to the pad and then to the cup.
At the bottom of the coffee maker you will find rubber suction feet and a sticker with the model number and technical information. There are also ventilation holes at the bottom, but there is no compartment for storing the cord: the short cord is simply routed out from the back of the device. Pay attention to the special place for installing a stand under the jug (we'll talk about it a little later).
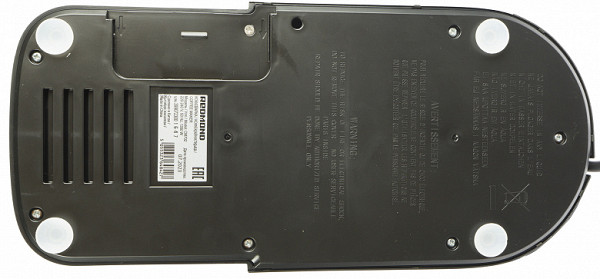
The removable 1.7-liter water container is made of darkened plastic and is located at the back of the coffee maker.
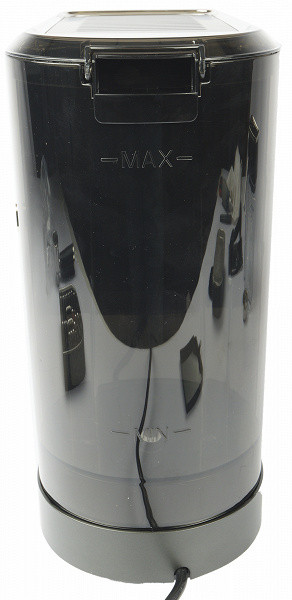
To remove the container, simply pull it up. However, you most likely won’t have to remove it too often: the container has a hinged lid, so you can simply add water as needed.
The Min and Max marks on the container are located on the back, so they are not visible from the side. Water is supplied to the coffee maker through a valve at the bottom, equipped with a simple mesh filter.
To the right of our coffee maker is connected a cappuccino jug, designed in much the same way as in “adult” automatic coffee machines.
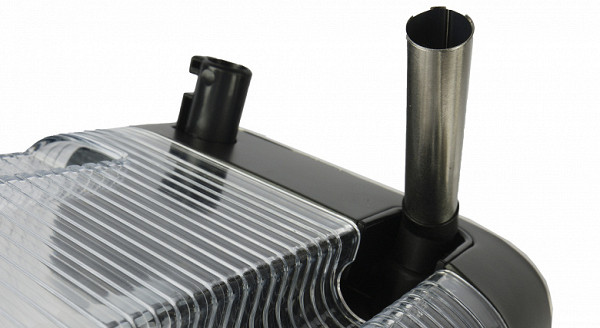
To install the jug, you must first connect the plastic stand, which is fixed on the underside of the coffee maker body.
On the right side of the device we see a connector for connecting a jug and a locking switch. Thus, the jug can be detached at any time (for example, to put leftover milk in the refrigerator). Or remove it altogether if you don’t drink coffee drinks with milk.
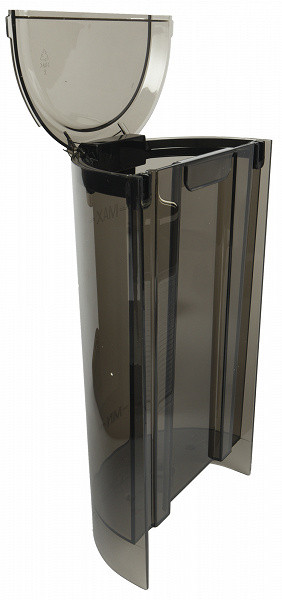
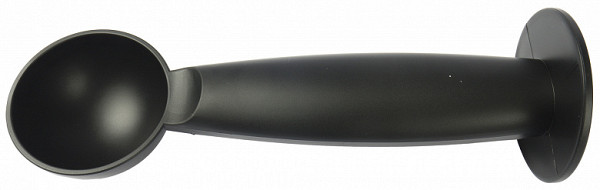
The body of the jug is made of plastic and equipped with marks that allow you to control the volume of milk (holds up to 0.7 liters). Inside you can see a plastic tube for supplying milk, there is also a spare tube included in the package. On the front side there is a plastic handle that allows you to adjust the angle of the spout for dispensing milk foam.
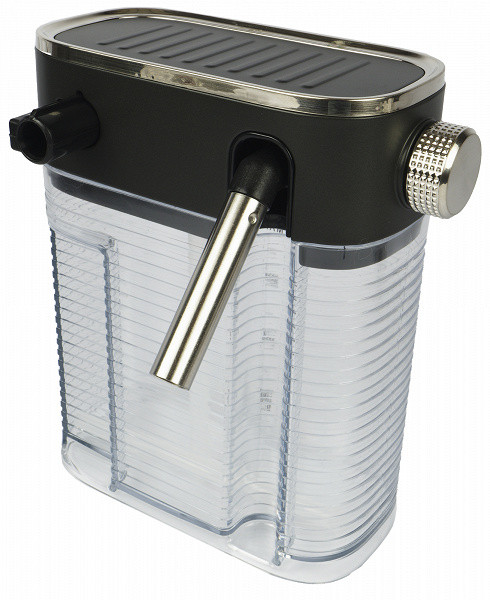
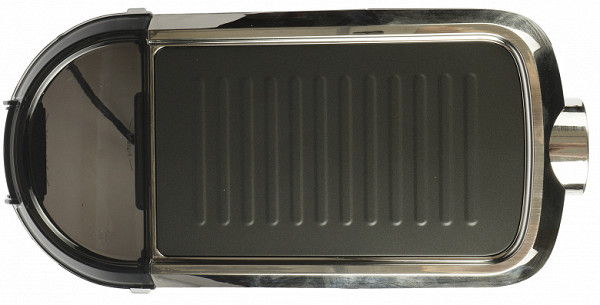
The cappuccino maker (foamer) itself is located inside a massive lid.
Let's move on to the brewing group. Our coffee maker is made of white metal (silumin?). This is better than plastic, but worse than stronger metals. The rubber gaskets look standard.
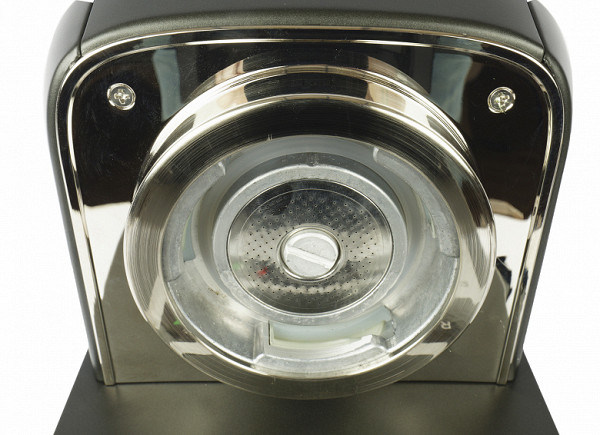
Water is supplied through a steel strainer with a large number of holes.
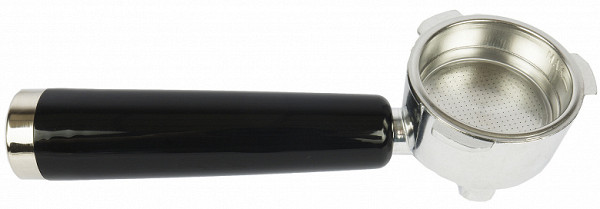
The horn of our coffee maker is installed with the handle to the left and tightened by moving it towards you. You can install a cup up to 11.5 cm high under the horn.

We note that the handle of the coffee maker’s horn has an unusual length, protruding several centimeters beyond the body. Its total length with the horn is 14 centimeters.
The handle of the horn is made of plastic, as well as the decorative trim with a “metallic” effect. The glossy plastic finish, in our opinion, can give the horn some simplicity, visually distinguishing it from the overall style of the coffee maker.
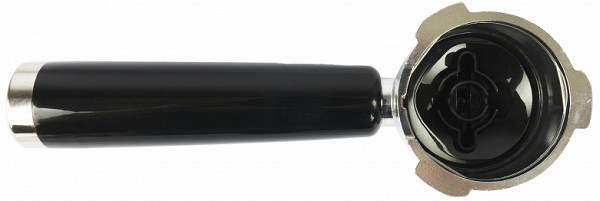
The diameter of the horn is standard 51-52 mm, which is typical for home coffee makers. The main material used in the horn is a light white metal, probably silumin. The package includes two filters for brewing 1 or 2 cups of coffee. These filters, common to home coffee makers, are equipped with a double bottom, also known as an “enhancer.” Its task is to correct possible user errors, ensuring equalization of the taste of coffee even with incorrect grinding or dosage.
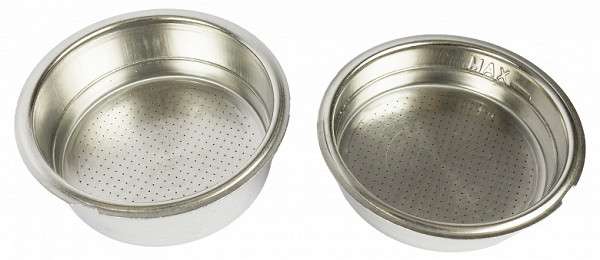
The filters are installed inside the horn using a spring wire. They are securely fixed in place, providing stability and preventing accidental falling out or dangling. This solution with a spring-wire is more typical for semi-professional models than for budget ones, and is rarely found in smaller horns compared to professional ones. This can be an additional plus.
Coffee is dispensed from two spouts, allowing you to brew two cups at the same time.
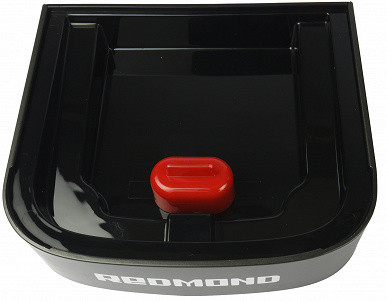
Below the cups there is a metal stand, as well as a removable plastic drip tray. The tray is equipped with a red float, which promptly signals the need for emptying.
In conclusion, the plastic tamper (on the other hand, the measuring spoon) is nothing special. Although, of course, it is preferable to use a specialized metal tamper (available, for example, on Aliexpress), but if this is not available, a plastic version will also come in handy.
The coffee maker weighs a little more than average — about 5 kg.
Instructions
The user manual is made in the form of a small black and white brochure printed on high-quality paper. The instructions are written in simple and understandable language, making it easy and enjoyable to read. The authors do not complicate the reader with unnecessary information that is mandatory for the compilers, highlighting it in a different font and allowing it to be quickly skipped.
The basic steps for using the device are illustrated with simple and clear illustrations. To get acquainted with the main functions, just study a few small pages.
Control
The control panel of the coffee maker consists of four electronic-mechanical buttons with LED backlight and a pressure gauge. Let's look at all the elements and understand their purpose.
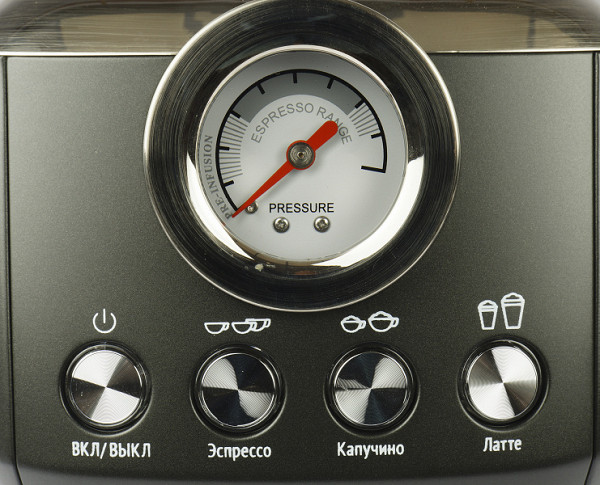
All buttons on the coffee maker are easy to understand, as they are labeled and equipped with clear, illuminated icons.
- The left button turns the coffee maker on/off.
- The «Espresso» button prepares a single espresso when pressed once and a double espresso when pressed twice.
- The Cappuccino button dispenses a single or double volume of milk foam when pressed once or twice.
- The «Latte» button, when pressed once or twice, delivers the appropriate volume of milk foam for preparing a latte.
Each button is accompanied by an LED indicator that provides clear device status. A flashing light indicates the heating process, and a constantly lit light indicates readiness to prepare a drink. Green illumination indicates double portions, blue illumination indicates single portions. Sound signals accompany all actions.
Holding the «Cappuccino» button allows you to dispense an arbitrary volume of milk, and a second press interrupts the process.
The user can reprogram the drink volume and save the settings. This is a useful feature that is rarely found in budget models. Adjusting the brew volume makes it possible to improve plant settings and fine-tune the quality of the drink depending on the grind or type of coffee.
If the coffee maker is idle for 15 minutes, it automatically switches to energy-saving mode, turning off the heating.
Exploitation
Before first use, thoroughly rinse the water tank, horn, filter and tray, and wipe the body of the coffee maker with a damp cloth. Start the coffee preparation mode without coffee drink, release some steam and hot water. This way the coffee maker is ready for use. Keep in mind that a new appliance may have a characteristic technical smell, so it is recommended to carry out several spills using unnecessary or expired coffee beans.
During testing, the device proved to be convenient and generally intuitive to use. The water reservoir easily “snaps” into place when installed in the housing and can be easily refilled by opening the lid. The fastening of the filter in the horn with a spring was rated as convenient and preferable to the “latches”-pimples on the filter body.
The drip tray can be easily removed and replaced. The maximum cup height that can be used with a coffee maker is 11.5 cm (and 10.5 cm when using a cappuccino maker). If the cup is too high, you can remove the drip tray.
A nice addition is that the top metal panel of the coffee maker heats up to 42 degrees, which can be useful for warming cups.
It was noted that milk exchange is supplied from the cappuccino maker nozzle intensively, with a quick start of work. The foam quality is rated as stable and uniform, with no large bubbles, which is comparable to the performance of many automatic coffee machines.
A pressure gauge with a pressure of 20 bar is assessed as a marketing ploy, since espresso usually requires no more than 9 bar. It is noted that the pressure gauge does not provide real numbers, but rather performs a decorative function. We also noticed a strange solution with the installation of a pressure gauge and the absence of a hot water supply mode.
It was disappointing to make a latte where the sequence of milk and espresso shots was not up to standard. It has also been noted that when preparing double portions, the volume of frothed milk may not fit in the cup, especially if these are tall Irish glasses.
Care
Taking care of your coffee maker includes making sure to rinse the coffee horn after each coffee preparation. It is recommended to store the horn separately after washing for faster drying. The filter and the area underneath should also be removed and washed periodically.
The milk supply system must be cleaned after each use, or at least after preparing several milk drinks in a row. The jug should be rinsed and self-cleaning initiated by pressing the «Latte» button for three seconds, which will ensure water flows through the spout of the reservoir.
Intensive self-cleaning, performed by pressing the Latte and Cappuccino buttons for three seconds using water instead of milk, will provide a comprehensive cleaning of the milk system and reservoir. However, to fully clean the cappuccino maker, it is necessary to remove and wash the metal milk supply tube separately. If the jug is rarely used, hand washing is also recommended, as automatic cleaning does not always remove all milk residues, which can lead to an unpleasant odor.
In addition, there is a special self-cleaning mode for descaling. In this case, it is necessary to add a descaling agent to the water, and after spilling the internal systems, the water tank should be manually rinsed.
It is recommended to empty the drip tray in a timely manner, and the housing can be wiped with a soft cloth.
Our measurements
Before we started testing, we measured energy consumption and the time required to prepare the coffee maker for use. The power of the device in heating mode reached up to 1220 W, in operating mode — up to 1265 W, which corresponds to the declared characteristics. In standby mode, power consumption was approximately 0.3 W.
It took only 1.5 minutes to prepare for operation (preheat) the coffee maker. Thanks to the use of a thermoblock and a boiler, the cappuccino maker warms up within a few seconds. The noise level during operation of the device is rated as low, not exceeding 62 dBA.
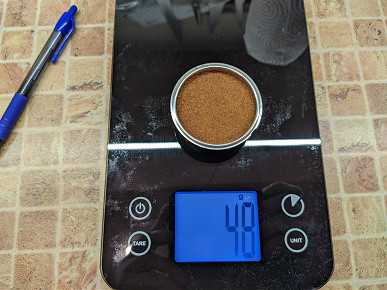
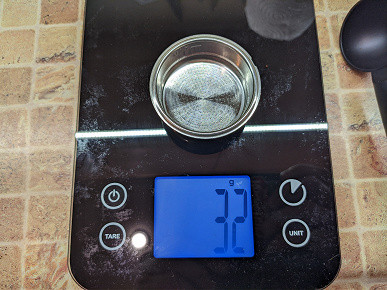
A single filter filled to the Max line holds up to 10 grams of coffee. It is possible to use more coffee — up to 12 grams, but this may make it difficult to spill water.
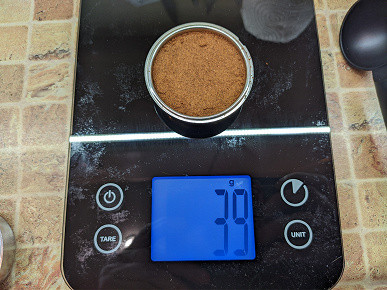
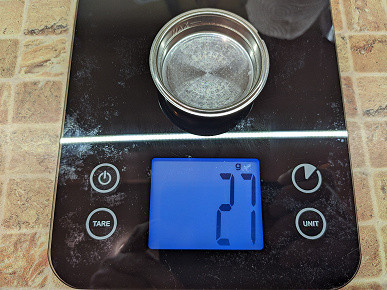
The double filter holds up to 16 grams of coffee. Not bad for making a double shot of espresso.
Testing
Let's start preparing drinks, starting with single espresso. It is worth noting that the process of preparing espresso involves first pouring a small amount of water for pre-wetting, which will take a few seconds.
Our coffee maker prepares a single espresso in just 19 seconds. With standard grinding we got about 40 grams of drink per cup. This is almost twice as much as the classic 1:2 ratio (2 grams of drink per 1 gram of coffee).
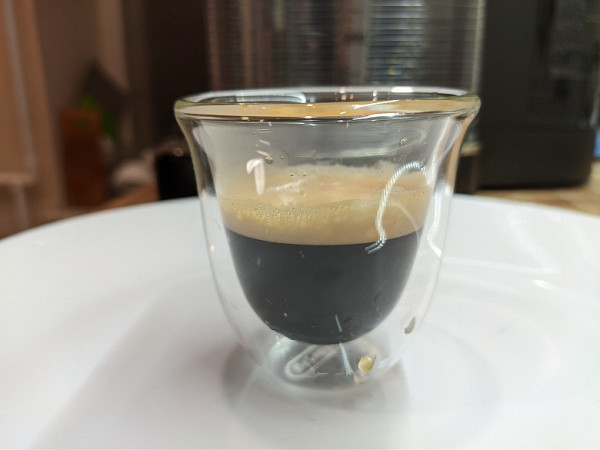
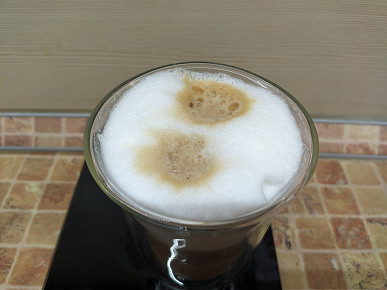
The foam of our espresso turned out to be lush. Even too curvy — the built-in “improver” has clearly overdone it.
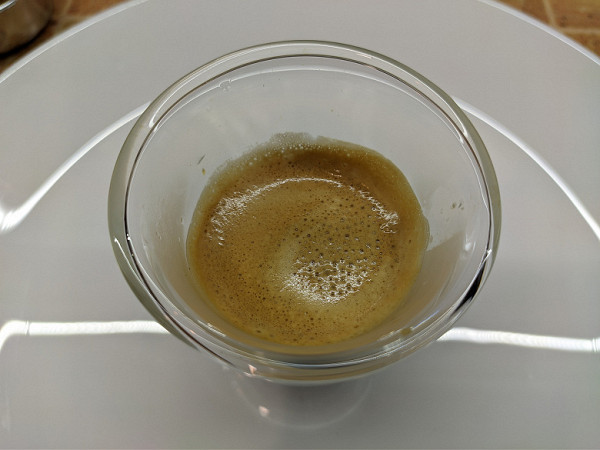
The temperature of the finished drink in an unheated cup was 67 degrees — somewhat less than we would like to see.
A double espresso at standard settings takes 45 seconds to prepare and the drink weighs 58 grams.
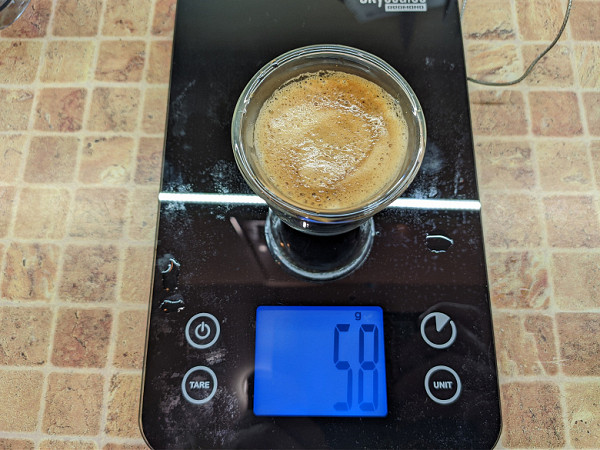
Here again we see excessively fluffy foam. But the temperature of the drink turned out to be slightly higher — 71 degrees.
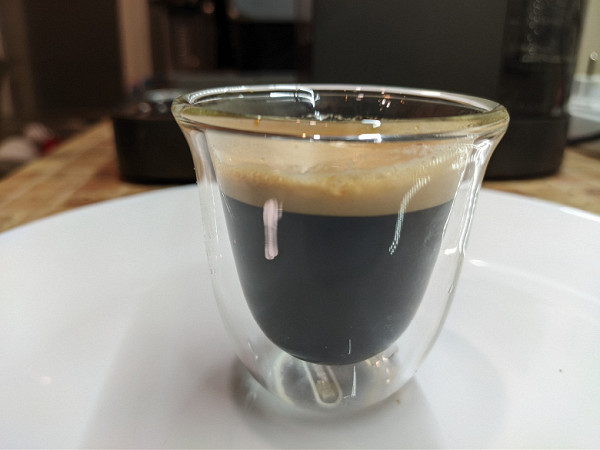
The deviation from the ideal ratio (32-35 ml of drink from 16 g of ground coffee) when preparing double espresso turned out to be insignificant. The double portion tasted predictably more interesting, rich and intense.
Milk foam at standard settings is dispensed for 30 and 45 seconds (for single and double cappuccino) or 40 and 50 seconds (for single and double latte). If measured with water (rather than milk), this corresponds to 75/115 grams and 140/170 grams, respectively. The temperature in the unheated cup was up to 72-74 degrees.
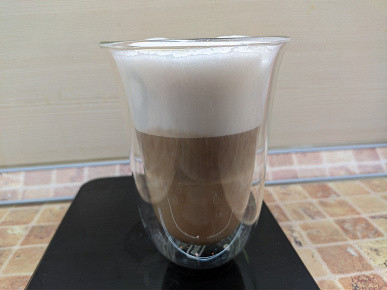
Ready-made milk drinks (cappuccino and latte) are prepared exactly the same (first milk, then espresso) and differ only in the volume of milk foam. The drinks look quite decent.
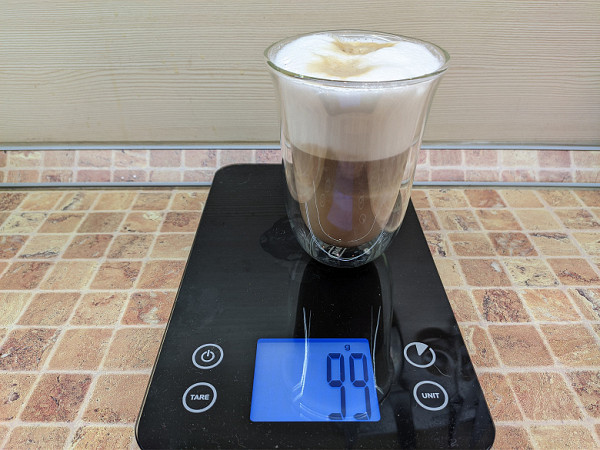
The milk foam holds firmly and does not settle too quickly.
The temperature of the finished drink is 60-62 degrees, so you can’t do without warming up the cup again.
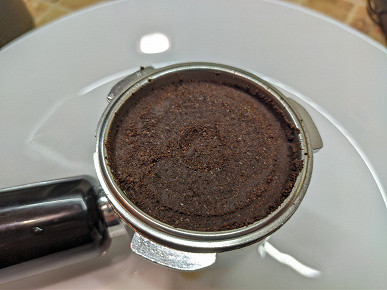
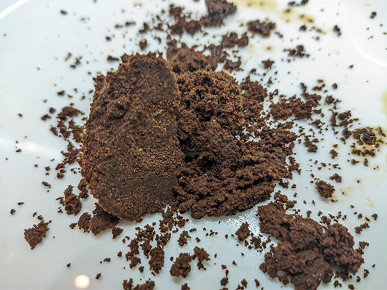
The spent coffee tablet looks good. There is practically no moisture left in the tablet; all the liquid is used to prepare the drink.
conclusions
To summarize, the Redmond CM702 coffee maker left us with conflicting impressions. In all the years of testing such devices, we have not been able to find an ideal budget “horn”.

The Redmond CM702 coffee maker has both its strengths and weaknesses. One of the advantages is the double heater (instantaneous + boiler), which reduces waiting time and allows you to prepare frothed milk almost immediately after preparing espresso. It is also worth noting the ability to program both the espresso volume and the milk foam volume, which gives the user the opportunity to customize the drink to their taste. The automatic cappuccino maker works efficiently and the quality of the milk foam leaves a positive impression. Thus, Redmond CM702 can be recommended for those who often drink milk-based coffee drinks.
However, among the disadvantages there are several important points. Firstly, the inability to use a tall pan is a significant disadvantage for a device aimed at preparing dairy drinks with copious amounts of frothed milk.
Secondly, preparing cappuccino and latte with this coffee maker is the same: first milk foam, then espresso. Thus, in fact, the device has two modes for espresso (single and double) and four modes for cappuccino (with different volumes of milk).
Americano lovers will also face inconveniences: the coffee maker does not provide hot water, so you will have to prepare boiling water separately or settle for lungo instead of espresso.
Pros:
- nice appearance
- good workmanship and assembly quality
- automatic milk foam supply
- Preparing drinks with milk at the touch of a button
- programming coffee/milk volume
Minuses:
- cappuccino and latte are prepared the same way
- the temperature of the finished drinks is not too high
- not suitable for tall dishes