
Drip coffee makers are devices that seem simple and proven. But despite this, from time to time we come across unsuccessful models that do not comply with temperature conditions or are inconvenient to use. This paradox is that each new drip coffee maker becomes a kind of lottery, although it seems that everything in this area has already been invented and does not require changes.
Today we received the Redmond model for testing, which received the CM700 index. Let's take a closer look at it and check it out!
Characteristics
| Manufacturer | Redmond |
|---|---|
| Model | CM700 |
| Type | drip coffee maker |
| Country of Origin | China |
| Guarantee | 1 year |
| Life time * | 3 years |
| Power | 900 W |
| Housing material | plastic |
| Case color | black, metallic |
| Jug material | glass |
| Jug volume | 1.2 l |
| Control | mechanical |
| Indicators | inclusion |
| Weight | 1.4 kg |
| Dimensions (W×H×D) | 213×323×257 mm |
| Network cable length | 0.75 m |
* Contrary to popular belief, this is not the time limit after which the device will necessarily break down. However, after this period, the manufacturer ceases to bear any responsibility for its performance and has the right to refuse to repair it, even for a fee.
Equipment
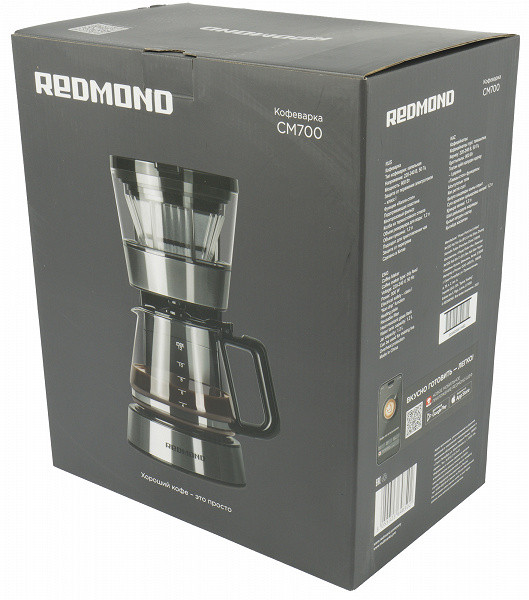
The coffee maker comes in an elegant cardboard box made in the recognizable Redmond style. Recently, the packaging of this brand's products has become more austere and minimalistic. The background of the box is gray, which highlights the image of the coffee maker on the front. The side panels contain information about the model and its technical characteristics.
The contents of the box were protected from shock using pressed cardboard inserts and plastic bags
Having opened the box, inside we found:
- the coffee maker itself with a jug
- measuring spoon
- instructions and warranty card
At first sight
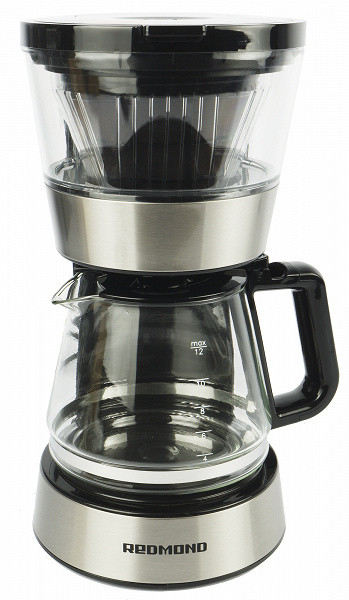
Immediately after unpacking, we were pleasantly surprised by the appearance of the coffee maker. Although there is nothing revolutionary about it from a technical point of view, it looks stylish and high-quality. We are not used to judging devices by their appearance right out of the box, but in this case we immediately got the impression that the coffee maker was made with due attention to detail.
Black plastic is used for the body of the coffee maker, and transparent plastic is used for attaching the funnel. In addition, the coffee maker has metal decorative inserts. The only thing we didn’t quite like were some of the joints between the plastic elements of the case, but they are located at the back and are not very noticeable during operation.
The general structure of the coffee maker is standard: it is a typical drip coffee maker with characteristic elements for this type of device. Despite this, we noticed a few interesting differences in the appearance of the device.

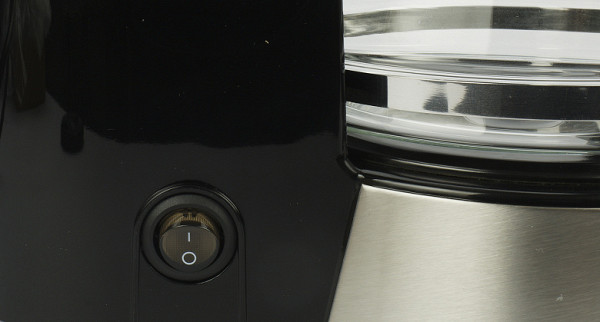
On the front bottom of the device, on the metal panel, the company logo stands out.
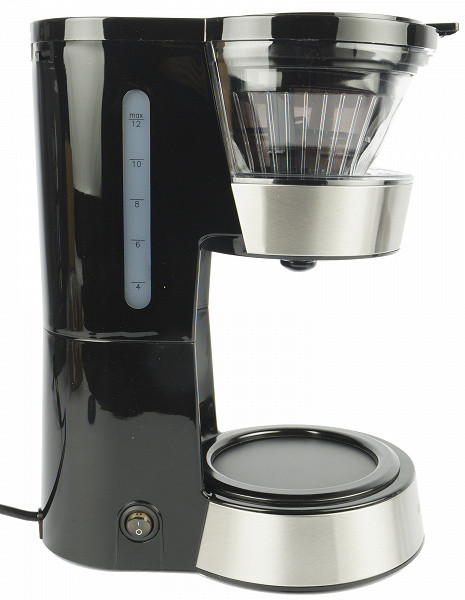
In the lower left corner there is a button to turn on the device, and at the top, in the window, you can see a scale for the water tank, marked from 4 to 12 cups. The total tank volume is 1.2 liters, which is equivalent to 100 ml per cup.

A hinged plastic cover is used to access the reservoir. The plastic “shower” from which the water comes is attached to the lid with a plastic jumper. In the closed position, it is securely fixed, pressing against the lid, which has a beneficial effect on the temperature inside the brewing chamber.
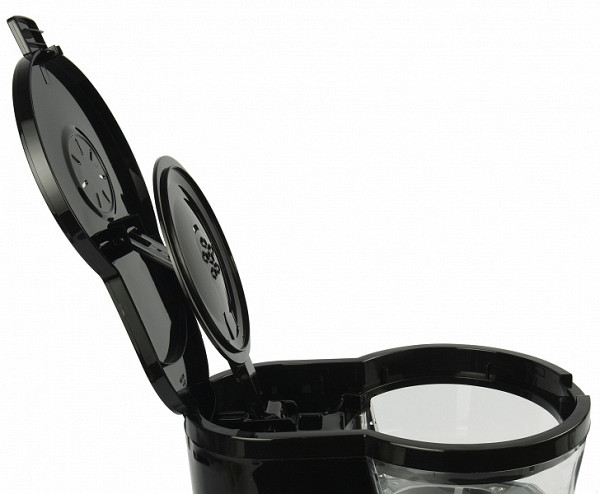
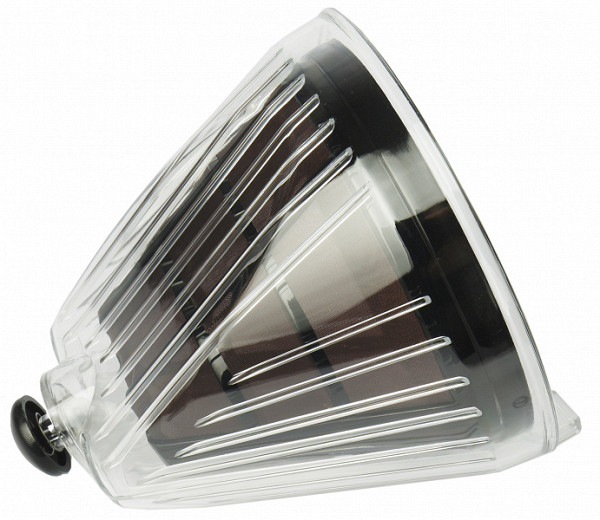
The brewing compartment itself consists of three parts — a plastic transparent body into which a plastic and, again, transparent cone with an anti-drip system is inserted.
The clear cone has only one correct installation position. It’s difficult to make a mistake here: you just need to align the protruding part (small handle) with the corresponding recess on the body.
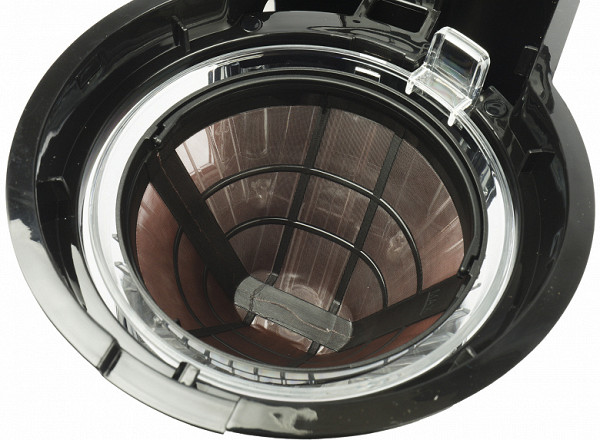
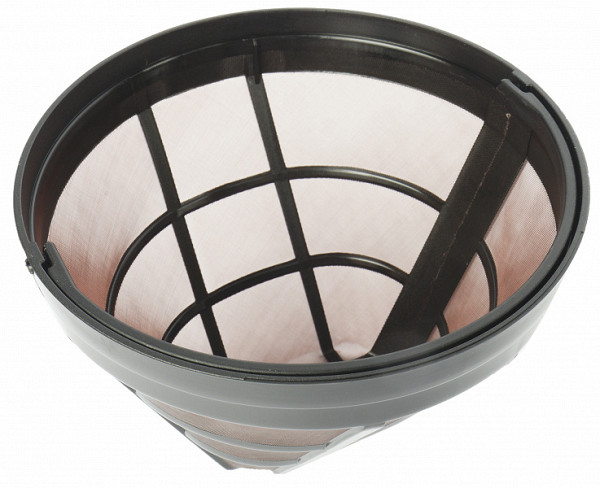
A reusable nylon filter with a folding handle is installed inside. However, you can use disposable paper filters instead.
The anti-drip system of our device is classic. This is a spring-loaded tap that shuts off the coffee flow when the user removes the jug.
All parts that come into contact with the coffee are easily detached from the body of the coffee maker; simply pull them up. This greatly simplifies the maintenance of the device: the most contaminated parts can simply be washed under running water.
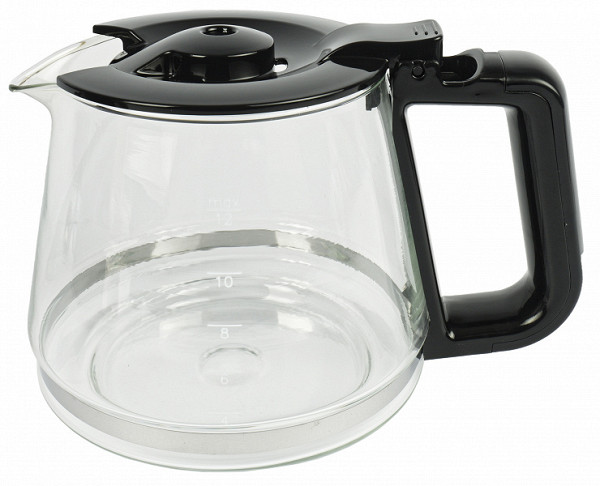
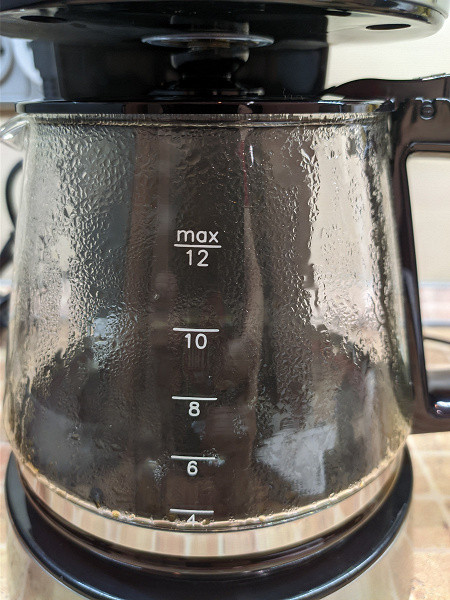
The jug of our coffee maker is made of heat-resistant glass, and the hinged lid and handle are made of plastic. The jug also has cup graduations (from 4 to 12).
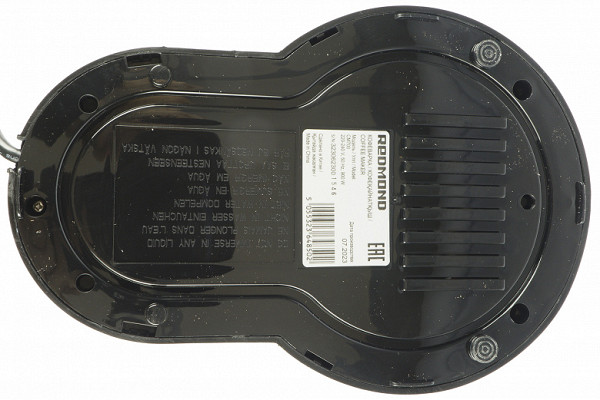
At the bottom, attention is drawn to rubber feet and a sticker with technical information about the model. There is no cord storage compartment.
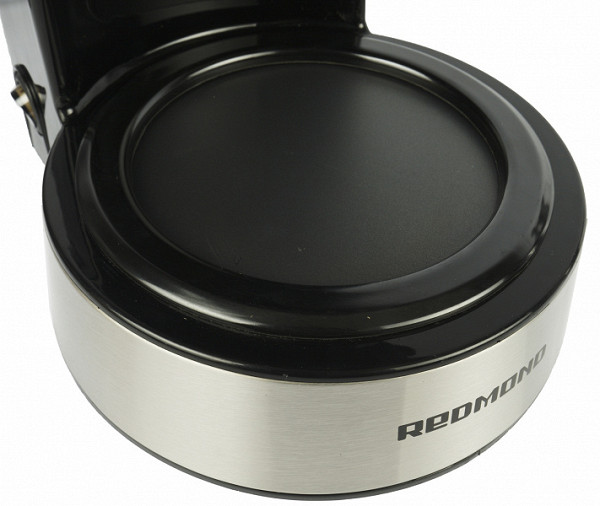
The jug is installed on a metal platform, which will heat the finished drink after it is prepared.
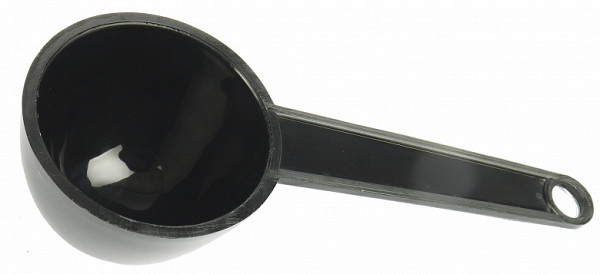
Included with the coffee maker, we also found a plastic measuring spoon with which you can measure the desired amount of coffee.
So, we draw an intermediate conclusion: we have before us a stylish and well-thought-out device. We are confident that this coffee maker will be a real pleasure to use. The manufacturer not only ensured ease of use, but also gave it an attractive appearance.
Instructions
The user manual is presented in the form of a small black and white brochure printed on high-quality glossy matte paper. It contains instructions in several languages, including Russian.
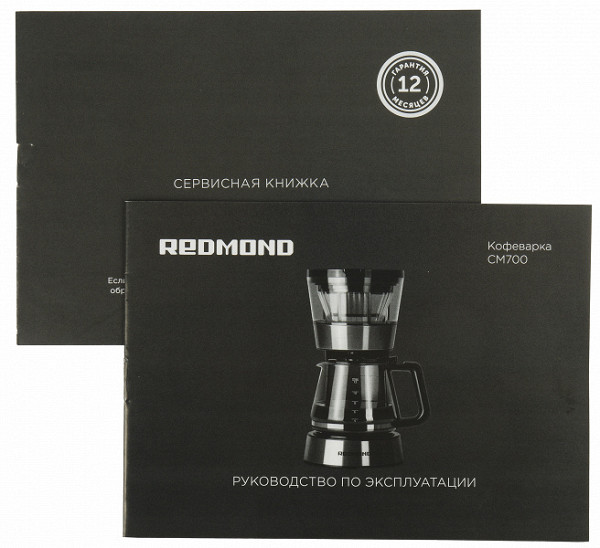
All the necessary information takes up three pages, and also includes sections on operational safety and warranty obligations. There are no special secrets or tips here. It is assumed that every coffee lover will be able to independently determine which grind is suitable and how much coffee should be used.
Control
The only control element of the coffee maker is a button with an LED, which starts the process of preparing the drink.
Upon completion of preparing the drink, the coffee maker does not automatically turn off and continues to operate in the mode of keeping the finished drink warm. The instructions do not indicate the duration of this mode. We conducted our own experiment by turning on the coffee maker, waiting for the drink to finish brewing, and recording the time. After 24 hours, we found that the coffee maker was still maintaining the temperature of the drink, even without any remaining coffee in the jug.
Although this did not cause any problems with the device or the pitcher, we consider this length of time to maintain temperature to be abnormal. In our opinion, the heating should be turned off an hour or two after finishing coffee preparation.
Of course, the user can always manually turn off the heating by pressing the device's off button.
Exploitation
Before first use, it is recommended to rinse the coffee maker with the maximum amount of water without a filter and coffee.
Then you can start preparing the drink, following the steps:
- Check the connection of the coffee maker to the electrical network.
- Fill the water reservoir with the required amount of cold water using a glass coffee pot or other container.
- Install a filter (paper or reusable) and pour in the required amount of coffee, distributing it evenly.
- Place the glass coffee pot with the lid closed into the machine.
- Turn on the coffee maker and wait for the brewing process to complete.
All actions are carried out easily and simply. The lid closes securely, preventing hot air from leaving the brewing chamber, and water is supplied evenly. Some caution is required when adding water to the tank due to the small neck of the tank.
Care
Regular cleaning of your coffee maker includes:
- Wipe the housing with a soft damp cloth.
- Wash the glass coffee pot with lid, plastic filter and funnel with mild detergents.
It is recommended to use a special product to remove scale. After cleaning, run clean water through the coffee maker several times.
Our measurements
We measured the main operating parameters of the coffee maker, including electricity consumption and temperature at different stages of coffee preparation.
In coffee preparation mode, the coffee maker consumes up to 810 W, which corresponds to the declared power (900 W).
A standard serving of coffee (full jug) requires approximately 0.16 kWh and takes about 10 minutes to prepare.
Our measurements have a certain error. For example, to measure the temperature we used an external thermometer placed in the working chamber. Although the measurement accuracy is not perfect, it is sufficient to give a general idea of the coffee brewing process.
We've also looked at recommendations for the amount of coffee you should use. According to the SCAA, the weight of water should be approximately 15 times the weight of coffee beans. For our 1200ml water coffee maker this means 80g of coffee. However, some recommendations suggest using less coffee — for example, 60g per liter of water or even 55g per liter, depending on preference.

Before you start brewing coffee in a drip coffee maker, it is recommended to pour a small amount of hot water through a paper filter to avoid paper taste. This step is especially important when brewing small amounts of coffee.
The supplied water temperature should be around 92°C for one minute and not exceed 96°C during cooking. We took measurements and found that the water temperature reached 91°C, which is a good result, given the possible errors.
The coffee jug should maintain the temperature of the drink at 80-85°C. In our case, the temperature of the water in the jug immediately after preparation was 82°C, which is within the recommended range.
We also checked how the coffee maker maintains the temperature of the drink in warm mode. After half an hour, the temperature remained stable at 81°C, which indicates good operation of the device without hidden underheating.
Now you can move on to testing the coffee directly.
Practice tests
Full jug (1.2 l)
Before we started making coffee, we decided to evaluate what a portion of coffee in a filter would look like. According to the recommendation to use 60 g of coffee per liter of water, we poured 80 g of coffee into the filter for a volume of 1.2 liters.
We noticed that the filter was filled to the Max level. The manufacturer claimed that the filter will hold up to 140 g of coffee, so this is either a typo or a figure from the description of another model.
However, there was still some free space in the filter, which gave us confidence that the coffee would not overflow during the brewing process and that all the water would pass through the coffee into the jug.
We confidently started brewing and started the coffee maker.
The first drops of coffee appeared in the jug after about a minute, and the complete completion of the water spill took 8 minutes and 20 seconds from the start of preparation. A little more liquid remained in the filter and flowed out in slow drops.
We rated this result as almost perfect: the coffee maker slightly exceeded the recommended maximum pour time (up to 8 minutes), which contributed to the rich and balanced taste of the drink. By using a coarser grind, you can increase the pour speed, which will change the taste of the finished coffee from more bitter to more sour.
As for the coffee itself, we think it turned out quite decent. The finished drink does not have the characteristic sourness, which is often present in coffee prepared in drip coffee makers due to the insufficiently high water supply temperature.
The final result is rated as «good» (compared to semi-professional and certified devices) or even «excellent» (compared to other home drip coffee makers).
Result: good/excellent
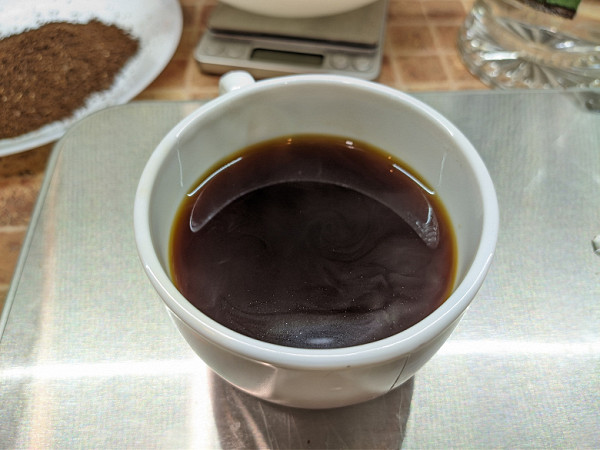
Liter of coffee
Let's try brewing one liter of coffee to once again compare our measurements with the recommended standards.
We used 60 grams of coffee and timed it.
This time, the characteristic gurgling sound, signaling the completion of cooking, was heard after 6.5 minutes, and the entire process was completed after exactly 7 minutes.
Energy consumption was 0.12 kWh, and the temperature of the finished drink was 82 °C. This is very close to the ideal result.
Repeated tasting confirmed our assumptions: the coffee turned out delicious, and the temperature of the finished drink remained stable throughout the heating mode.
The result is significantly superior to what budget drip coffee makers usually show.
Now let's look at what coffee looks like.

As you can see, the entire volume of coffee beans in the filter was used, and excess coffee did not flow over the edge. Water spilled evenly over the entire surface, and the characteristic funnel in the center turned out to be shallow.
Again, the result can be assessed as excellent.
Result: excellent
conclusions
It's been a while since we tested drip coffee makers. Therefore, it was especially pleasant to discover that the Redmond CM700 is not only attractive in appearance, but also capable of preparing a delicious drink, almost without deviating from the recommended standards.
This coffee maker can be recommended to those who are looking for a good “home” machine that can brew excellent coffee for a reasonable price.

Who should pay attention to this model?
For lovers of large cups who distinguish between good coffee and ordinary coffee designed just to keep you awake. They will find in the Redmond CM700 a coffee maker that can prepare an acceptable quality drink without any hassle.
This is also a good choice for those who do not want to delve into the intricacies of making coffee and are not willing to spend a lot of time on it. With a drip coffee maker, you just need to select the appropriate proportion of coffee and water, and then enjoy a fresh drink at the touch of a button.
Although you may need to figure out a few details, and perhaps standard store-bought coffee will not work, and you will need to either grind the beans yourself or order a suitable grind from a roaster.
For home users, the capabilities of the Redmond CM700 will be more than enough. But for true coffee connoisseurs, it may be worth paying attention to more serious models that have been certified and have stricter quality control.
Pros:
- stylish design
- adequate spill time
- stable temperature
Minuses:
- no automatic heating shutdown