

We tested a relatively budget gaming case with ARGB backlighting and a glass side panel: Cooler Master CMP 520 (CP520-KGNN-S00)
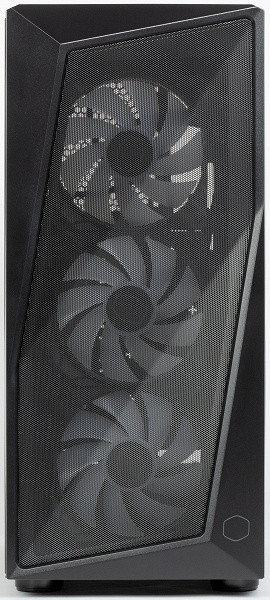
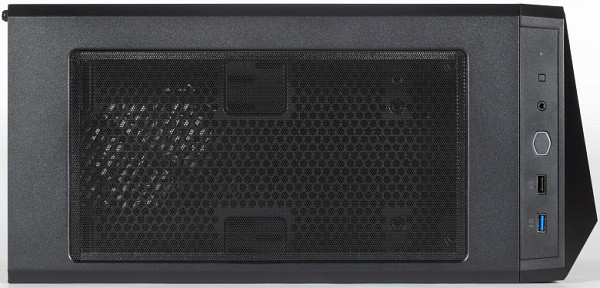
The outer covering of the card is smooth, matte, black. The plastic is dyed throughout, and all external surfaces of the front panel are matte, with the exception of the grille, which promises low wear during use. The buttons are made of high quality and function stably, without jamming or distortion.
The packaging of the case is a regular cardboard box with monochrome printing. The delivery set includes a standard installation kit in one bag.
Layout
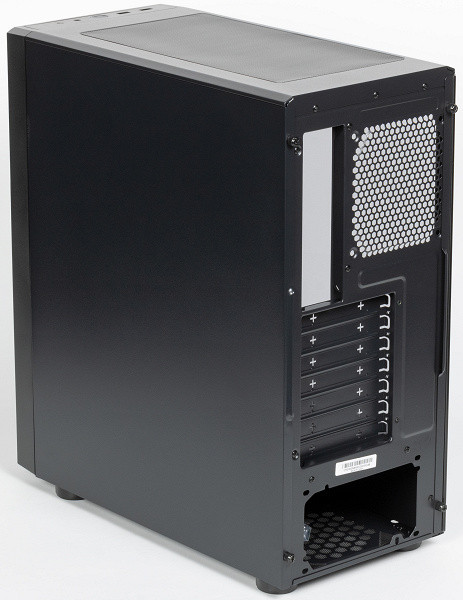
The layout solutions of this model correspond to modern trends in cabinet design. In this case, the developers abandoned the bay for 5.25″ devices, and the bay for 3.5″ devices is located near the front wall of the chassis, although it is present in a truncated form — only for two disks. If necessary, it can be removed by unscrewing the screw.
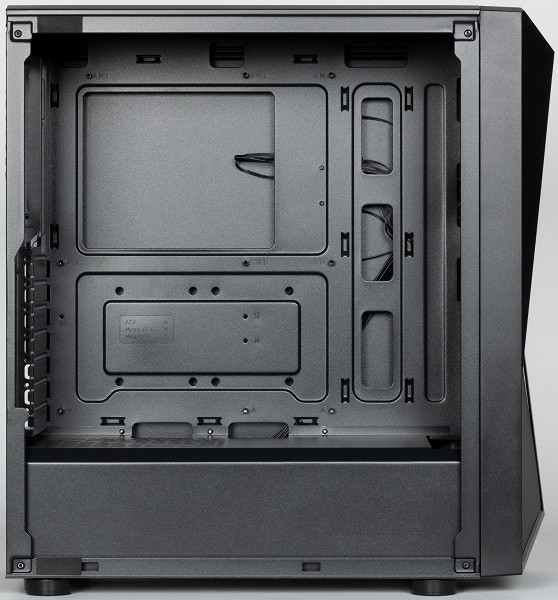
The case is a tower solution with a vertically located ATX format board (or smaller) and a horizontal placement of the power supply at the bottom. The casing covers the area for installing the power supply on the left wall, which gives the interior appearance of the case neatness and completeness. In addition, the casing acts as additional rigidity, providing additional support for the motherboard base from the bottom.
There are no mounting spaces for drives with external access in the case. Thus, the layout of the case corresponds to standard modern solutions, without having any noticeable features.
Backlight system
The case has an extensive lighting system with control based on a standard controller.
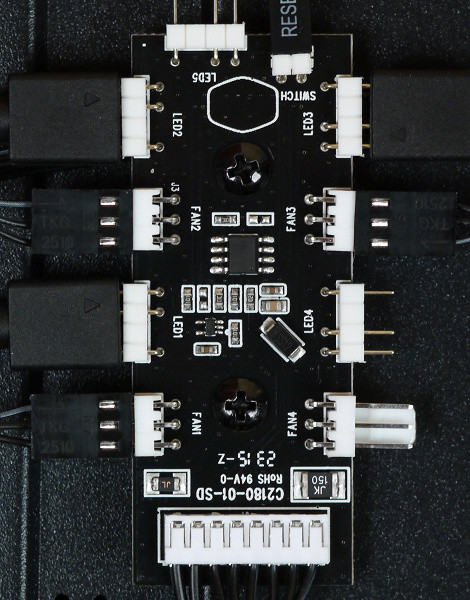
The case uses three front fans with individual addressable LED backlighting. They connect to the built-in controller via standard three-pin ARGB connectors.

The controller has the ability to be manually controlled via a reset button on the top panel. It is also compatible with software solutions such as Asus Aura Sync. The backlight system is powered via the SATA Power connector.
Cooling system
The controller in the housing is a multifunctional device. It controls the backlight and regulates the rotation speed of four fans with three-pin connectors using rotation speed control via the supply voltage.
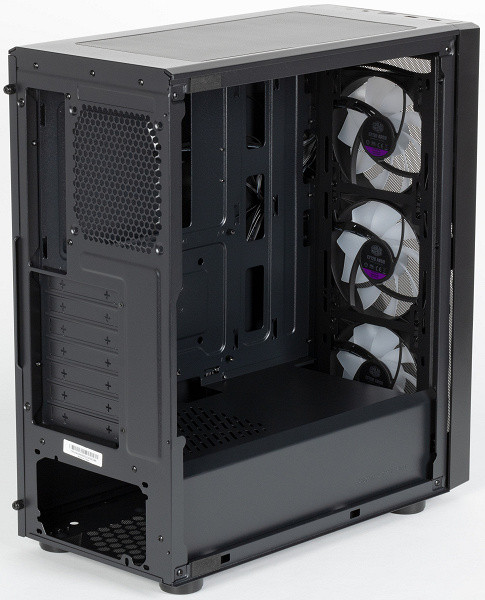
The case provides the ability to install fans of sizes 120 and 140 mm, with seats in the front, top and rear. Three 120 mm fans are standardly installed in the front. Each of them has two connectors: a standard three-pin for connecting to the motherboard with power management and a three-pin with a 1x4 header (ARGB) for controlling the backlight. You can also install up to three radiators in the case, with the ability to install up to 280 mm at the front and up to 240 mm at the top.
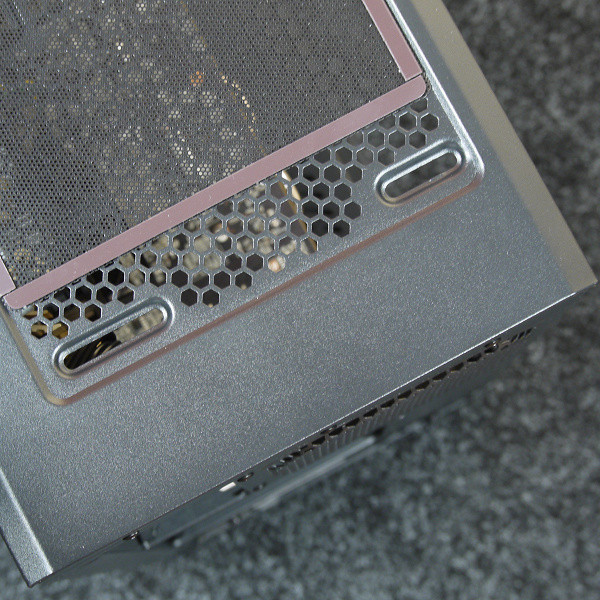
The top wall filter is easily removed and replaced thanks to the magnetic edge. However, it is made of a large plastic mesh, which can allow fine dust to pass through. Despite this, the filter does a good job of preventing small objects and dust from falling inside the case, making it a useful addition.
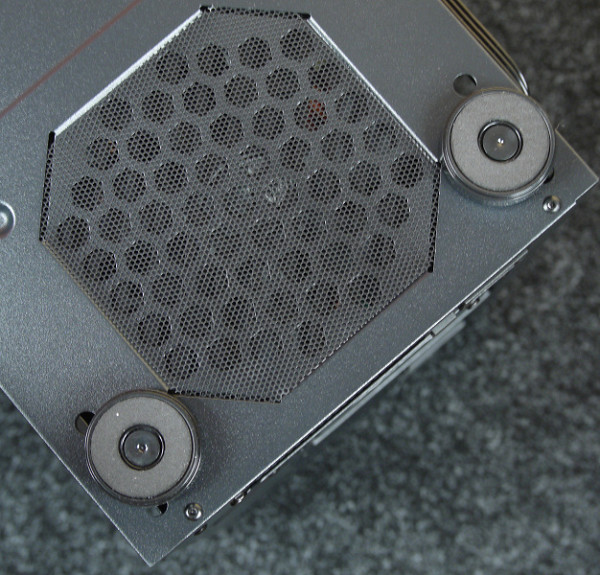
The filter under the power supply is made of a large mesh with round holes, consisting of a stamped sheet of plastic. It has no frame and is held in slots in the bottom wall of the chassis, which makes removing and putting it back a little difficult to the touch.
There is basically no filter at the front, except for the steel grill covering part of the front panel.

To clean the filter under the power supply, you need to remove the entire front panel and wash it, or use a vacuum cleaner. The front panel is easy to dismantle, as it has no electrical connections, which is convenient. The absence of a through hole at the lower end of the front panel has a positive effect on the direction of air flow, which passes only through the front grille.
However, the dust protection of this case leaves much to be desired. There are only filters at the top and bottom, and their filtering capacity is not the highest. There is no full filter at the front at all.
Design
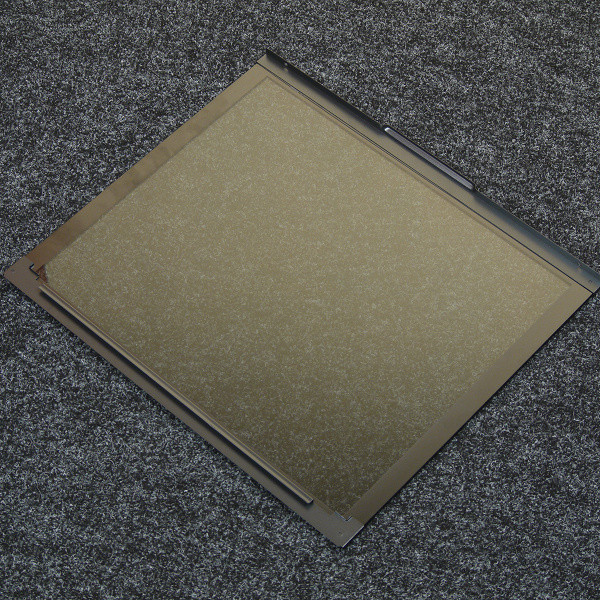
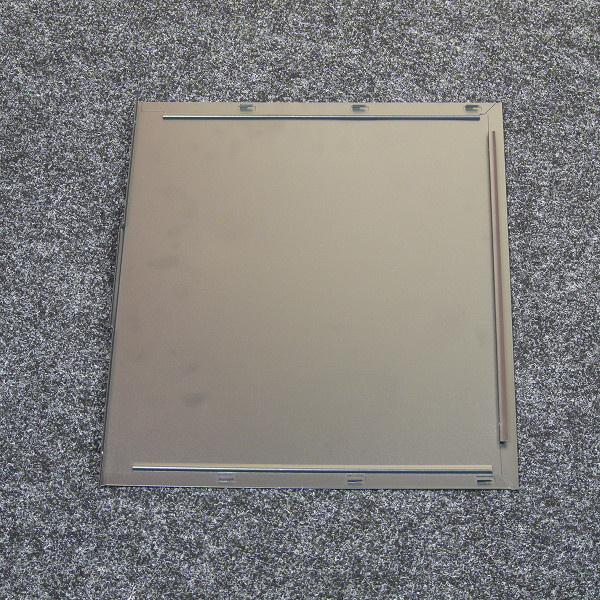
The left side wall is made of tempered glass with steel overlays. To fasten it, a swing system is used: in front of the wall there is a hook that is put on the side of the chassis, providing reliable fixation.
The right wall is completely steel, the fastening system is tongue-and-groove. There is a hook at the front.
Although the chassis of the case is of a budget design, it is quite high quality, especially when considering the internal structure. It can be seen that attention was paid to increasing the rigidity of the structure due to specially molded parts, as well as increasing the ease of assembly.

The body weight is about 5.7 kg, of which the glass wall weighs 1.6 kg.
The top panel is made of steel, there is a large ventilation hole that covers the filter on top.
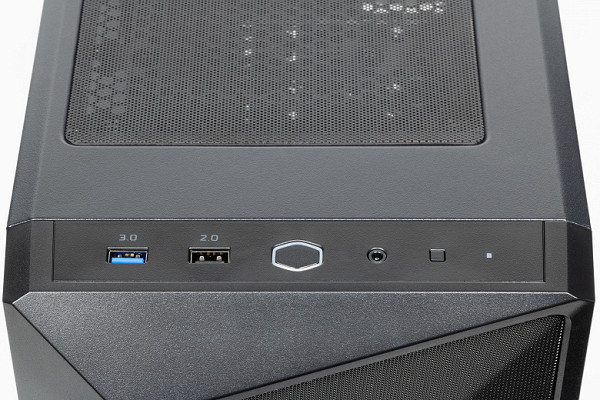
The front of the top wall houses controls and connectivity ports, including one USB 3.0 and one USB 2.0 port, as well as two audio jacks (headphones and microphone). It would be desirable to have more USB ports, since two ports are often not enough, and it is not entirely clear why not add at least two USB 3.0 ports.
The power and reset buttons come in different shapes and sizes, and their placement ensures ease of use. The default reset button is used to control the backlight. There is a white ring indicator around the power button.

The front panel has a plastic base, inside of which a steel grille is fixed.
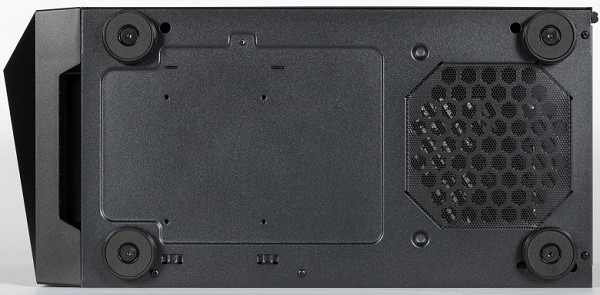
The legs of the case are entirely plastic, they are equipped with anti-slip pads made of foam material, and in general they perform their tasks normally.
Drives
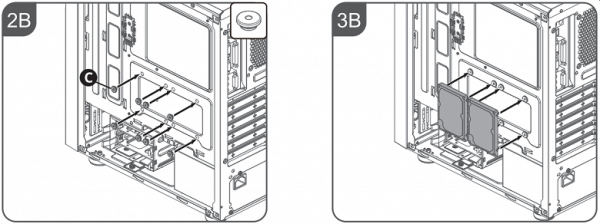
Full-size hard drives are installed in a double cage designed for them.
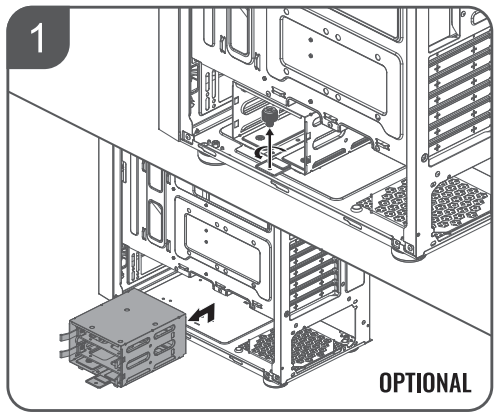
The basket in this case is removable.
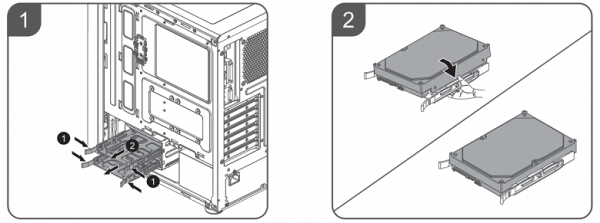
The discs are installed in the basket through plastic frames and secured with screws through the bottom and sides. The basket can accommodate both a full-size disk and a 2.5-inch drive.
There are no shock-absorbing elements provided.
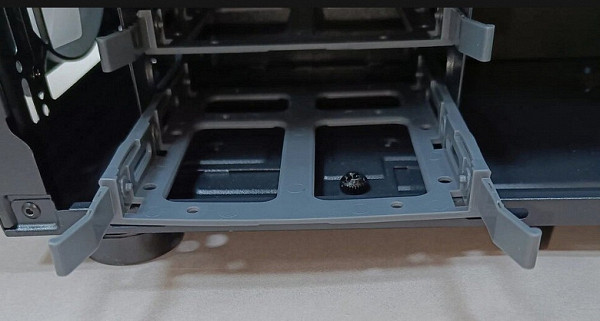
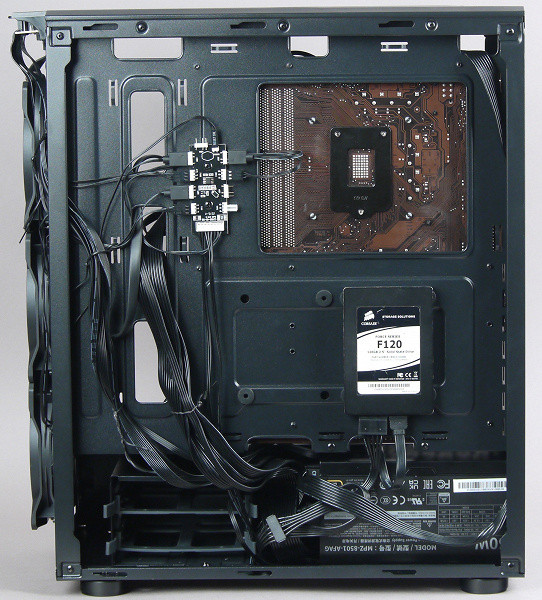
To install 2.5-inch drives, two identical slots are additionally provided on the reverse side of the motherboard base.
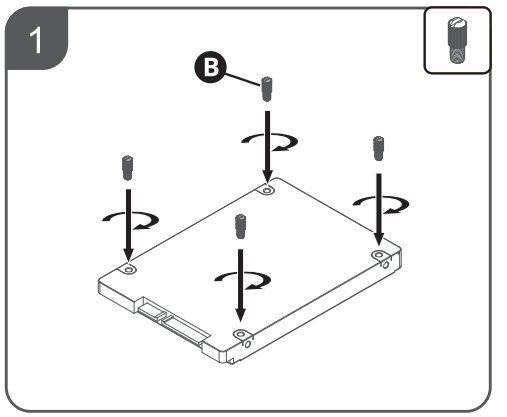
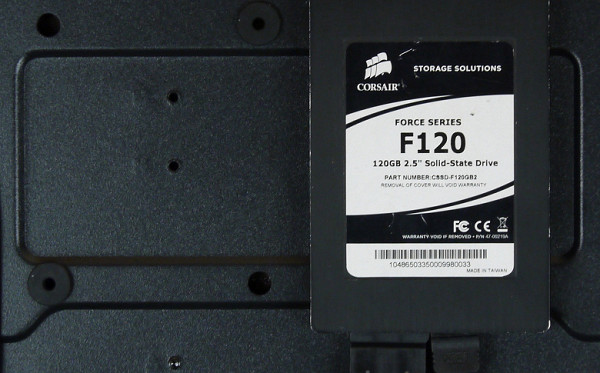
The mounting method is quite unique: cap screws are screwed into the drive, which is then inserted into rubber grommets installed in the mounting holes. Thus, fixation is achieved solely by friction.

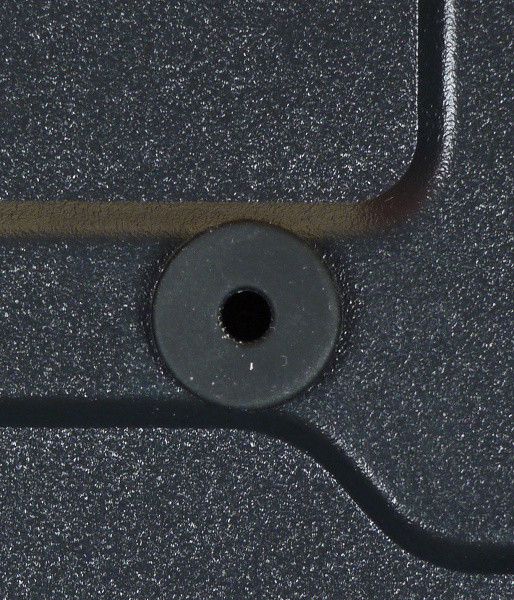
It is important to note that the builder will have to install the bushings into the chassis mounting holes themselves, as they are supplied in a separate bag along with the screws. Why this was not done in production is a little unclear, given that some Cooler Master cases already have bushings installed from the start.
This method is quite suitable for installing SSDs, but when installing laptop hard drives, some inconvenience may arise, especially if the drives are quite massive.
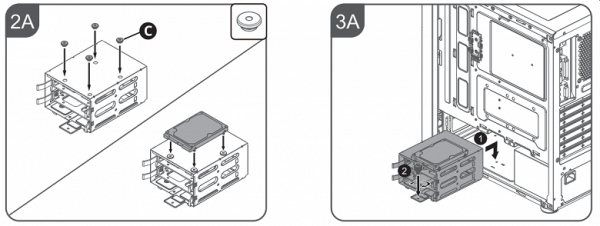
There is also another place to install the drive on the top plane of the basket, however, a separate set of rubber bushings is not provided for this installation option.
The total number of seats for drives in the case is 4 for the 2.5-inch format or 2×3.5″ and 2×2.5″. This is more than enough for a regular home or office computer. The storage basket is blown by a front fan.
Assembling the system unit
Both walls are secured with two thumbscrews. Standard wall sizes make fitting a glass wall onto a vertically standing case quite convenient, but a steel wall requires some effort.
All racks for mounting the motherboard are pre-installed by the manufacturer, taking into account the dimensions of a full-size ATX board with a width of 244 mm.
Although the order in which the PC is assembled in this case is not particularly important due to the spaced components, it is recommended to start by installing the power supply and routing the wires. The power supply is installed on the right side and secured with four screws. There are no vibration-isolating pads on the seat for the power supply.
The case provides for the installation of standard power supplies. The manufacturer claims that a power supply up to 160 mm long can be installed without problems. The distance between the rear panel of the case and the basket in the normal position is about 215 mm. We also recommend choosing a power supply no longer than 160mm, preferably 140mm, to leave enough room for cable management.
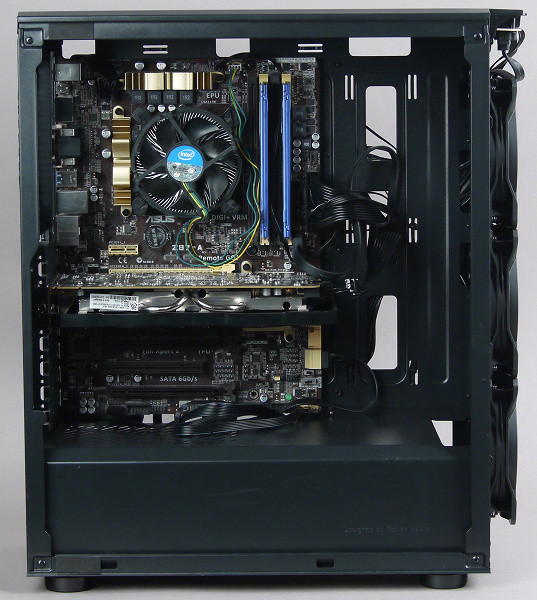
According to information from the manufacturer, the case can accommodate a processor cooler with a height of up to 161 mm. The distance from the motherboard base to the opposite wall is about 180 mm.
The depth of the cable routing compartment is approximately 17 mm at the rear wall. This is not much, so for convenience it is better to choose a power supply with ribbon wires. To secure the wires, loops for zip ties or similar products are provided. There are no blade membranes in the mounting holes on the system board base.
After this, you can install the necessary expansion cards, such as a video card, which can reach a length of about 350 mm if the space between the motherboard and the front wall of the case is not occupied. If we focus on ease of manipulation and the presence of standard fans, then the maximum length of the video card will be about 265 mm from the rear I/O panel, which is quite enough for most modern video cards.
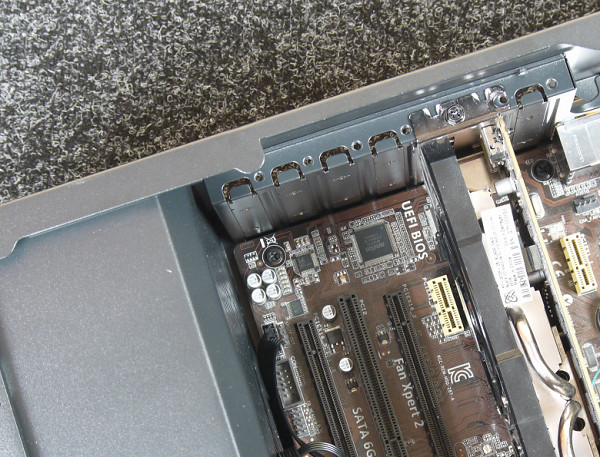
The mounting system for expansion cards is standard — they are secured inside the case with screws. All plugs on the rear panel are disposable and are required to be broken out before installing expansion cards. It is necessary to act carefully, since it is not so easy to break off the plugs, and the back panel near the plugs can be bent quite easily. For an experienced assembler this will not be a big problem, but a beginner may encounter difficulties, even damaging the case.
Ports and buttons on the front (in this case, top) panel are connected in a standard way: USB and audio — through monolithic multi-pin connectors, the rest — through single-pin and two-pin connectors.
Acoustic ergonomics
The noise level of the standard cooling system varies from 26 to 41 dBA when the microphone is located in the near field.
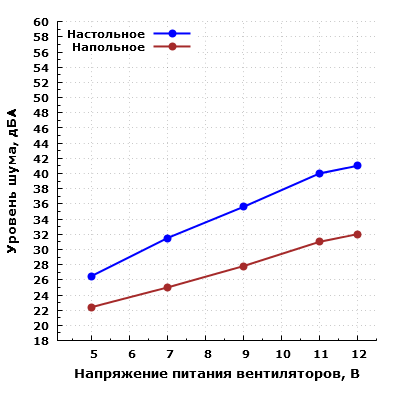
When using 5V voltage to power the fan, the noise level remains low. However, as the voltage increases, the noise also increases. In the range from 7 to 11 V, the noise level varies from medium (31.5 dBA) to high (40 dBA), which is typical for residential premises during the daytime.
If the enclosure is placed at a greater distance from the user, for example, on the floor under a table, then the noise can be characterized as low when using a voltage of 5 V and as medium when using a voltage of 12 V, which corresponds to typical noise levels for residential premises during the daytime.
Results
Cooler Master CMP 520 is no exception in the world of cases. It has a modern design, but is made of relatively thin steel and does not have rich functionality. However, its affordable price will attract its buyer. It should be noted that the case is not sufficiently protected from dust due to large holes in the filters, which require effort to clean, especially the bottom one. The assembly of powerful systems or systems with life-support systems may be inconvenient due to limited dimensions, but it is quite possible. It is important to choose a tower cooler with a 120mm fan. In general, it is not difficult to assemble a mid-level gaming system in this case. The presence of a multifunctional controller that controls the backlight and fan speed is a noticeable advantage.
The case allows you to create a compact system unit using standard components and looks decent, despite its shortcomings.