
The Digma brand offers a wide range of electronics, including laptops, smartphones, tablets, e-readers, TVs, speaker systems, headphones, players, digital photo frames, action cameras, video recorders, radar detectors and other devices for cars, as well as various accessories. In the fall of 2023, printers were added to this list, represented by two monochrome A4 laser models. One of them has only a USB connection, while the other is additionally equipped with Wi-Fi and Bluetooth wireless interfaces.
These compact printers are designed for the SOHO segment, aimed at home users and small offices. Although they can also be used for multiple jobs in larger organizations. An important difference from the products of some major manufacturers is the absence of chips on consumables for Digma printers. Moreover, the manufacturer claims the possibility of using compatible cartridges without limiting users' choice. Let's take a closer look at the older model — the Digma DHP-2401W printer.
Characteristics, equipment, consumables
As usual, we start with a list of declared parameters:
| Digma DHP-2401W | |
|---|---|
| Image technology | laser electrographic |
| Standard Features | monochrome printing |
| Memory | 128 MB |
| CPU | 1.2 GHz |
| Interfaces | USB 2.0 Wi-Fi 802.11b/g/n, Bluetooth |
| Supported Operating Systems | Windows, Linux |
| Printing from removable media | No |
| Printing from mobile devices | no (there is only a network configurator for Android and iOS) |
| Dimensions (W × D × H, trays folded) | 355×236×182 mm * |
| Net weight | 5.2 kg |
| Power Options | 220—240 V, 50/60 Hz |
| Power consumption: sleep mode , print mode | 1.8 W 360 W |
| Printing noise level | ≤ 54 dBA |
| Operating temperature, humidity | n/a |
| Description on the manufacturer's website | digma.ru |
| Seal | |
| A4 print speed | up to 24 ppm |
| First print out time | less than 8.5 s |
| Warm-up time | n/a |
| Print Resolution | 600x600 dpi |
| Monthly print volumes: recommended peak | n/a n/a |
| Working with materials | |
| Paper trays, capacity | one — folding for 150 sheets |
| Output capacity | n/a |
| Additional trays (optional) | No |
| Automatic duplex printing | No |
| Media Density | 70—140 g/m² |
| Print media formats | from 76×128 mm to 216×356 mm |
| Media Types | paper |
* on the official website it is indicated 418×289×267 mm, but these are the packaging dimensions
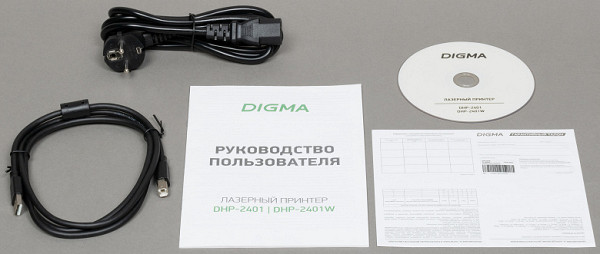
The set includes:
- power cable,
- USB cable,
- cartridge (installed in the printer),
- CD with software,
- user manual (in Russian) and warranty card.
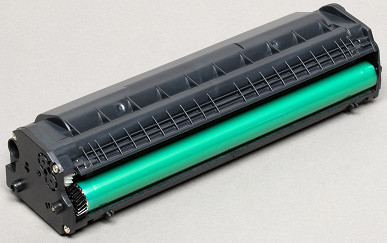
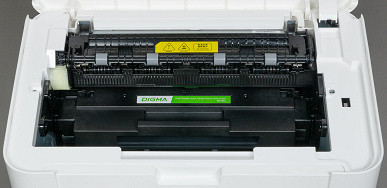
It is noteworthy that there is no chip on the cartridge, despite the presence of space for its installation.
It is noticeable that the manufacturer clearly indicates compatibility with Cactus CS-S1660S cartridges, which are affordable and more economical (on average they cost about a thousand rubles), even considering that they are designed for 1500 prints. This allows us to conclude that it is possible to use compatible cartridges without voiding the warranty, which represents a significant economic advantage for users. It is important to note that it is not the quality of Cactus consumables that is being discussed, but the fact of official compatibility and the absence of sanctions from the manufacturer.
There may be parts that require replacement after a certain period of use, but details of their maintenance and replacement are the responsibility of service centers.
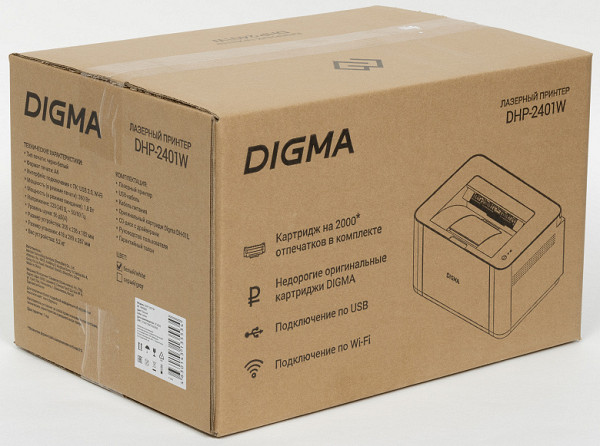
The printer comes in a regular cardboard box without convenient slots for carrying by hand.
Appearance, control, indication
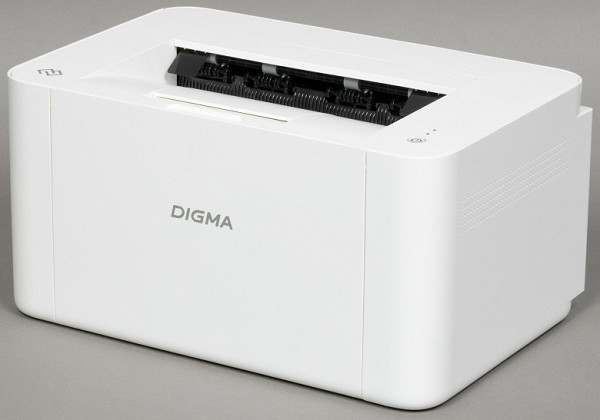
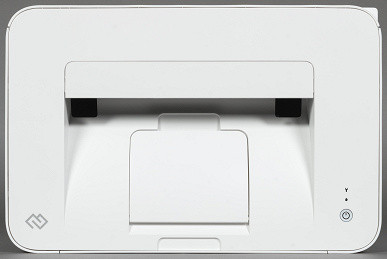
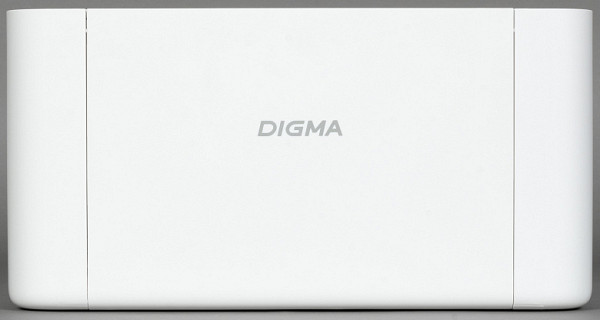
The printer is available in two colors: milky white and light gray. The entire body has a matte finish. Our review unit comes in white, but the light gray option is probably more practical.
From the outside, the printer is a compact unit with pronounced, rounded vertical edges.
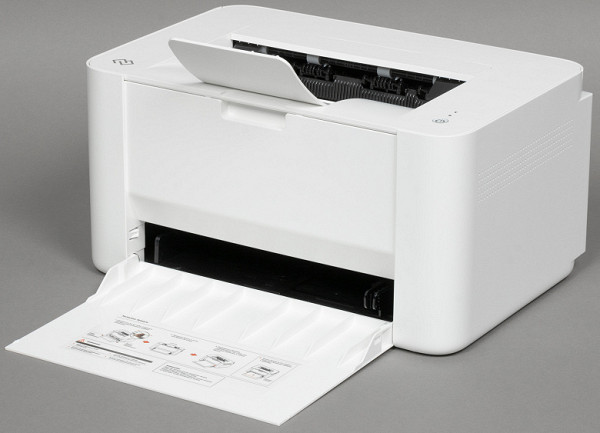
The only paper feed tray is a folding one and is installed on the front wall of the printer. It has a capacity of 150 sheets (at 80gsm unless otherwise noted). It is possible to adjust the width using movable stops, although there are no such options for length, which, however, does not affect the paper feeding process.
The recess-shaped output tray is located on the top surface of the printer and is equipped with a folding support for outputting printed sheets. This support consists of two parts and allows you to lift the front of prints of varying lengths.
Thus, the sheet of paper is expected to bend almost completely during the paper transfer process, limiting the range of media weights that can be used. It is important to note that there is no hinged cover on the back wall, which limits the ability to adjust the path of passage, as is the case in some other models.
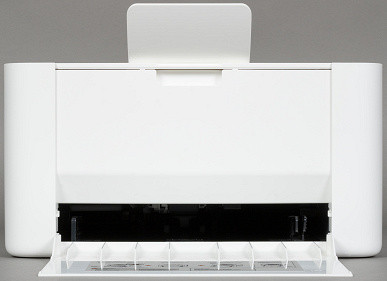
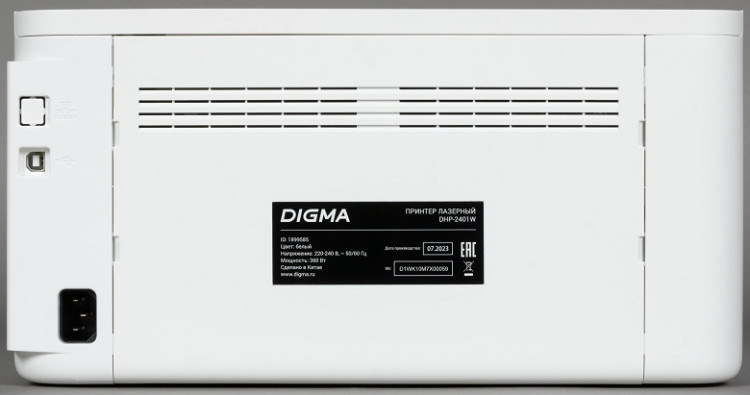
On the back wall of the printer on the right there are connectors: at the bottom — for connecting the power cable, above — a USB-B (female) port for local connection to a computer. There is also a closed hole, hidden by a plug, with an Ethernet network symbol, which may indicate the possible appearance of a modification of the printer that supports wired networks.
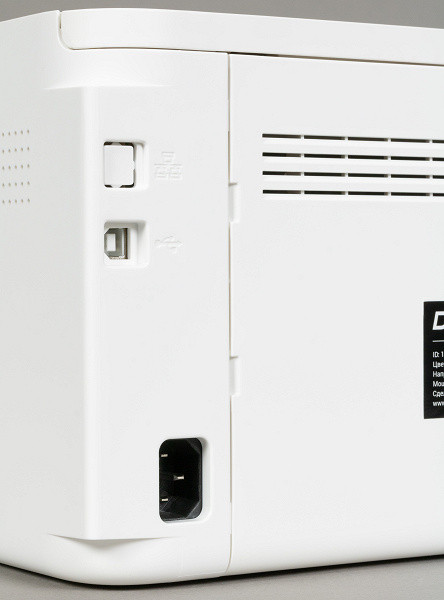
Cables connecting to the printer will require some space behind the device, which may limit the ability to mount it directly to a wall.
To the right of the output tray is a single control — a round button with a built-in white indicator, as well as two additional indicators: yellow, indicating the status of the cartridge in the form of a droplet, and red, indicating errors in the form of a wrench.
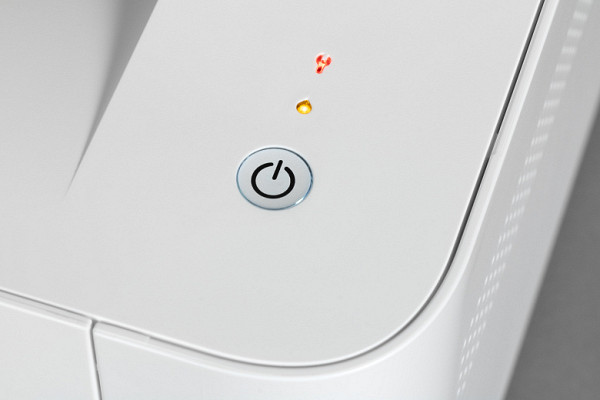
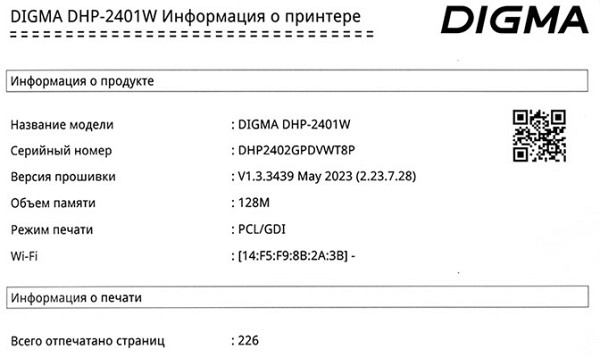
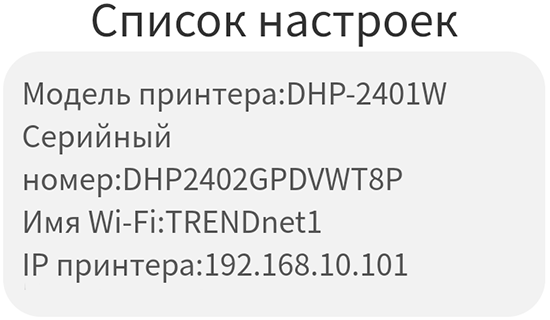
The printer button performs several functions: a short press turns on the device, a long press (five seconds) turns it off, and two short presses cancel printing. It is also possible to print a test page: to do this, you need to hold the button for about two seconds and release when the red and yellow indicators light up; The page will contain useful information, including the serial number, firmware version, network MAC address and fingerprint counter. It is important to remember that if the button is not held down when turning off, there is a possibility of getting a printout instead of shutting down.
In energy saving mode, the white indicator built into the button will blink slowly, when printing — quickly, in ready mode it will light constantly.
A flashing yellow droplet may indicate that the toner is about to run out or the cartridge is not inserted correctly. If the yellow drop is constantly glowing, the cartridge should be replaced; There is no definitive information on whether printing will continue (possibly with reduced quality) after replacement, since the toner was not completely used up during testing.
A flashing red wrench indicates a paper jam; To resume printing after removing a sheet, you must press the button.
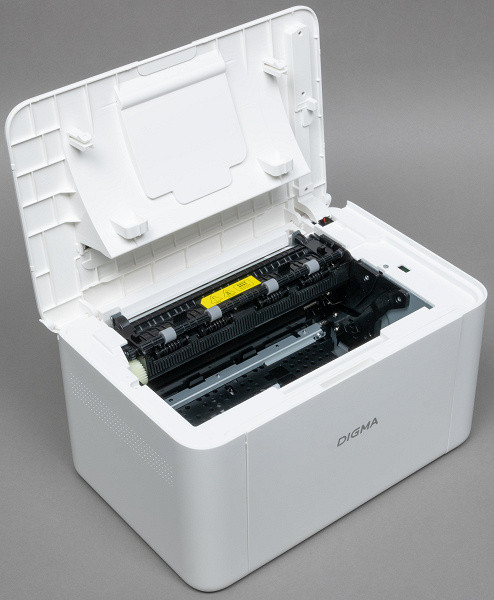
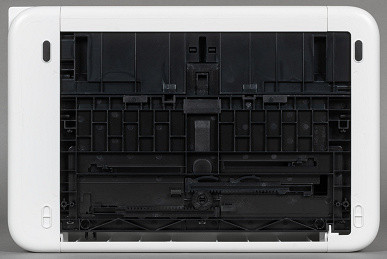
The top of the printer, along with the output tray, can be folded down to gain access to the cartridge compartment. Before turning it on for the first time, you must remove the cartridge (this requires some effort) and remove the protective sheet of black paper.

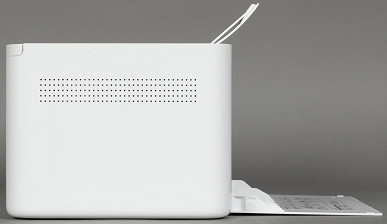
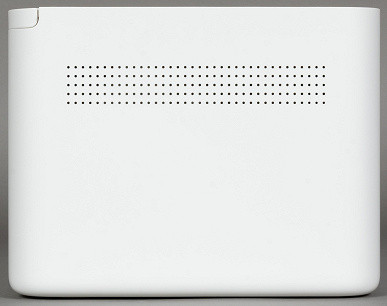
There is no duplex (automatic two-sided printing) function, so sheets must be turned over manually for two-sided printing. There are ventilation grilles on the side and rear surfaces. There are no cutouts for finger grip when carrying, but they are not very necessary since the printer is quite light.
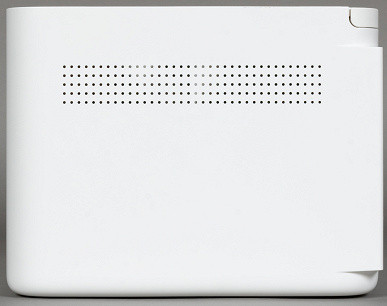
Top and bottom views:
Connecting a printer
Testing was carried out on the Windows 11 operating system, which is the most current at the time of the study. For users who prefer non-Microsoft operating systems, Linux software is also available.
The kit includes a CD with drivers, but in modern conditions it is quite difficult to find a computer equipped with an optical drive to extract information from such media.

At the time of testing, downloading the necessary software from the official Russian website turned out to be unavailable; only instructions were provided. We hope this is temporary and software downloads will become available in the future. It is also worth noting the inconvenience of searching for files in the “Support → Downloads” section, where the search is carried out by serial number, which requires additional effort on the part of the user. It is important to draw the attention of developers to this point.
Note: in the process of preparing the material for publication, drivers appeared on the official website in version 7.9.0.1, including versions for Windows (available on the product page).
Local connection
The Windows installation file on the disk is version 6.8.7.4.

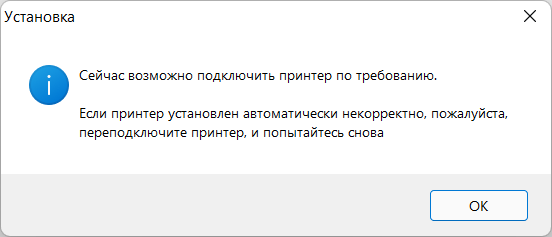
As usual, we first begin installing the driver, and only when prompted by the installation program do we connect the printer and computer with a USB cable.
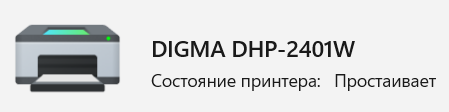
We get the installed printer.
Kurulu yazıcıyı alıyoruz.
The driver interface is Russified, although the number of available settings is minimal. However, this is not a significant drawback, since the basic parameters necessary to work with a simple printer are provided. Despite their presentation in a standard form, the lack of various «fine» adjustments characteristic of more advanced devices is not considered a problem, given the functionality of this printer.
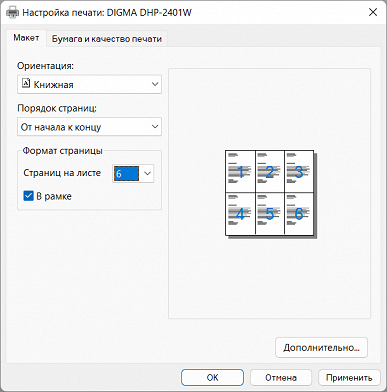
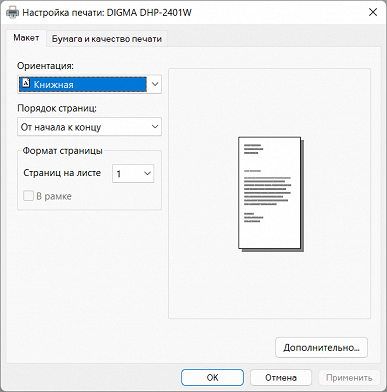
On the first tab of the main window, you can set the orientation, the order in which pages are displayed in multi-page documents, and also place from 2 to 16 reduced pages on one sheet. Although the question of who and why needs 16 pictures on one sheet remains, a similar function is found in various printing devices.
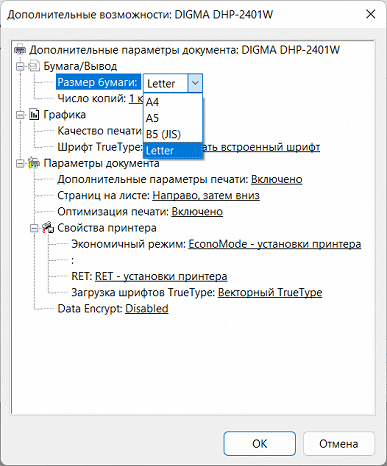
Clicking the Advanced button opens up an additional set of options, some of which could be more conveniently located in the main window. For example, regarding the “Letter” format, which is exotic for our region and is installed by default, it would be more logical to immediately offer the standard A4 format. In addition, A5 (half of A4) and B5 JIS (182x257 mm) formats are available. However, settings for printing on envelopes are not provided, nor is the ability to separate paper into gradations of weight.
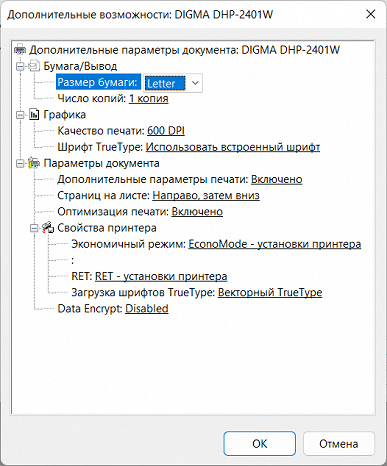
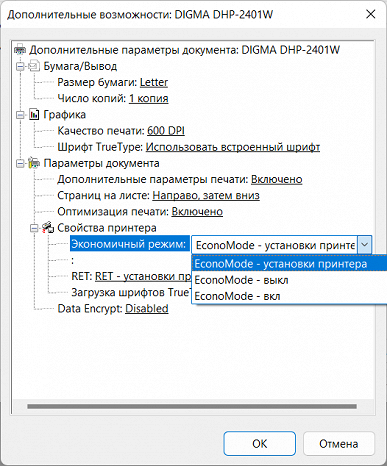
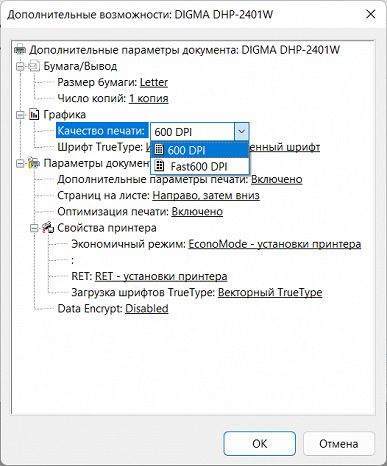
You can also customize the default number of prints. Two quality options are provided: “600 DPI” and “Fast600 DPI” (we will look at the differences between them when testing and analyzing prints). In addition, there is a toner saving mode.
Wi-Fi network connection
Utilities for configuring network settings are not installed with the software, and with only one control element, it is impossible to immediately determine the method of connecting to wireless networks.
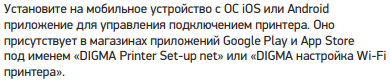
In this situation, you have to resort to folk wisdom: in case of difficulties, you should refer to the instructions. Indeed, the instructions contain a detailed description of the procedure, although it itself is far from trivial. In addition, to complete the process you will need to have a smartphone or tablet running Android (we used just such a device) or iOS. It is important to start by installing the driver when connecting via USB.
However, it is worth remembering that you cannot always rely on what is written in the instructions. For example, the instructions direct you to the appropriate resources for downloading the “Digma Printer Set-up net” or “Digma Wi-Fi printer setup” application, but at the time of testing such names were not found on Google Play.
Fragment of PDF instruction file
Originally, it turned out that you need to search for and install an application called “Digma Netprint”. Obviously, it is difficult to change the title on already printed brochures that are included in the box with the printer. However, at least in the PDF file of the instructions, which is available for download on the manufacturer’s website, this point could be clarified!
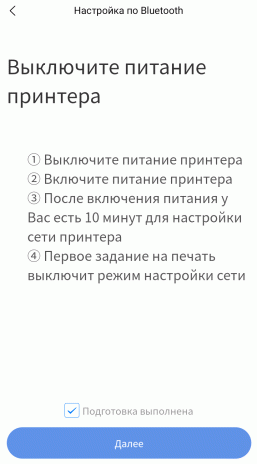
For the configurator to function properly, Bluetooth and geolocation must be turned on on your smartphone.
To begin setup, launch the installed application, select a language if necessary, and select the «Bluetooth Setup» option. After that, turn off and then turn on the printer, check the “Preparing complete” box, click “Next” and wait until the printer is detected.


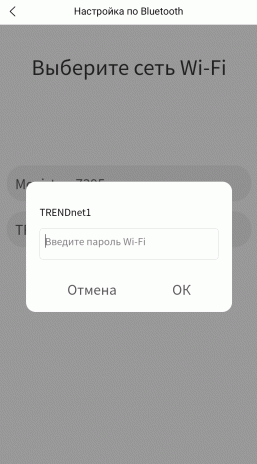
Click on the line with the name of the printer, after a long wait, select the desired network and enter the password.
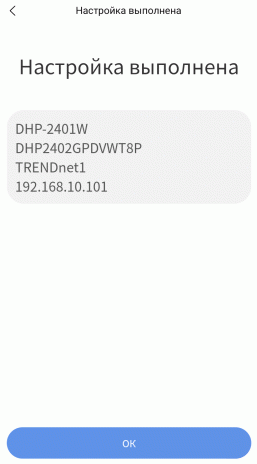

Done — the printer is successfully connected. The setup process turned out to be somewhat confusing, and it was not always possible the first time, so I had to start over. But don't be discouraged if you have difficulties — this is quite normal, and we are sharing this experience so that you are prepared for small difficulties.
However, it is worth noting that this application only performs network configuration functions and does not provide the ability to print from a smartphone. Its main purpose is to view already installed parameters.
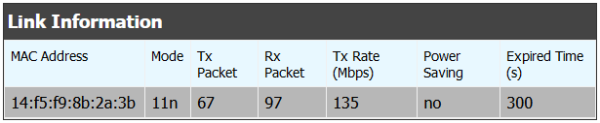
Here is the connection information from the router:
All that remains is to add the printer in the computer settings. We couldn't find it automatically, but after manually entering the IP address and TCP/IP port, everything connected successfully.
It is important to note that on a wireless network, the printer can only be used through a router or access point, and direct printing via Wi-Fi Direct is not provided. The instructions indicate that it is not possible to print from a smartphone connected to the same network. However, you can use both local and network connections at the same time. Thus, the printer can be connected to several computers via Wi-Fi and simultaneously to one PC locally.
Web interface
When accessing the printer's IP address through a browser, a web interface opens, but its functionality is limited. Currently, the only options available are to update the firmware, and this can only be done using a pre-downloaded file, and not online. However, at the time of testing, the corresponding files for updating the firmware were not available.
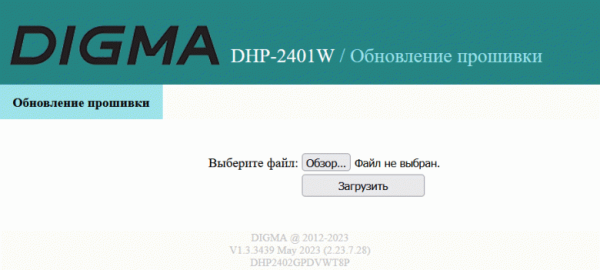
When and if new firmware versions become available, the web interface may take on additional significance. However, some confusion remains regarding the procedure for updating the firmware on the DHP-2401 model without a Wi-Fi adapter. It seems quite natural that the owners of such devices may not show an active interest in regular or at least occasional firmware updates.
It would also be useful to be able to access device status, including the fingerprint counter and some settings, through the web interface. The ability to control power saving mode and change network settings would also be practical. While these aspects can currently be configured using a smartphone via Bluetooth, the increased functionality of the web interface is a welcome improvement.
Testing
The average time to become ready after switching on was 22 seconds. Shutdown occurs almost instantly after holding the button for five seconds.
During testing on a wireless network, both devices — both the printer and the test computer — were connected via Wi-Fi. It should be noted that the environment was not congested by neighboring networks.
Print speed
A4 printing speed was measured on a PDF text file containing 11 pages. Default settings were used. Time was measured from the moment the first sheet was issued, excluding the time of data transfer. Two measurements were carried out with subsequent averaging of the results.
| Quality | Time, s | Speed, ppm |
|---|---|---|
| 600 DPI | 30.3 | 19.8 |
| Fast600 DPI | 25.6 | 23.4 |
Now it’s clear why the name of the second quality setting contains “Fast”: printing is noticeably faster, the speed is approaching the stated 24 ppm, while with the default “600 DPI” it is fifteen percent lower.
The printing time of a 20-page PDF file in A4 format was measured.
| Quality | Local USB | WiFi | ||
|---|---|---|---|---|
| Time, min:sec | Speed, ppm | Time, min:sec | Speed, ppm | |
| 600 DPI | 2:03 | 9.8 | 2:02 | 9.8 |
| Fast600 DPI | 1:08 | 17.6 | 1:04 | 18.7 |
In all cases, the speed was lower than in the previous test, but not only because of the time required to process and transfer data. With the “600 DPI” setting, printing was accompanied by noticeable pauses after every 2-4 sheets, while when using “Fast600 DPI” there were no such pauses, and the document was printed almost twice as fast. However, in this case, the speed did not reach the declared maximum.
Local and wireless connections demonstrated almost the same speed, but it is worth considering that our test network only included a printer and a computer from which printing was done. If there is significant traffic from other devices, the speed ratio may be different.
The printing time of a 20-page DOC file was measured (A4, default margins, text typed in Times New Roman 10-point font, headings 12-point, from MS Word).
| Quality | Local USB | WiFi | ||
|---|---|---|---|---|
| Time, min:sec | Speed, ppm | Time, min:sec | Speed, ppm | |
| 600 DPI | 1:14 | 16.2 | 1:17 | 15.6 |
| Fast600 DPI | 1:04 | 18.8 | 1:02 | 19.4 |
Printing of such a document at both quality settings proceeds evenly, without pauses, so the speeds turned out to be higher than in the case of a PDF file. In addition, «Fast600 DPI» again demonstrates a higher speed compared to «600 DPI», although the difference is no longer as noticeable.
With both connection options, the printing speed is also approximately the same.
Noise measurement
The measurements were carried out with the microphone positioned at the level of the head of a sitting person at a distance of one meter.
The background noise level was less than 30 dBA, which is typical for a quiet room where the only devices working were the printer itself and the test laptop.
Measurements were carried out in the following modes:
(A) Printing a circulation when set to “600 DPI”,
(B) Printing a run when setting “Fast600 DPI” (slightly higher speed),
© Maximum value during initialization after power-on.
Since the noise is uneven in nature, the table shows the maximum level values for the indicated modes, as well as short-term peak values expressed as a fraction.
| A | B | C | |
|---|---|---|---|
| Noise, dBA | 54.0/59.5 | 54.5/59.5 | 49.5 |
In ready mode, the noise level from the device does not exceed background noise.
Note that this model does not have a silent mode, which is present in some other printers and MFPs.
When compared with other devices we tested, the noise production of the Digma DHP-2401W is rated as average.
Feed Path Test and Other Observations
In previous testing, we printed more than 220 pages on plain paper ranging from 80 to 100 gsm and reported no jams or paper feeding issues.
Now let's look at working with paper whose density exceeds the stated parameters in order to evaluate how the printer copes with feeding it and fixing prints. At the same time, we do not set the task of deliberately causing the device to fail, but simply testing paper with a density that exceeds the stated maximum by several units.
While we didn't have 140gsm paper (which is what the manufacturer lists as the maximum), we tried 160gsm paper and the printer performed well in two five-sheet tests.
It is important to note that the specification does not provide for the use of media other than paper, and does not provide corresponding settings in the driver. We tried printing on C5 size envelopes, choosing a similar A5 size and feeding them one at a time with the short edge. In general, the printer did a good job, but sometimes the envelopes became noticeably deformed when bent in the printing path.
Thus, working with thicker paper than specified in the specification and with envelopes is possible, but you should be prepared for possible risks and deformations of the materials.
Print quality
Let us remind you that fine details cannot be fully conveyed in the scans provided — the compressed format has an effect.
Text samples
When printing with the “600 DPI” setting, the transfer of text samples turns out to be quite acceptable for a printer of this class. Sans serif fonts start to be legible at point 4 (albeit with some flaws), and serif fonts at this size are difficult to read. The density of the fill is rather excessive: on small sizes, adjacent characters begin to partially merge, which impairs legibility. The contours of the letters of medium and large sizes are very even, perhaps influenced by the quality of the paper surface, but the raster is not visible even with magnification.
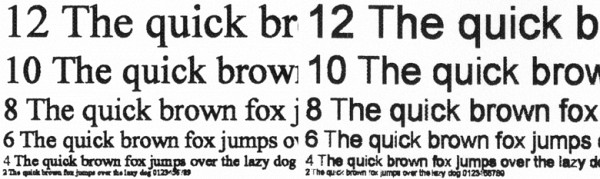
Setting «600 DPI» (increased)
Switching to the “Fast600 DPI” mode slightly reduces the fill density, which has a positive effect on the readability of small font sizes. Although the contours are no longer so smooth, and the raster becomes noticeable at some magnification, which is why the thinnest lines can be torn, you can confidently make out the 4th point with and without serifs. Taking into account also the increase in printing speed, this mode can be recommended as the main one for printing text documents. An additional bonus will be some reduction in toner consumption.
Settings: left “600 DPI”, right “Fast600 DPI” (increased)
Enabling the toner save mode with any of these quality settings does not make any noticeable changes, even with a magnifying glass.

Setting “600 DPI”, on the left, toner saving is disabled, on the right is enabled (increased)
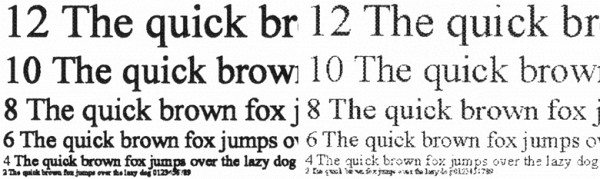
Samples with text, graphics and illustrations
The same can be noted for prints of combined samples: with the “600 DPI” setting, the density is excessive. In extended areas with continuous filling, frequent stripes are noticeable across the movement of the sheet, which, it should be noted, is typical for inexpensive laser printers and MFPs.

Setting «600 DPI»
If you select «Fast600 DPI», the density becomes slightly less, but the mentioned banding remains, although it is slightly less noticeable.
Settings: top “600 DPI”, bottom “Fast600 DPI”
The text becomes paler, but readability remains at a quite acceptable level, that is, for such documents this setting can be made the main one.

Settings: top “600 DPI”, bottom “Fast600 DPI”
Enabling toner saving does not have any noticeable effect here either — it seems that this setting is not processed by the printer at all.
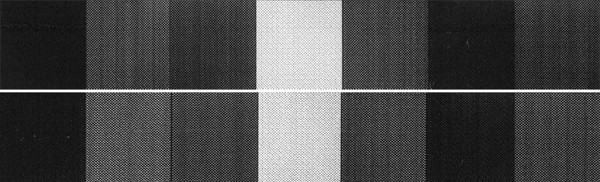
Test strip
When printing such a sample with the “600 DPI” setting, the density is also excessive; as in the combined samples, frequent stripes are visible across the movement of the sheet.
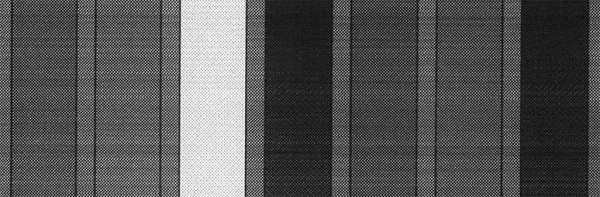
Setting «600 DPI» (increased)
The discernibility of shades of neutral densities at the light end is average — from 7-8 percent, and at the dark end it covers only up to 80 percent. The solids are fairly saturated areas, but the raster becomes noticeable even at low magnification.

Setting “600 DPI” (enlarged, rotated 90°)
In text fields, during normal printing, the 4-point point for sans-serif fonts can be made out, but with serifs it is difficult to read; When printing with reverse, legibility begins with the 5th and 6th point, respectively. Decorative fonts are readable from 7 point, but not very confidently, especially for reverse.

Setting «600 DPI» (increased)
There are no sharp transitions on gradients.

Setting «600 DPI»
The maximum number of distinguishable lines per inch is less than 60 — there are simply no fields with lower lpi on our test sample.
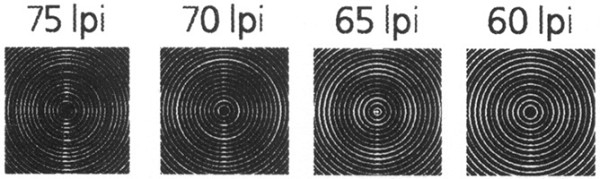
Setting «600 DPI» (increased)
And even with “Fast600 DPI” I would like to reduce the density; the difference with the previous setting is insignificant — here you can regret the lack of additional settings in the driver (like brightness and contrast adjustments).
And even with “Fast600 DPI” I would like to reduce the density; the difference with the previous setting is insignificant — here you can regret the lack of additional settings in the driver (like brightness and contrast adjustments).
Photos
The printer is not intended for printing photographs, so we will limit ourselves to only examples and express an evaluative opinion: the Digma DHP-2401W printer is not suitable for such purposes at all — at any quality setting, the prints turn out extremely dark, and the stripes mentioned above are noticeable in more or less light areas.

Settings: left “600 DPI”, right “Fast600 DPI”
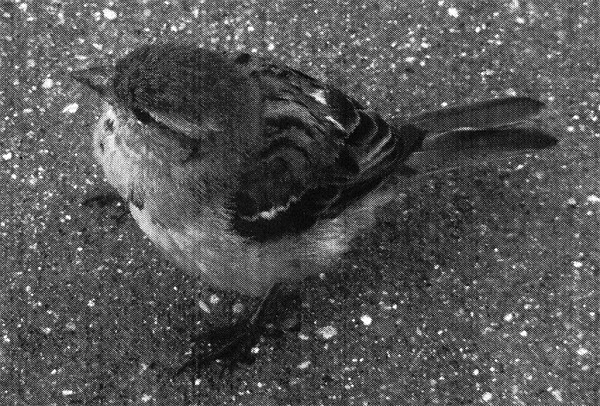
Setting «Fast600 DPI»
Bottom line
Digma DHP-2401W is a typical modern laser printer for the SOHO segment: moderately compact and quite productive. It contains characteristic features, such as the lack of duplex and the ability to connect to wired networks, but the presence of a full-fledged cartridge in the kit, and not a “training” one, brings positive emotions. The device supports the use of compatible consumables due to the absence of chips on the cartridges.
The appearance and ergonomics of the printer are standard characteristics for such devices. The driver and primitive web interface may cause some criticism, but these are typical aspects. The network configurator requires the use of a smartphone or tablet, which may be inconvenient for some users.
The print quality is suitable, but not ideal, for printing documents, including those containing graphics. The printer is not designed for printing photographs. The ability to work with envelopes is limited, but if necessary, the printer can handle them (at least C5 format).
Overall impressions of the Digma DHP-2401W are positive and it could be a good choice for office or home use, especially if the ability to use compatible consumables is valued. However, we are unable to evaluate the reliability and durability of the device within the scope of this review.