Passport specifications, delivery set
Appearance
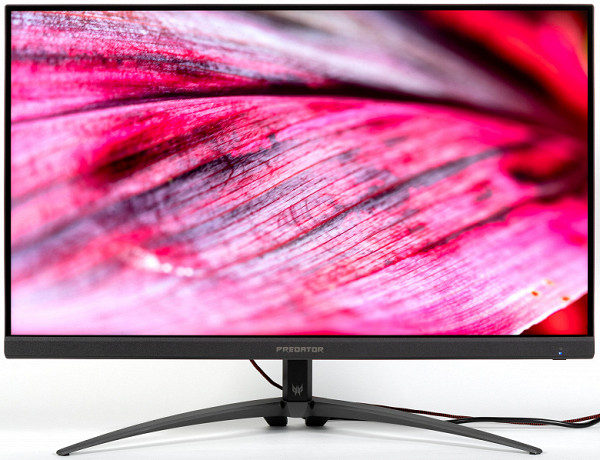
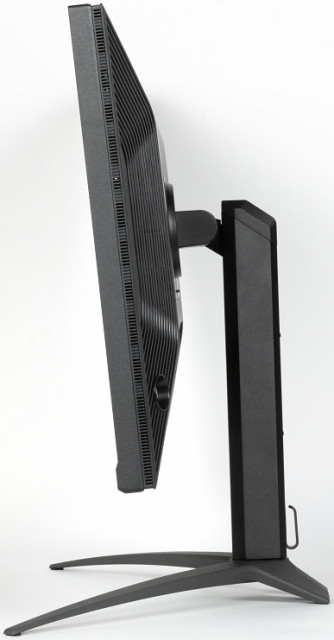
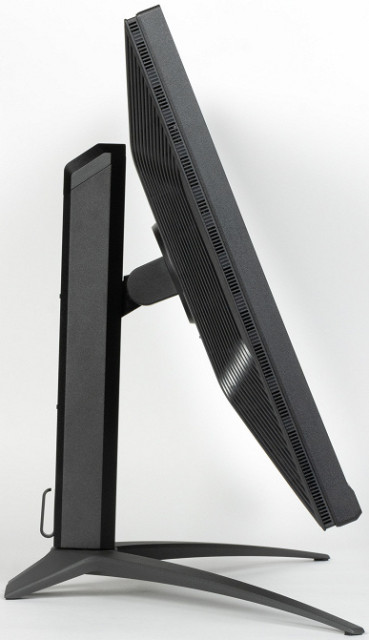
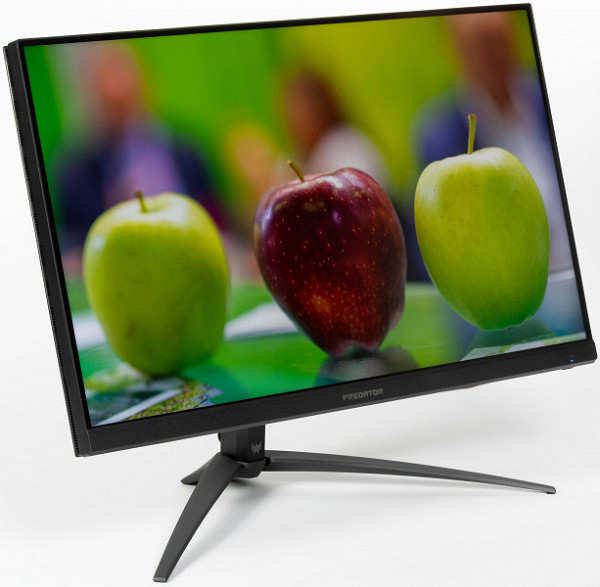
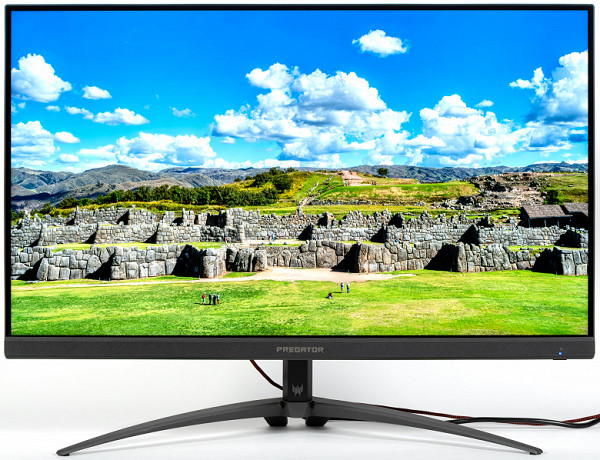
The design of the monitor is generally moderately gaming, which allows us to consider it universal in terms of appearance. The only elements that indicate a gaming focus are the design of the stand and the inscription on the central front panel. The case and stand are made of black plastic with a predominantly matte surface. The outer surface of the matrix is also black, semi-matte and hard. The screen looks like a monolithic surface, limited at the bottom by a relatively narrow bar, and at the top and sides by a narrow border. When displaying an image on the screen, you can see that there are narrow margins between the outer borders of the screen and the display area: 8 mm to the outer edges at the top and sides, and about 2 mm to the lower bar.
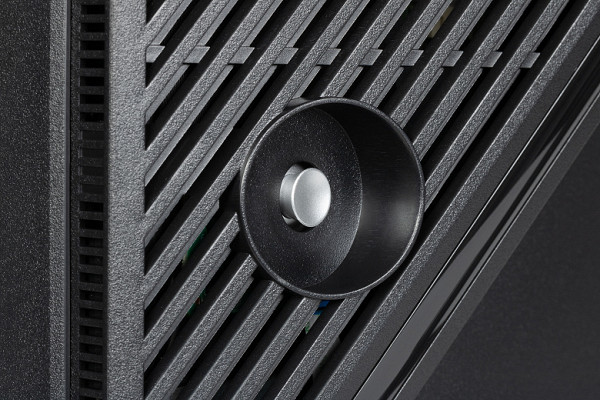
In the lower right part of the rear panel, close to the right end, there is a 5-position joystick. If necessary, you can reach it from below.
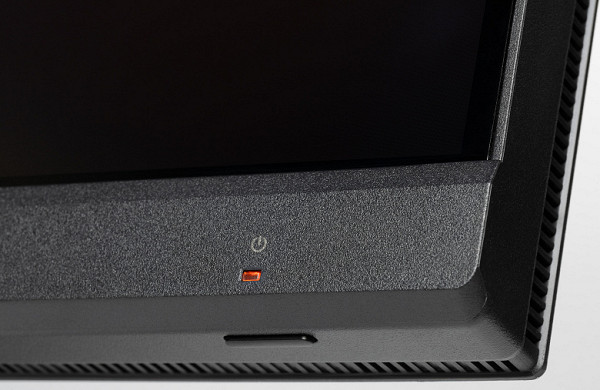
On the front panel, closer to the right corner, there is a light diffuser for the status indicator.
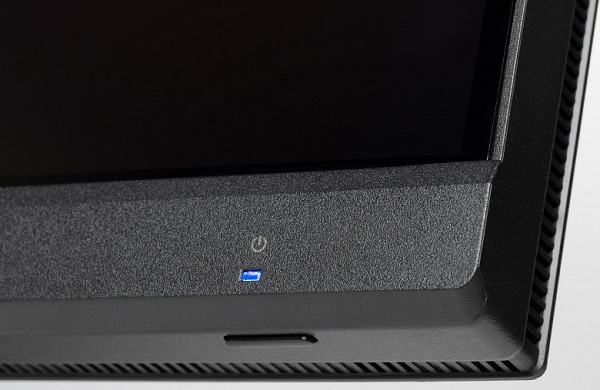
Behind it, on the bottom end, is the power button.
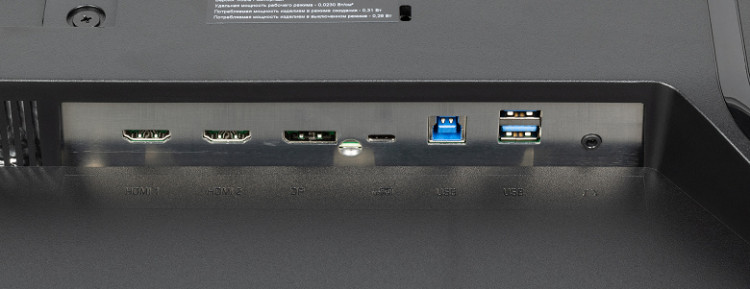
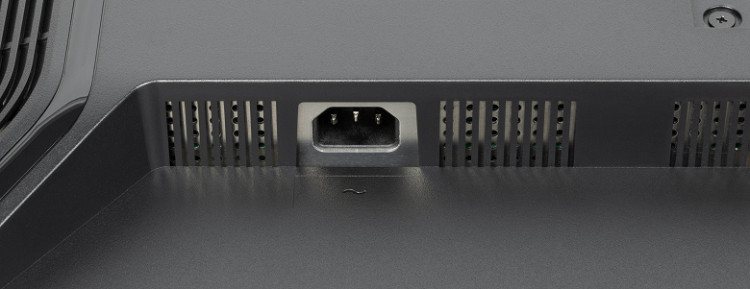
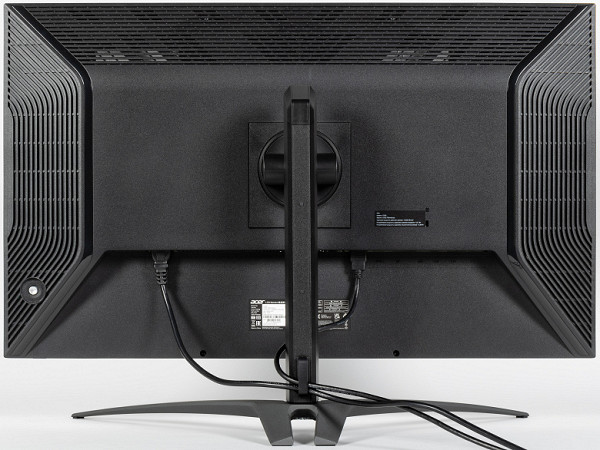
The power connector and all interface ports are located in an open niche on the back panel and are directed downwards, which makes it difficult to connect cables to the monitor. There is also a Kensington lock slot on the back panel. The cables can be neatly pressed to the stand post using a plastic bracket.
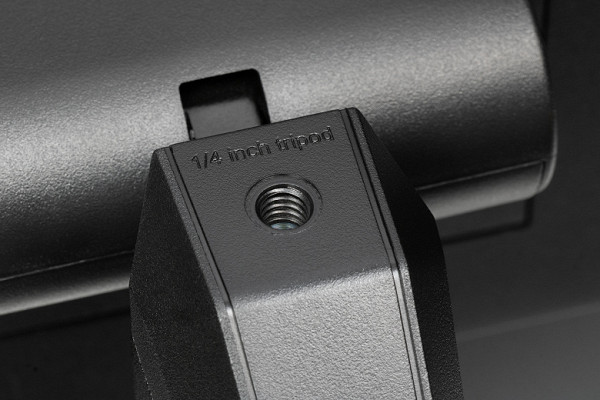
At the top end of the stand there is a tripod socket, apparently intended for attaching some accessories, such as a camera.
Numerous ventilation grilles located on the rear panel and around the perimeter of the screen provide effective cooling of the internal components of the monitor. On the left and right behind the rear panel are built-in mini-speakers with elongated diffusers, which are installed in the housings on elastic stands.
The base and stand are made of aluminum alloy and have a durable matte black coating. The stand design is quite rigid, and its wide supports provide good stability of the monitor, slightly reducing the working area of the table. You can conveniently place a keyboard between the supports. Rubber pads on the underside of the base support planes protect the table surface from scratches and prevent the monitor from sliding on smooth surfaces.
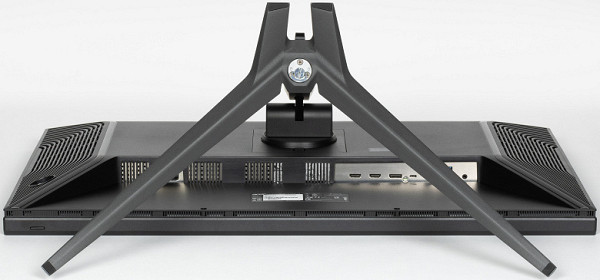
The stand has a fixed height, but a spring mechanism with rail guides allows vertical adjustment of the screen unit. This allows the screen to be installed at the desired height. One hinge in the mounting unit allows the screen to be tilted slightly forward from the vertical position and more backward, and the second hinge allows the screen to be rotated at a small angle in both directions.
The horizontal rotation of the screen is provided by a hinge located at the junction of the base and the stand post.
The stand is attached to the screen unit with latches in one movement and is also easily detached by pressing the lock. If necessary, the stand can be removed and the screen unit can be installed on a VESA-compatible bracket (the size of the platform is 100 by 100 mm).
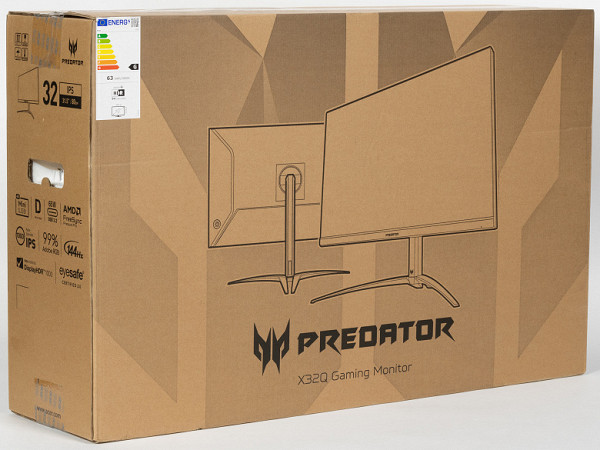
The monitor is packed in a modest box made of durable corrugated cardboard with cut-out handles on the sides. Foam inserts are used inside to distribute and protect the contents.
Switching
Information about the availability of interfaces can be found in the specifications table at the beginning of the article. The monitor is equipped with four digital inputs for receiving a video signal: DisplayPort, two HDMI and USB-C. The input is selected through the main settings menu.
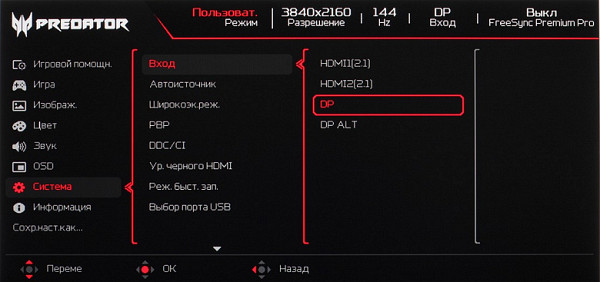
The monitor has a switchable automatic signal search function at the inputs. Digital audio signals received at the specified inputs are converted to analog format and output either to the built-in speakers or to the headphone output.
The output power for the headphones is high enough to provide a comfortable volume level in 32-ohm headphones with a sensitivity of 92 dB, with a small reserve. The sound quality in the headphones is good — the sound is clear, with a wide frequency range, and during pauses, no extraneous noise is heard.
However, the built-in speakers are of low quality. Their volume is quite sufficient for the user sitting in front of the monitor, but low frequencies are not reproduced at all, and due to the resonances of the case, a noticeable «plastic» overtone occurs. The stereo effect can be detected.
The monitor's integrated dual-port USB hub is accessible via USB type B or USB type C connections, and the desired input is selected by the user in the settings menu. There is also an automatic input selection function that implements KVM — you can connect a keyboard and mouse (or storage device) to the monitor to use them with two video sources, for example, with a PC and a laptop or with a PC and a tablet. In this case, one device must be connected via USB-C, and the other via USB-B. When inputting a video signal via USB-C, this input is automatically selected as the input for the hub, and USB-B is selected when switching to another source. The USB type C port supports power supply to the connected device with a power of up to 65 watts.
The monitor comes with good, although not very long, cables. The HDMI cable indicates that it supports 8K signal. The quality of the cables looks decent, which is confirmed by the absence of artifacts when testing at extreme modes.

Menu, control, localization, additional functions and software from the kit
The power indicator lights blue when in use, orange when in standby mode, and is off when the monitor is turned off. When the monitor is on and there is no menu on the screen, the first press or deflection of the joystick opens the settings menu. The bottom of the menu displays tips on the joystick functions for navigation.
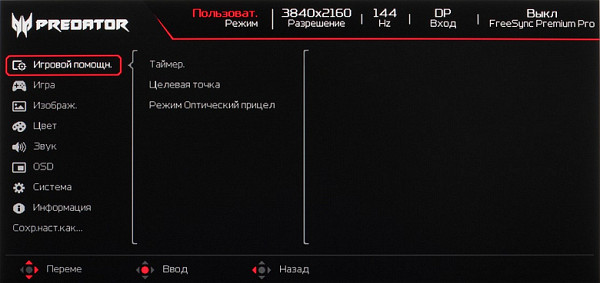
The menu is quite large, the text is readable (the white field is the entire display area):
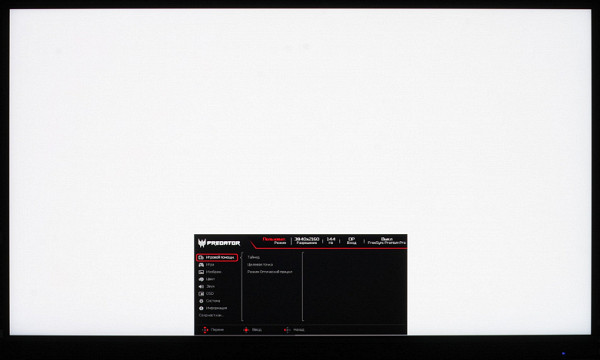
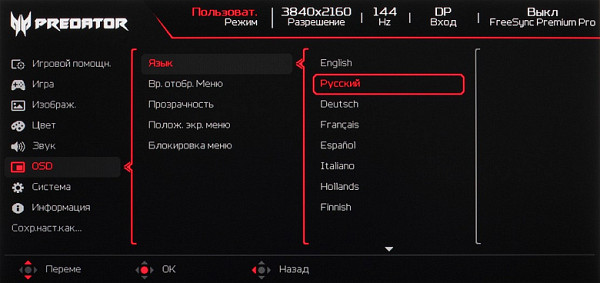
Navigation is intuitive, as all operations are performed using the joystick, without requiring you to move your finger to the buttons, and the lists have a looped structure. During image adjustments, the menu remains on the screen, which makes it a little difficult to assess the changes being made. If necessary, you can adjust the background transparency level, select the timeout for automatic exit from the menu, move it to one of five positions, and enable menu locking to prevent accidental changes to settings. The on-screen menu is available in Russian with high-quality translation. The Cyrillic font is smooth, and the inscriptions are clear and legible.
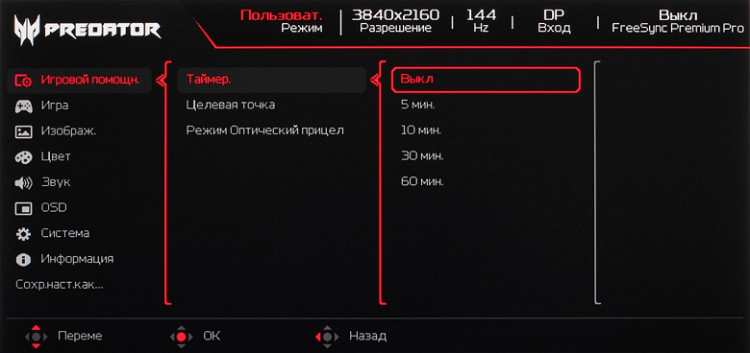
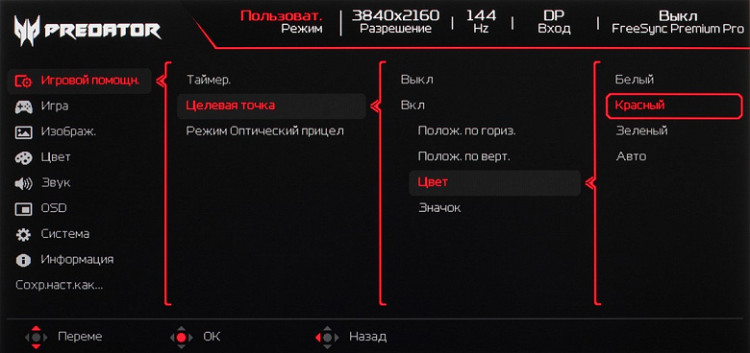
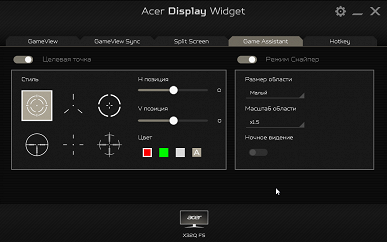
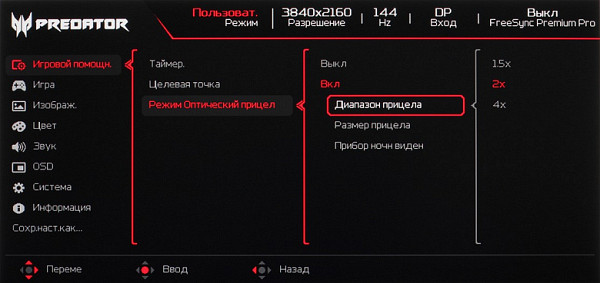
The monitor offers three additional features aimed at gamers: an on-screen frame rate counter, the ability to select a crosshair with different types and colors (red, white, green, or Auto, where the color automatically changes to contrast with the background), and a timer that counts down from preset values. The crosshair position on the screen can be changed, and all elements can be displayed simultaneously.
The monitor also features a screen magnifier function that displays a square area with a magnification of 1.5, 2 or 4 times, which helps with aiming. The user can choose one of three magnification area sizes and turn on the simulation of a night vision sight.
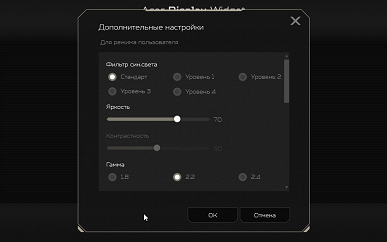
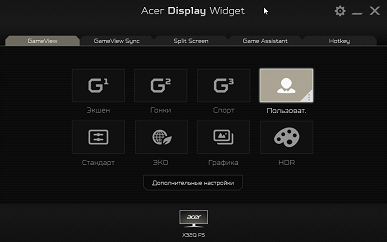
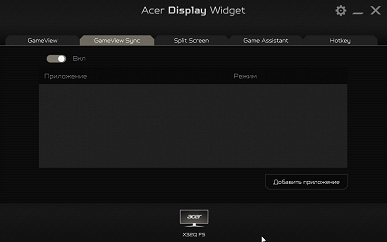
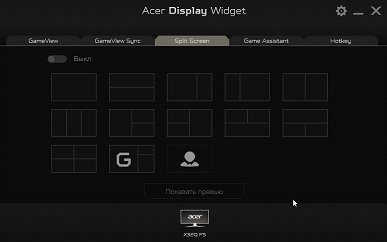
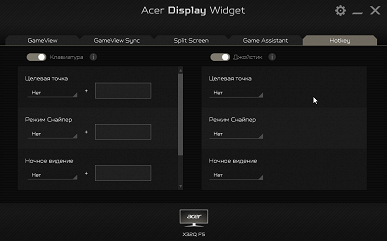
The package includes only a minimal amount of printed documentation. Full user manuals are available in PDF format on the Acer website, although they are not very informative. In addition, the site contains an archive with the Acer Display Widget program, which is designed to configure the monitor via a PC and helps organize windows on the desktop.
Image
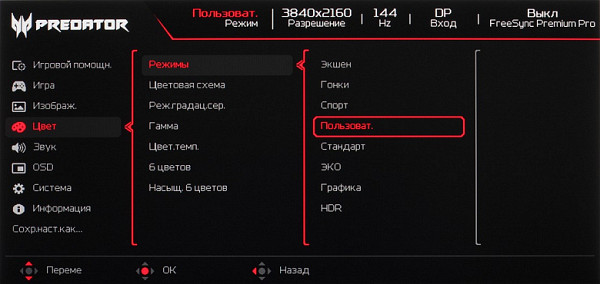
There are quite a lot of settings that change the brightness and color balance.
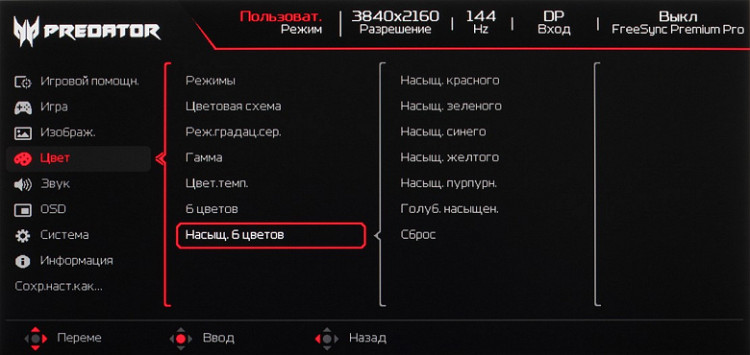
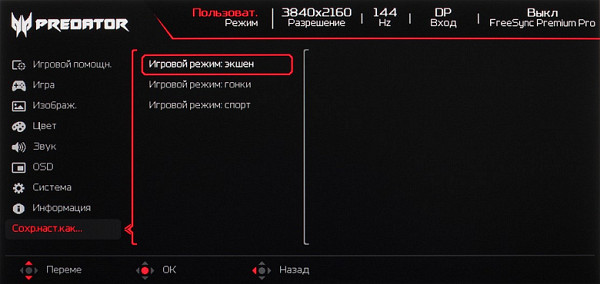
There are four built-in profiles and one custom one where you can customize everything, and three sets of setting values can be saved in three game profiles:
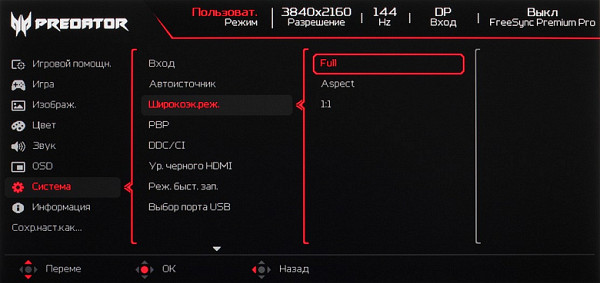
The monitor offers three modes of geometric transformation: the image can be stretched to the entire screen, enlarged to the edges of the screen while maintaining the original proportions (while the pixels are considered square) and displayed in the «one to one» mode, in which the image is displayed pixel by pixel in the center of the screen.
The monitor supports picture-by-picture (PBP) display of two sources simultaneously, while maintaining the original aspect ratio. However, this is not supported for a resolution of 1920 by 2160 pixels, leaving 1920 by 1080 pixels as the only «1:1» option.
When using the DisplayPort interface with a professional graphics card, 10-bit color output is possible. We tested this with an Nvidia Quadro K600 graphics card and the NEC Display Solutions 10 bit Color Depth Demo to see if programs such as Adobe Photoshop and Adobe Premiere Pro support 10-bit color output on monitors with professional graphics cards such as Nvidia Quadro, AMD FirePro, or AMD Radeon Pro. Graphics cards such as the Nvidia GeForce RTX 3060 Ti also support 10-bit color with the latest drivers.
The monitor supports FreeSync technology (specifically AMD FreeSync Premium Pro) via DisplayPort and HDMI inputs with a frequency range of 48–144Hz at 144Hz. We used a benchmarking utility for visual evaluation, and enabling FreeSync provided smooth, tear-free motion. Nvidia graphics cards also support G-Sync Compatible mode via DisplayPort and HDMI inputs, where G-Sync mode delivers smooth, tear-free images. The USB-C port has not been tested for compatibility with FreeSync and G-Sync.
When connected via DisplayPort and HDMI, the monitor supports resolutions up to 3840×2160 at 144Hz, which also corresponds to maximum 10-bit color and supports HDR. The monitor is claimed to be VESA DisplayHDR 1000 compliant, which means a minimum of 600 cd/m² of long-term brightness and 1000 cd/m² of 10% white on black. We used VESA's official DisplayHDR test tool software to check compliance. The test results showed that the long-term brightness on a white background reached 850 cd/m², which confirmed that it meets VESA DisplayHDR 1000 criteria for long-term brightness, number of gradations, and color gamut, although it does not meet the peak brightness.
LCD matrix testing
Micrographs of the matrix
The micrograph below shows the typical IPS matrix structure with parallel stripes. You can also see that each subpixel is divided into two almost equal domains (the black dots in the image are dust on the camera matrix).
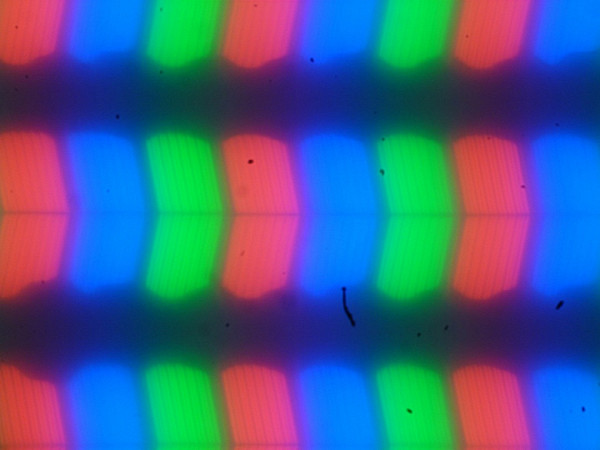
Focusing on the screen surface revealed randomly located microdefects on the surface responsible for the matte properties:

The sizes of these defects are significantly smaller than subpixels (the scale in both photographs is the same), which makes focusing on microdefects and «jumping» of focus across subpixels when changing the viewing angle less pronounced. As a result, there is no «crystal» effect.
Evaluation of color rendering qualities
The actual gamma curve depends on the value selected in the Gamma list (the values of the indices of the approximating function are given in brackets in the captions, as well as the determination coefficient):
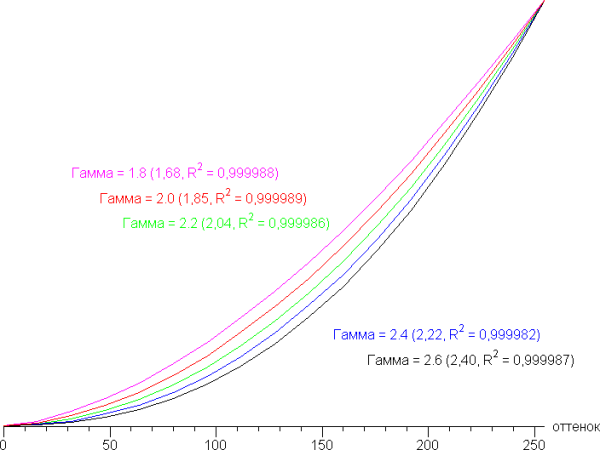
The actual gamma curve most closely matches the default when setting the Gamma parameter to 2.4. Therefore, we measured the brightness of 256 shades of gray (from 0, 0, 0 to 255, 255, 255) at this value. The graph below illustrates the increase in brightness between adjacent halftones (these are not absolute values!).
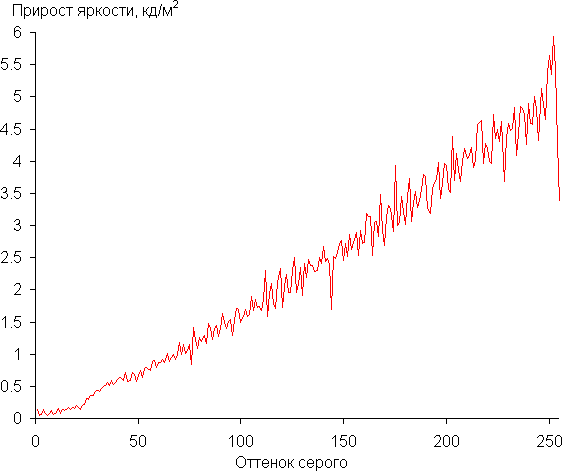
The increase in brightness is quite uniform. At the same time, each subsequent shade is significantly brighter than the previous one, even in the dark area, which is very useful for a gaming monitor:
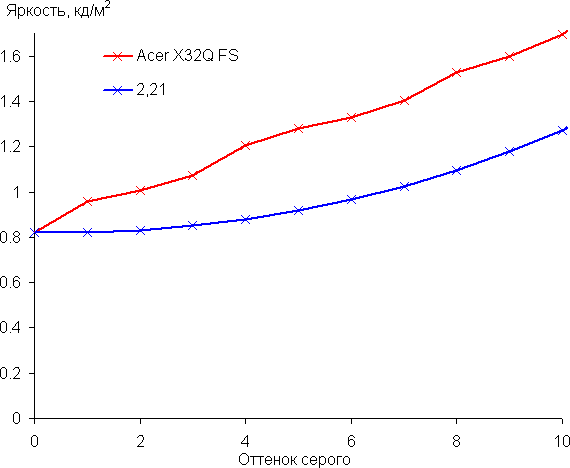
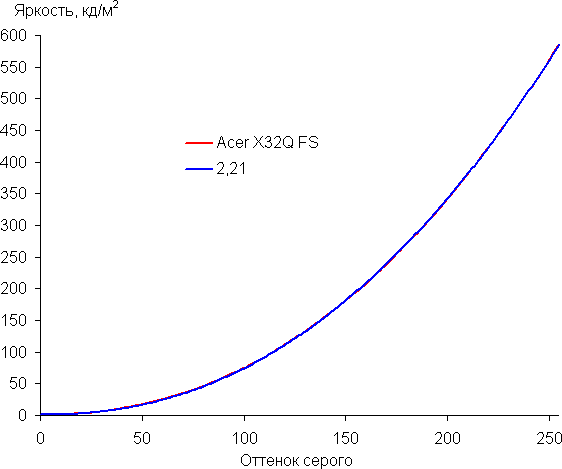
The approximation of the obtained gamma curve gave an indicator of 2.21, which is very close to the standard value of 2.2, while the real gamma curve deviates little from the approximating power function:
The additional Black Gain setting (from 0 to 10, default 5, on the graphs — UB) can be used to adjust the gamma curve to improve/deteriorate the visibility of details in the shadows:
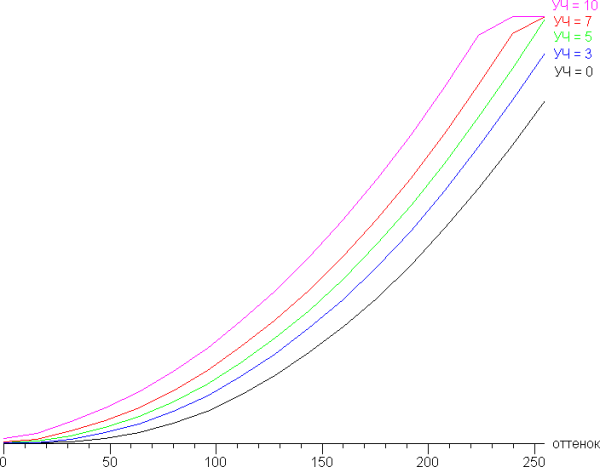
Fragments of gamma curves in shadows:
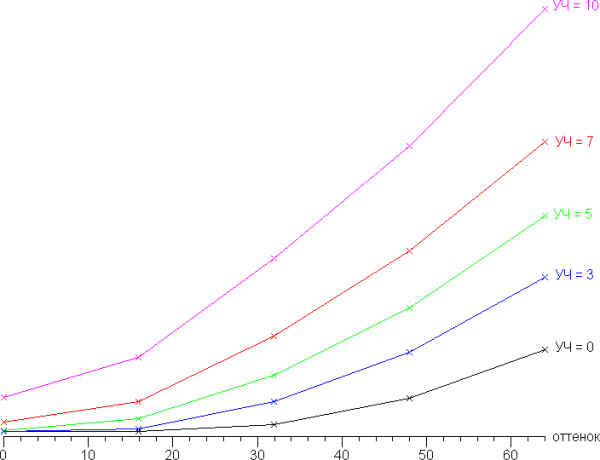
It is noted that increasing this parameter improves the visibility of details in the shadows, although at the same time the black level increases slightly and a roll-off in the highlights appears. This function will be useful, for example, in games with dark scenes.
A report on the quality of the color balance is provided with the monitor.
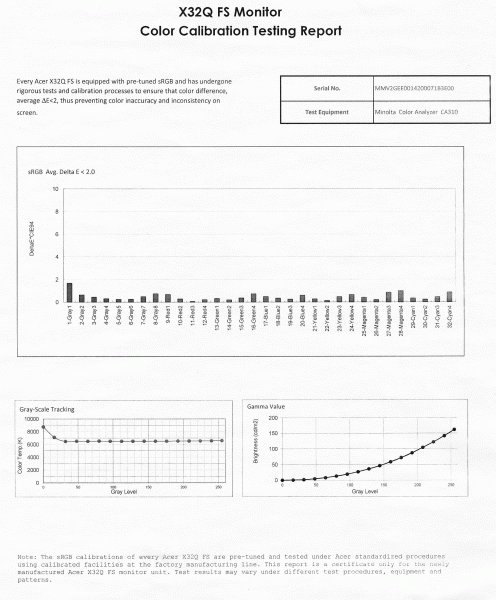
The i1Pro 2 spectrophotometer and Argyll CMS software package (version 1.5.0) were used to analyze the color rendering quality.
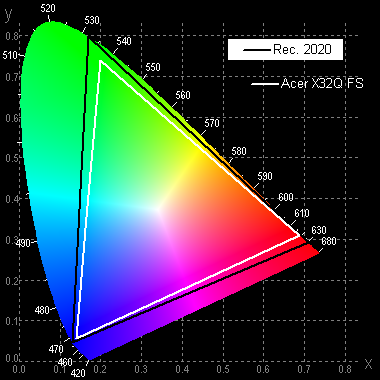
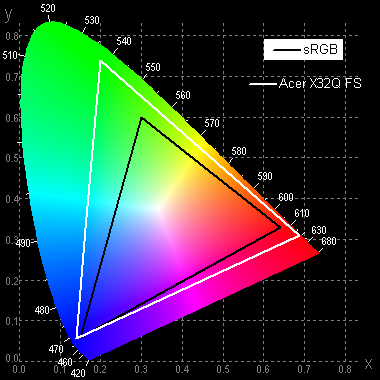
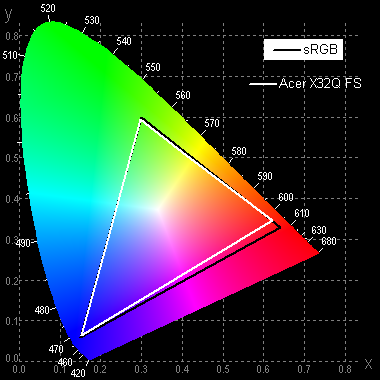
The native color gamut significantly exceeds sRGB, providing 100% coverage and 178% volume, and also exceeds DCI-P3 with 96% coverage and 126% volume, approaching the Rec. 2020 standard.
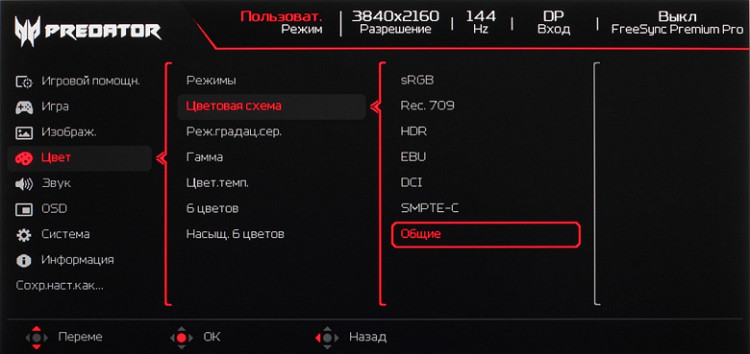
This color gamut is achieved by selecting the «General» option in the «Color scheme» settings. When you select other options, the gamut changes accordingly. For example, when you select the DCI-P3 mode:
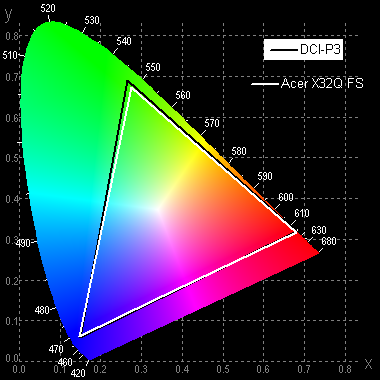
And the sRGB version:
Below is the spectrum for the white field (white line) superimposed on the spectra of the red, green and blue fields (lines of the corresponding colors) in the case of the original color gamut:
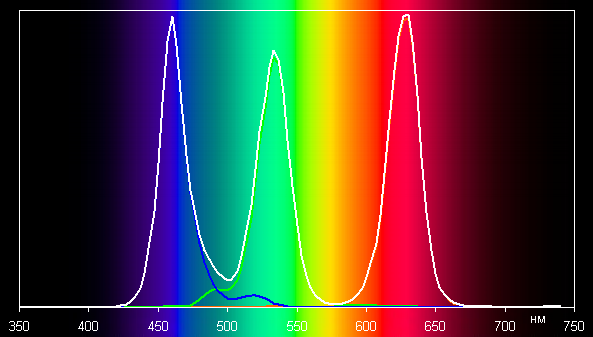
It is clear that the primary color components are well separated, which helps achieve a wide color gamut. When using the sRGB profile with maximum correction, the gamut is reduced due to significant cross-mixing of the components.
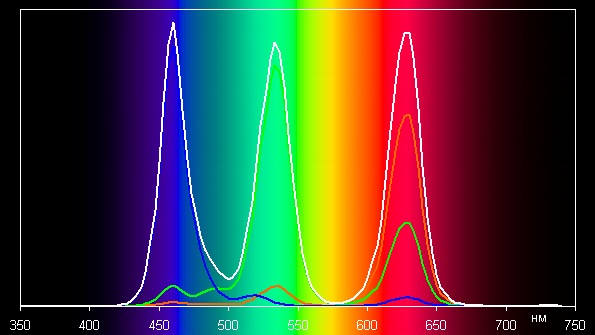
Unfortunately, when adjusting the color gamut, some parameters, in particular the color balance settings, become unavailable. This is a common mistake of many monitor manufacturers. It should be noted that on screens with a wide color gamut, images optimized for sRGB devices may look unnaturally saturated without appropriate color correction. However, in modern operating systems such as Windows and in advanced image software, you can achieve the necessary color correction using a color management system. For example, you can use the color profile we created during testing using DisplayCAL software. In most cases, it will be enough to select the sRGB profile in the monitor settings.
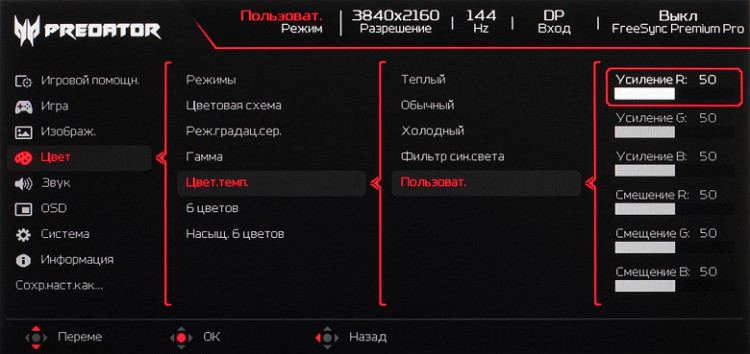
The graphs below show the color temperature in different areas of the gray scale and the deviation from the spectrum of an absolutely black body (parameter ΔE) in the absence of correction (marked as Custom), after color balance correction (50/50/48 for red/green/blue gain — Corr.) and when selecting the sRGB profile (sRGB) without additional correction, which, however, is not possible.
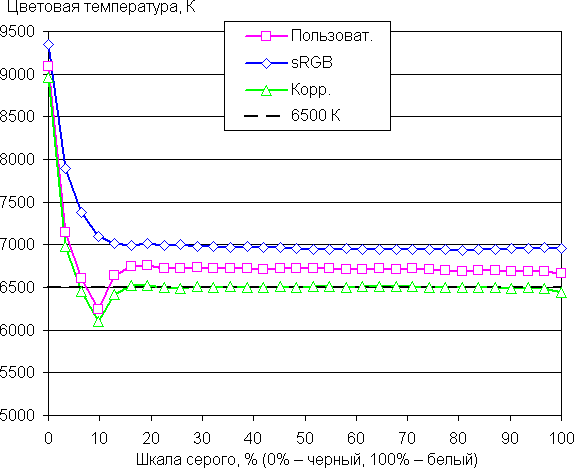
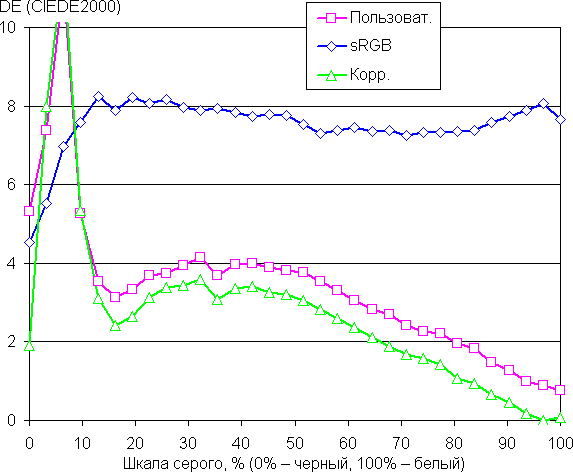
The lowest range, close to black, can be ignored, since color rendering is not so critical in it, and the measurement error of color characteristics is large. In all three cases, the color balance remains good, since the color temperature is close to the standard 6500 K, and the deviation from the spectrum of an absolutely black body (ΔE) is less than 10 units, which is considered acceptable for consumer devices. At the same time, both parameters remain stable in different parts of the gray scale, which has a positive effect on the perception of the color balance.
Measuring black and white field uniformity, brightness and power consumption
Brightness was measured at 25 points on the screen, spaced at 1/6 of the width and height (screen borders were not taken into account), with the monitor settings set to values that provide maximum brightness and contrast in SDR mode. Contrast was calculated as the ratio of the brightness at the measured points, and dynamic brightness adjustment was disabled in this test.
| Parameter | Average | Deviation from the mean | |
|---|---|---|---|
| min, % | max, % | ||
| Black field brightness | 0.81 cd/m² | -19 | 62 |
| Brightness of white field | 600 cd/m² | -5.7 | 6.0 |
| Contrast | 760:1 | -36 | 24 |
The uniformity of white is excellent, while the uniformity of black and, as a result, the contrast is noticeably lower. For this type of matrix, the contrast, by modern standards, is not very high. Visually, there is a slight overexposure of the black field, which is confirmed by the photo below.
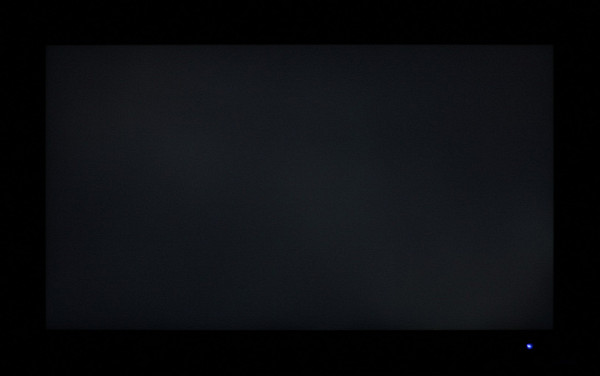
When activating modes with dynamic brightness control, the set contrast formally increases, but does not reach maximum values, since even on a completely black field the backlight does not turn off completely.
The monitor is equipped with a direct multi-zone LED backlight (Mini-LED), located behind the LCD matrix. This backlight uses quantum dots, and each LED zone is controlled independently. This allows for good uniformity of backlighting across the screen and local dimming of dark areas, which improves image contrast. The manufacturer indicates the presence of 1152 backlight zones, which are probably organized in a 48 by 24 matrix.
Since the number of backlight zones is significantly less than the number of pixels in the matrix (8,294,400), each zone illuminates approximately 7,200 pixels (the boundaries between the zones are fuzzy). As a result, artifacts in the form of local illumination around bright objects on a dark background and darkening at the edges of bright objects may appear on some images. For example, this can be seen in the test image with white dots (with increased ISO and shutter speed for better visibility).
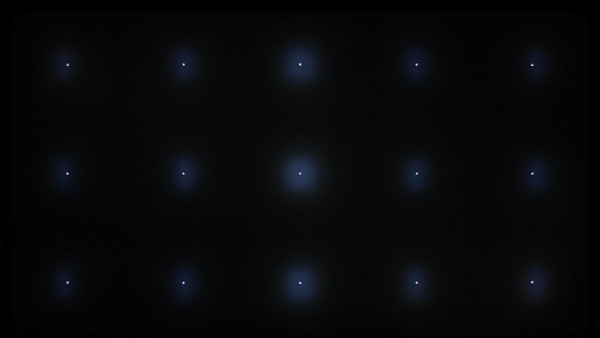
Artifacts associated with zonal backlighting can also appear on other types of images. This backlighting is especially useful for HDR images, as it allows localized brightness increase and significantly decrease the brightness of black areas, even completely turning off the backlighting in these areas.
However, in this monitor, the brightness of bright objects is significantly reduced when zonal backlighting is turned on, which makes this mode ineffective for HDR content. In SDR mode, the decrease in brightness is tolerable, since there is a brightness reserve. Zonal backlighting is activated when selecting a value other than «Off» for the «Adaptive brightness» setting. At the same time, within the values «Low», «Medium» and «High» there is an increase in the speed of change of the backlight brightness. It is unclear why this is done, since the ideal option should be a fast brightness change.
There is also a dynamic mode (ACM setting), which changes the brightness across the entire screen, but it works too slowly and its usefulness is questionable. The «Black Boost Pro» mode is responsible for darkening dark areas by adjusting the transmission of the LCD cells, but this does not have an obvious dependence on the time and position of the dark areas on the screen, and we did not find this function useful. The graph below illustrates how the brightness increases (along the vertical axis) when switching from a black field (after 2.5 seconds of display) to white when the three functions described above are activated (the dependencies are smoothed for clarity).
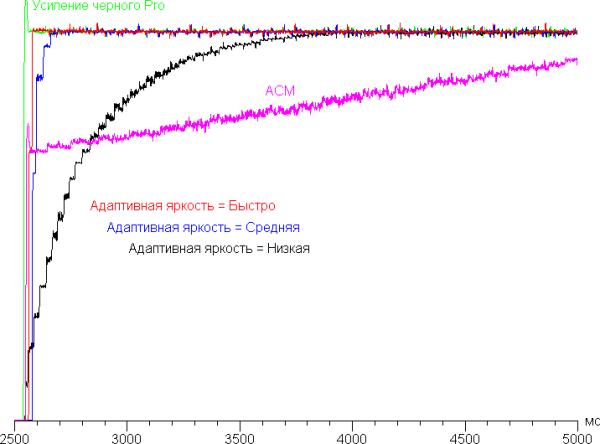
The brightness of the white field in the center of the screen and the power consumed from the network (with all other settings set to values that provide maximum image brightness in SDR mode, and dynamic brightness adjustment disabled):
| Brightness setting value | Brightness, cd/m² | Power consumption, W |
|---|---|---|
| 100 | 586 | 94.4 |
| 50 | 311 | 63.5 |
| 0 | 45 | 31.0 |
In standby mode, the monitor consumes about 7 W, which is quite a lot, and in the conditional shutdown state — 0.7 W. A mechanical switch on the rear panel completely disconnects the monitor from the network.
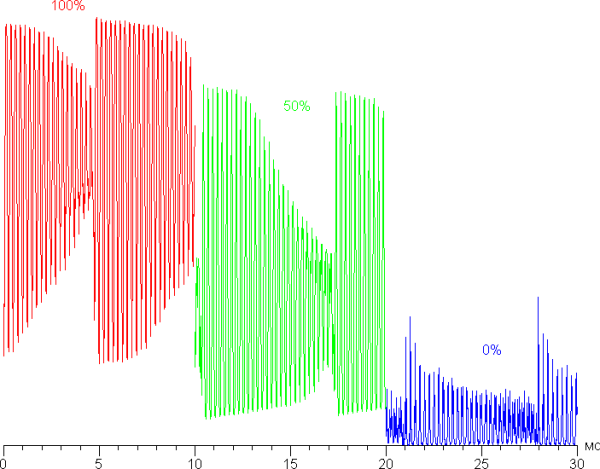
The monitor's brightness is regulated by changing the backlight brightness, which allows you to change the illumination level within a wide range without compromising the image quality (contrast and the number of distinguishable gradations are preserved). This ensures comfortable use in both light and dark rooms. The brightness of the LEDs is probably regulated using PWM, with the modulation frequency reaching about 4 kHz, and the modulation phase is distributed among the zones. As a result, there is no visible flickering, and the stroboscopic effect test does not show the presence of modulation. Here are the graphs of the dependence of brightness (vertical axis) on time (horizontal axis) at different brightness settings (measurements were taken on an area of about 1 cm²):
Determining response time and output latency
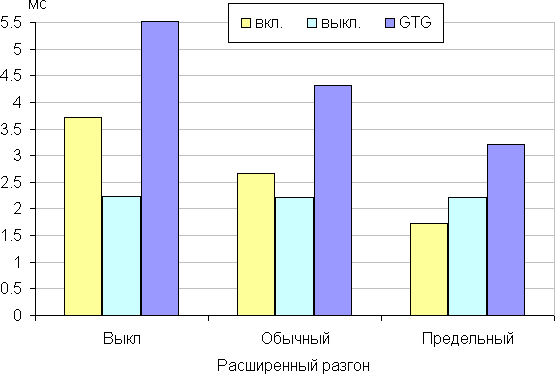
The response time depends on the «Advanced Overclocking» setting, which is responsible for overclocking the matrix. Three adjustment levels are available. The graph below shows the changes in the on and off time when switching between black and white (the «on» and «off» columns), as well as the average total time for transitions between halftones (GTG columns):
Below are graphs of the halftone transition between 70% and 90% shades and back for different values of the «Advanced Overclocking» setting (vertical — brightness, horizontal — time; for convenience, the graphs are arranged sequentially):
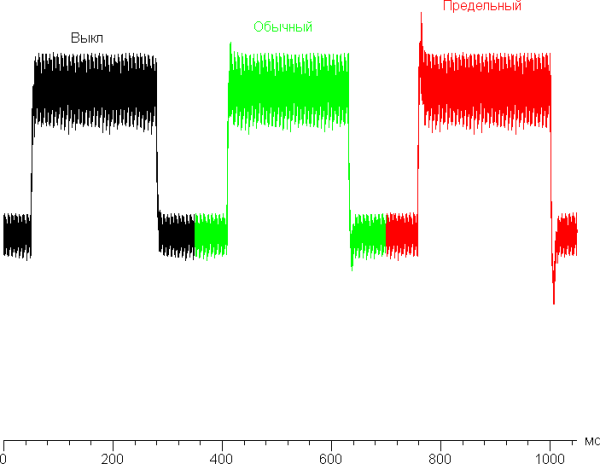
You can select the «Maximum» mode, since even at maximum overclocking the artifacts do not appear too noticeably. However, in our opinion, the matrix speed, even without overclocking, is quite sufficient for games with high dynamics.
Graphs are presented demonstrating the dependencies of brightness when alternating white and black frames at a frequency of 144 Hz (graph with the caption «144 Hz»):
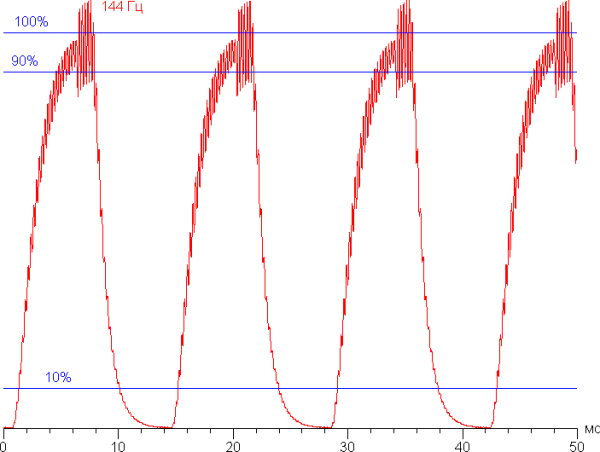
It is clear that at 144 Hz the maximum brightness of the white frame significantly exceeds the level of 90% white, and the minimum brightness of the black frame corresponds to black in static mode. The amplitude of the brightness change exceeds 80% of the white level. Thus, according to this criterion, the matrix speed is quite sufficient to display an image with a frequency of 144 Hz.
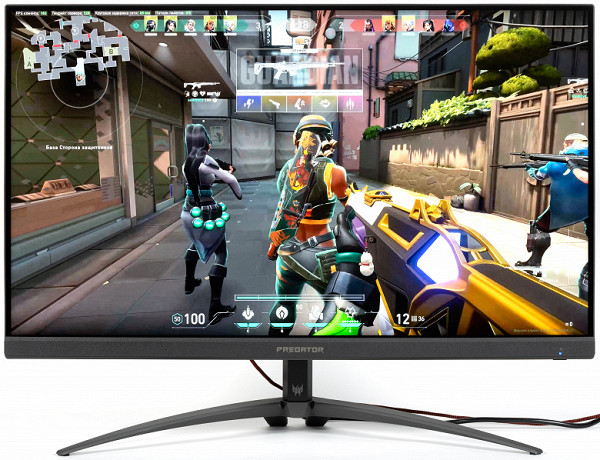
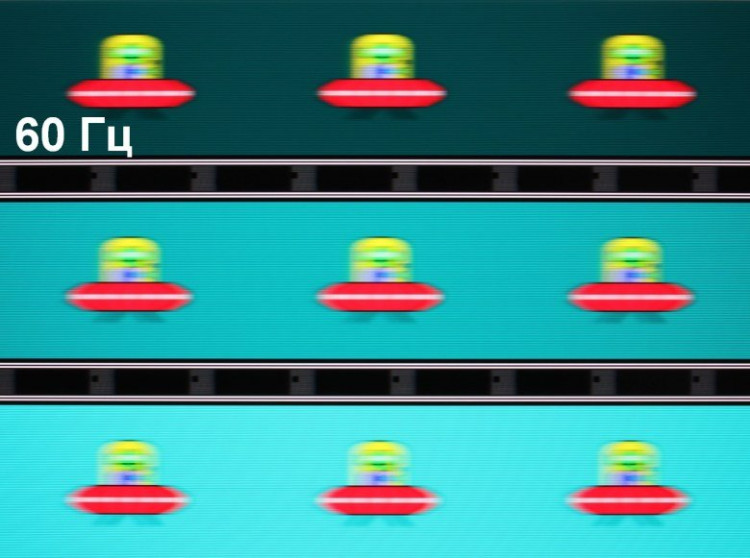
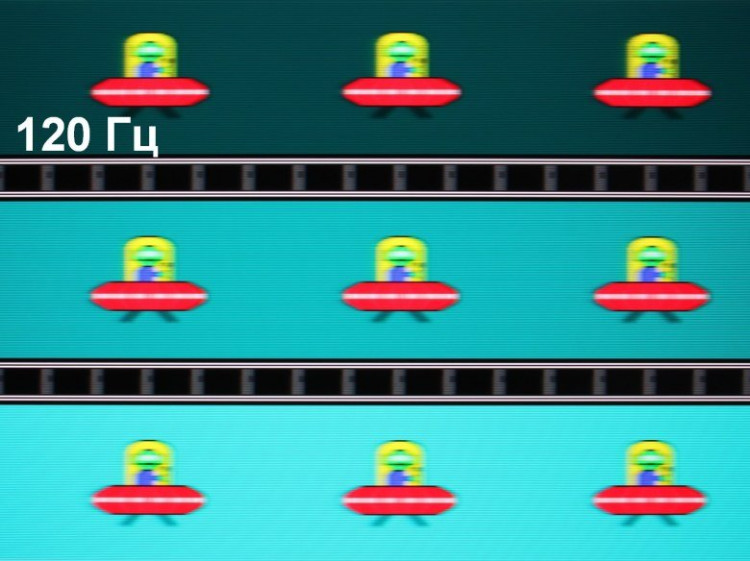
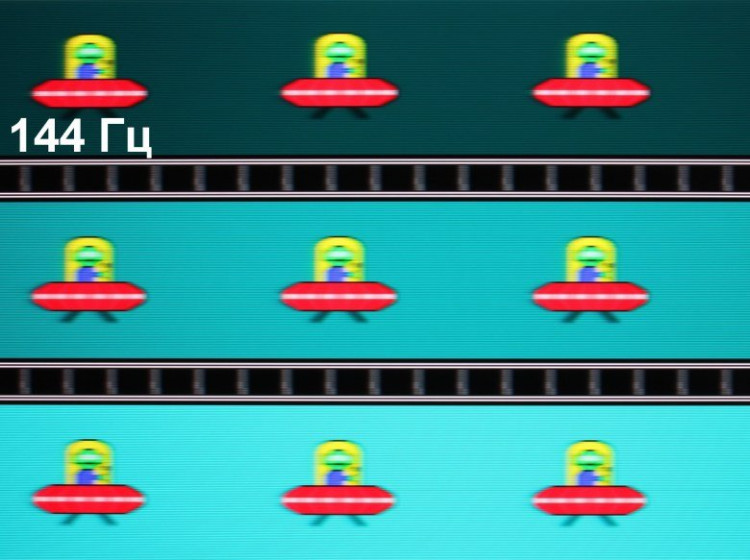
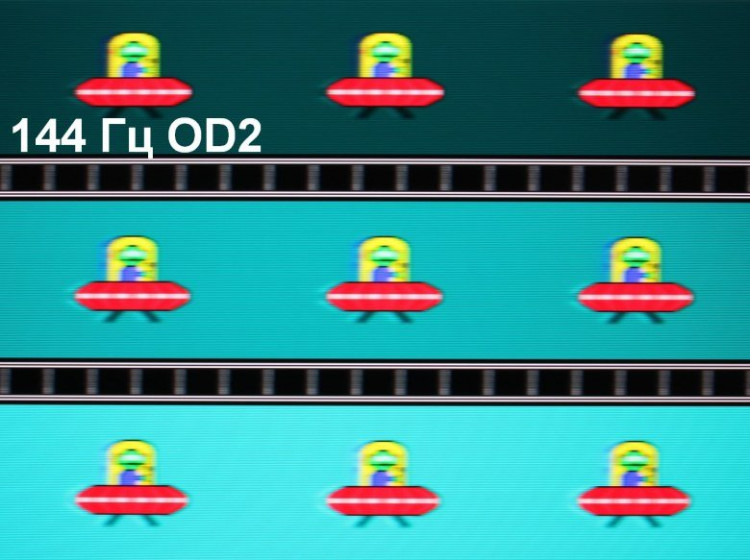
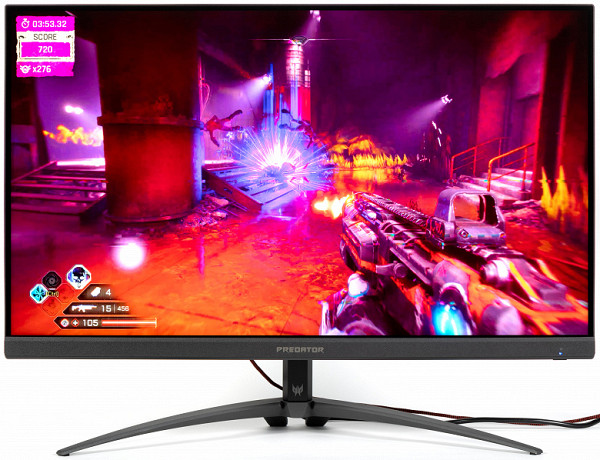
To illustrate what such a matrix speed means in practice and what artifacts may arise from overclocking, we will provide a series of photographs taken with a moving camera. These pictures illustrate what a person sees when following a moving object on the screen with his eyes. Recommended settings were used: a movement speed of 960 pixels/s for a refresh rate of 60 and 120 Hz, and 1008 pixels/s for 144 Hz, with a shutter speed of 1/15 s. The refresh rate values and overclocking step (ODx) are indicated in the photographs.
It is clear that, all other things being equal, image clarity increases with increasing refresh rate and overclocking level. However, at maximum overclocking, artifacts become noticeable. We believe that the optimal choice is the penultimate overclocking level.
Now let's try to imagine what a matrix with instant pixel switching would look like. At 60 Hz, an object moving at 960 pixels/s is blurred by 16 pixels. At 120 Hz — by 8 pixels, and at 144 Hz and a speed of 1008 pixels/s — by 7 pixels. Blurring occurs because the focus of vision moves at a specified speed, and the object remains stationary for 1/60, 1/120 or 1/144 of a second. To illustrate this, we will simulate blurring by 16, 8 and 7 pixels.
The image clarity, even without overclocking the matrix, is only slightly lower than that of an ideal matrix.
We measured the total output lag from switching the video buffer pages to the start of displaying the image on the screen. This lag depends on the operation of the Windows OS and the video card, and not only on the monitor. At a refresh rate of 144 Hz (when connected via DisplayPort), the lag is 6 ms. This is a very low figure that is not noticeable when working on a computer and does not affect the efficiency in dynamic games. If you disable the Ultra Low Latency mode, the lag increases to 20 ms. Although this is no longer the best result for games, it is unclear why you would turn this mode off, since there is no visible change in image quality when activating or deactivating it.
Measuring viewing angles
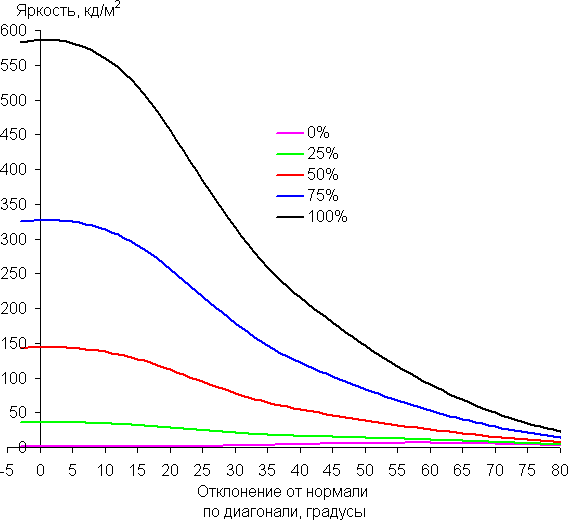
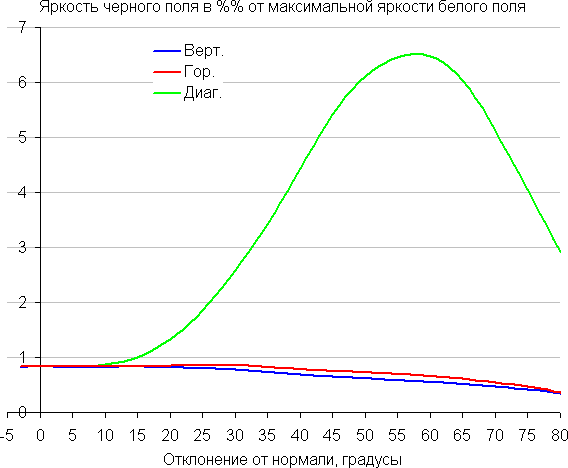
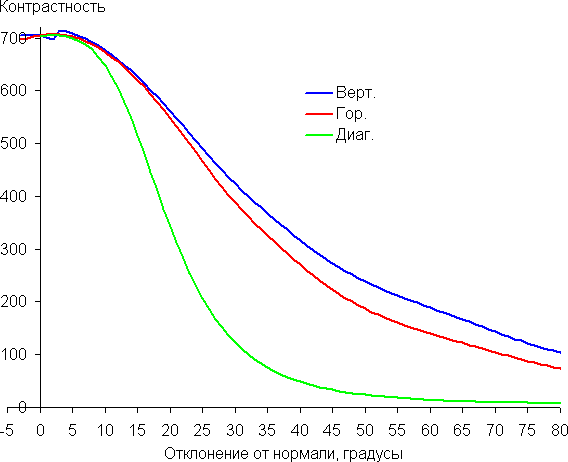
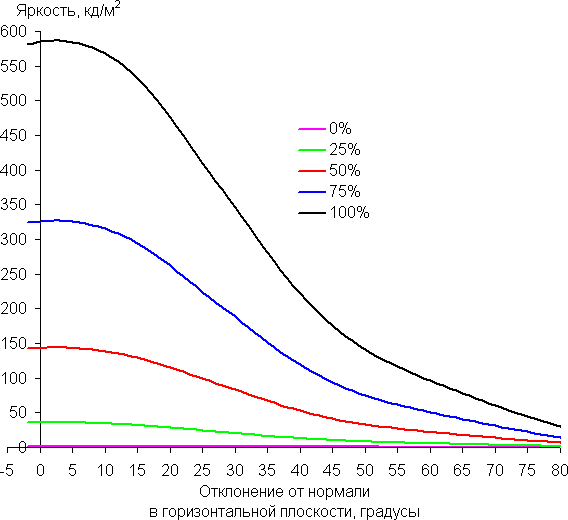
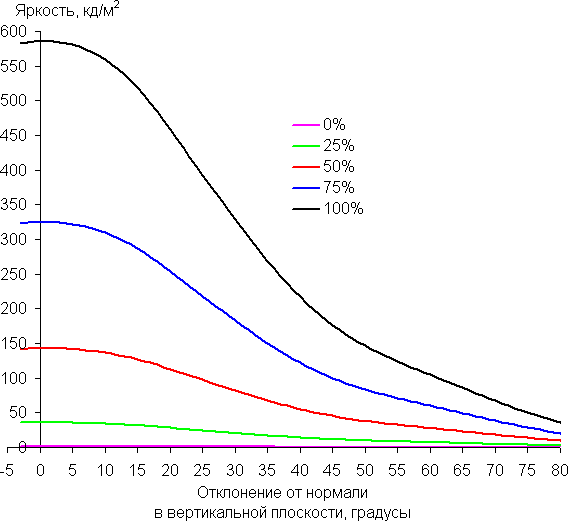
To study the change in screen brightness when tilted from the perpendicular, we conducted a series of measurements of the brightness of black, white, and shades of gray in the center of the screen. The measurements were taken in a wide range of angles, with the sensor axis tilted in the vertical, horizontal, and diagonal directions (from the center to the corner for the 16:9 format).
Reduce brightness by 50% of maximum value:
| Direction | Corner |
|---|---|
| Vertical | 33° |
| Horizontal | 33° |
| Diagonal | 32° |
The viewing angles in terms of brightness reduction are not very wide. With a diagonal deviation, the brightness of the black field begins to increase significantly already at 20°-30° from the perpendicular to the screen. If you are close to the screen, the black field in the corners will be noticeably lighter than in the center. Contrast with a diagonal deviation falls below 10:1 at a deviation of more than 68°.
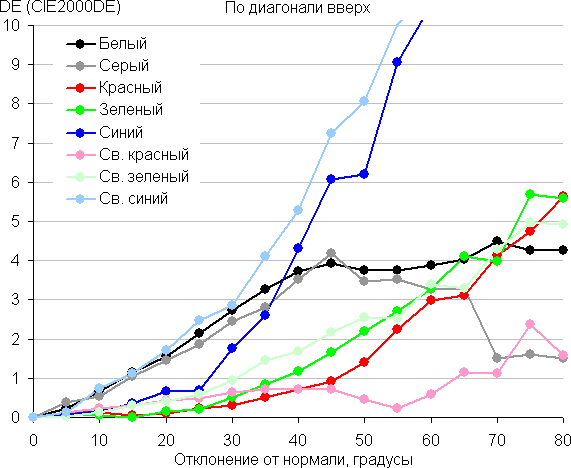
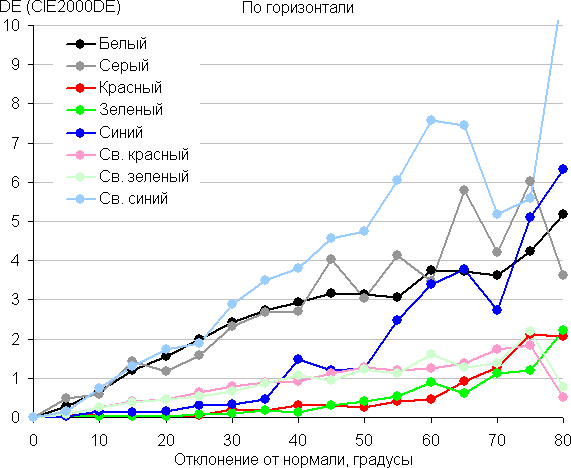
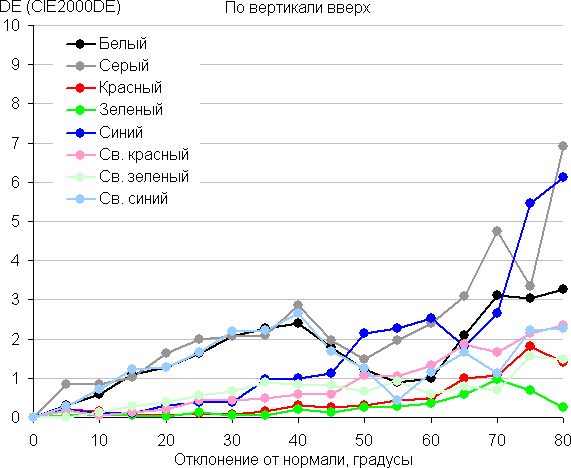
To quantify the changes in color rendering, we performed colorimetric measurements for white, gray (127, 127, 127), red, green and blue, as well as light red, light green and light blue fields on the entire screen. Measurements were performed in the angle range from 0° (the sensor is directed perpendicular to the screen) to 80° in 5° increments. The obtained intensity values were recalculated into ΔE relative to the measurements of each field with the sensor in the perpendicular position. The results are presented below:
A 45° deviation can be considered as a control point, which is relevant if two people are viewing the image on the screen at the same time. The criterion for maintaining color accuracy can be considered a ΔE value of less than 3. Color stability is quite good, although for IPS-type matrices it is usually better.
Conclusions
The Acer Predator X32Q FS features a large, bright 4K display with multi-zone LED backlighting. It has a great set of gaming features and a design that meets the standards of gaming monitors, making it a high-end device. Support for refresh rates up to 144 Hz, AMD FreeSync Premium Pro, and high-quality HDR implementation make this monitor a great choice for gaming, watching movies, and working with large amounts of information. It is also worth noting that it can function as a laptop docking station thanks to its USB-C port with an output power of 65 watts, which is enough for most situations.
Pros:
- Neat moderately gaming design
- Good color balance and sRGB coverage when choosing a preset profile
- HDR support
- Wide range of backlight brightness adjustment
- AMD FreeSync Premium Pro technology support
- 144 Hz refresh rate
- Low input lag
- Fast matrix
- Several gaming functions, including adaptive sight
- Picture-by-picture mode
- Support for operation in 10-bit per color mode
- Monitor configuration using the Acer Display Widget application
- Convenient and adjustable stand
- No backlight flickering
- Convenient 5-way joystick on the control panel
- Four video inputs, including USB-C with a power of 65 W
- Two-port USB hub (3.2)
- KVM support
- Good quality headphone output
Cons:
- No significant ones

