
The Tricolor video surveillance device line currently includes only two models, both based on the Dahua platform, which guarantees reliability and durability. The models have similar names, differing by only one letter: SCI stands for an indoor camera, and SCO for outdoor use. Easy to remember.
Design, technical characteristics
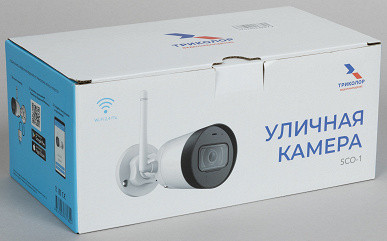
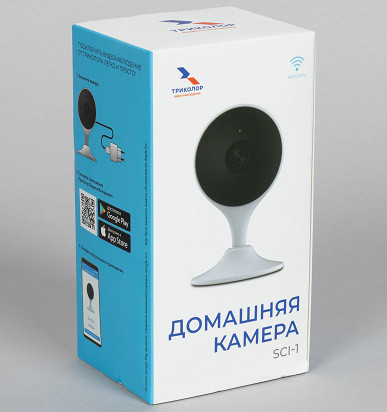
The cameras are supplied in cardboard boxes on which the main technical characteristics of the devices are printed.
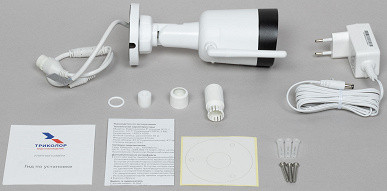
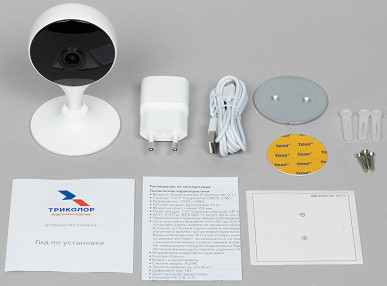
The camera kits are different, as, for example, the internal camera does not require a sealed coupling to protect the connections from moisture. The accessories included in the kit allow you to start working with the device immediately, without the need for additional accessories.
| SCI-1 | SCO-1 |
|---|---|
|
|
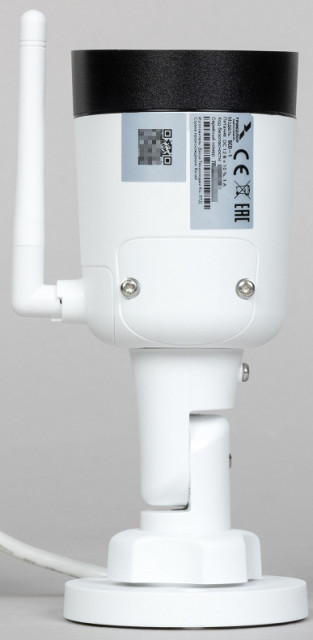
Both cameras have a black and white color scheme, the body of the outdoor device is made of a metal alloy.
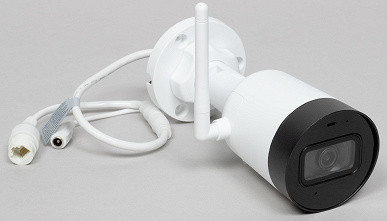
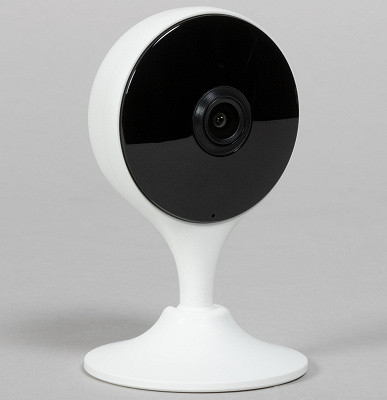
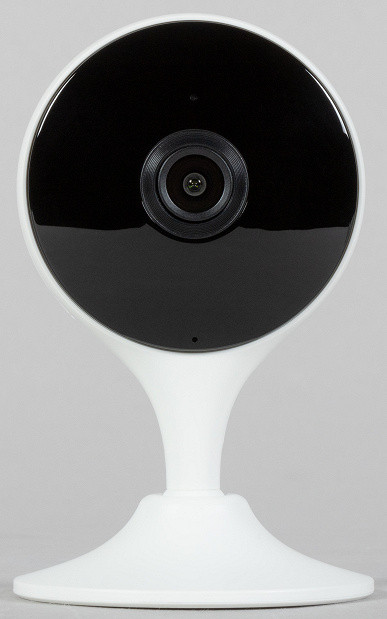
The cameras are compact and neatly assembled, their form factor is one of the most popular among IP cameras. The indoor teardrop-shaped camera on a stand is ideal for home interiors, and the outdoor bullet-type model with a classic design will not attract unnecessary attention. These are simple, familiar solutions.
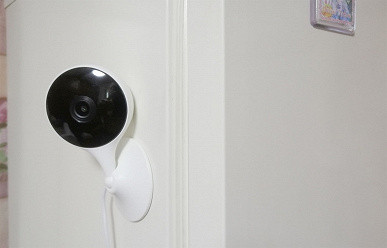
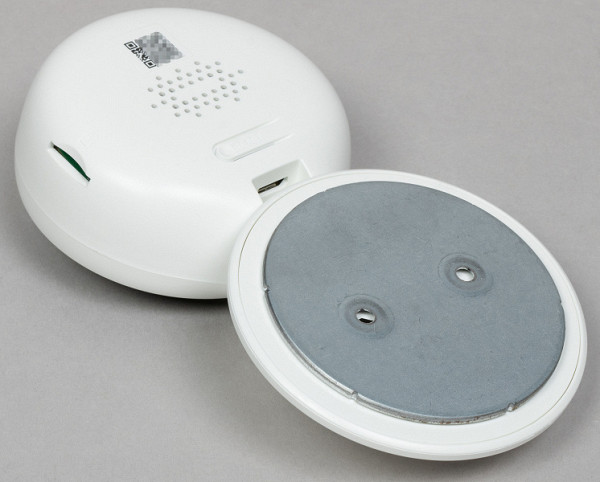
Both devices can be installed on both horizontal and vertical surfaces. Powerful magnets are built into the base of the indoor camera, which allows it to be securely attached to metal surfaces, whether it is a complete mounting platform on a wall or ceiling, or, for example, the surface of a refrigerator.
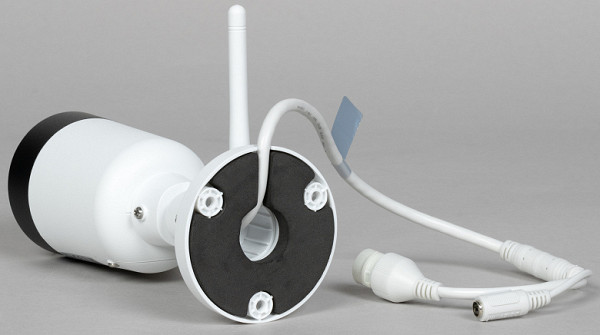
If you plan to install an outdoor camera in a place exposed to wind and precipitation, it is recommended to place it under a canopy or visor. The problem is not so much in the tightness of the case (its violation is unlikely), but in the fact that in our latitudes snow often falls. It can accumulate on the camera case, forming a small but heavy snowdrift, which can cause the device to tilt or block the lens. The mounting system with four joints allows you to adjust the position of the lens at any angle, regardless of the location of the mounting platform.
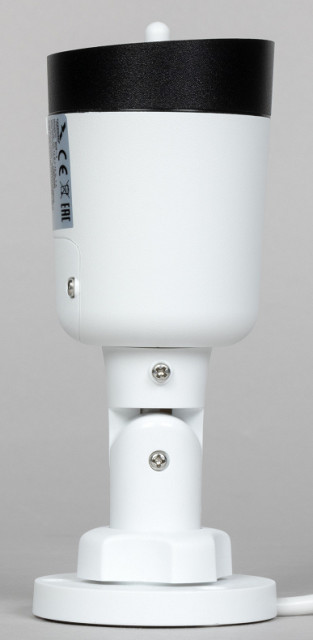
To ensure that the outdoor camera is held more securely and does not damage the surface to which it is screwed, there is a foam rubber gasket in the bottom of the platform.
I wonder why outdoor cameras are most often white? This is due to the same reasons as in space technology — white color reflects sunlight, preventing the case from overheating. Thanks to this, our outdoor camera can operate in a wide temperature range from -30 to +50 °C.
Unlike many home IP cameras, the outdoor model supports not only wireless connection. The cable for supplying 12 volts is also equipped with an RJ-45 connector for connecting to a local network. However, PoE technology is not supported, so you will need to run separate wires.
On the front panel of the cameras, there is not only a lens, but also IR illumination LEDs, a light sensor, and a built-in microphone.

Only the indoor camera has a built-in speaker, located at the back of the droplet.
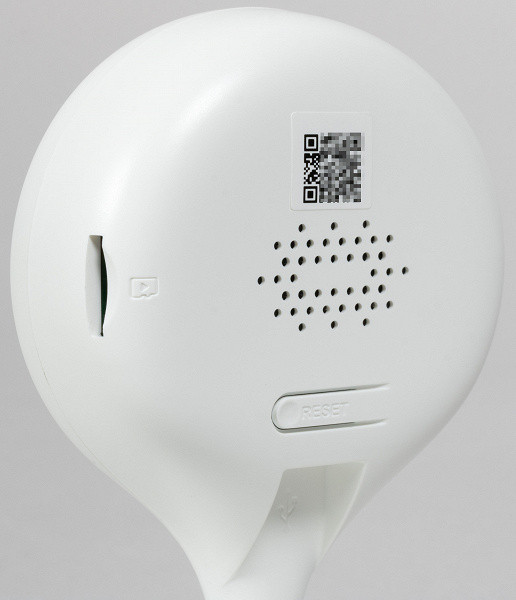
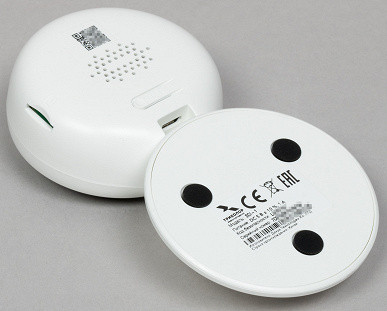
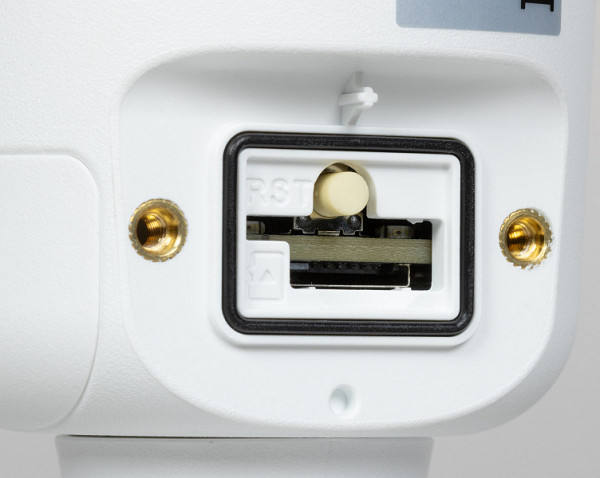
There is also a factory reset button here, and a Micro-USB power connector at the bottom. Finally, there is an unprotected memory card slot on the end of the case.
Unlike the indoor version, in the outdoor chamber these organs are protected from the elements by a removable cover with bolts.
It should be noted that the outdoor camera operates on 12 volts, while the indoor camera requires 5 volts via USB.
The main technical specifications of the devices are listed in the table below. These and other details can be found on the product page.
| SCI-1 | SCO-1 | |
|---|---|---|
| Manufacturer (trade mark) | Tricolor | |
| Model | SCI-1 | SCO-1 |
| Lens | 2.8 mm | 3.6 mm |
| Viewing angles |
|
|
| Sensor | 1/2,7″ Progressive CMOS, 2 Мп | |
| Video/audio | ||
| Video standard | View:
| |
| Compression | H.264 (AVC) | |
| Video bitrate | up to 2 Mbps in 1920×1080 mode | |
| Audio | AAC mono, 128 kbps | |
| Net | ||
| AND | No | RJ-45, 100 Mbps |
| Wi-Fi | IEEE 802.11b/g/n (2.4 GHz) | |
| Support for standards and protocols | proprietary (closed) protocol | |
| Operational requirements | ||
| Software |
| |
| Performance characteristics | ||
| Local storage | microSD memory card up to 128 GB (required only for cloud backup, works with a paid subscription) | |
| PTZ | No | |
| Nutrition, consumption | DC 5V 1A, <3.1W | DC 12V 1A, <4.8W |
| Dimensions, weight | 66×33×109 mm, 102 g | 85×70×165 mm, 260 g |
| Permissible operating temperatures | from −10 to +45 °C | from −30 to +50 °C |
| Protection class | No | IP67 |
| Functions |
|
|
| Prices and offers | ||
| Price at the time of review preparation | $34 | $45 |
Settings, operation
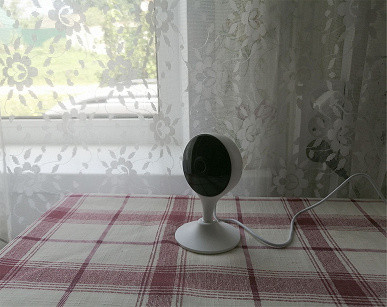
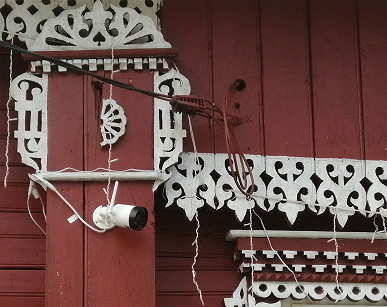
The cameras were tested in a country house with modern amenities, including high-speed Internet. Although the outdoor camera is weatherproof, we decided to install it under the roof to avoid rain hitting the lens or blocking it with snow. The indoor camera was simply placed on a table, without any additional tricks.
As for the connection, everything is simple with the indoor camera — it only supports Wi-Fi. But why didn't we use a wired connection for the outdoor camera? It all depends on the specific conditions. For example:
- the camera is far from the router or there are thick walls between them;
- there are many other Wi-Fi networks nearby;
- it is easy to lay the power supply together with the LAN cable.
In such cases, a wired connection will be more reliable, eliminating wireless communication problems. But another situation is also possible:
- the camera is close to the router;
- there are not many Wi-Fi networks nearby (less than ten);
- laying the LAN cable is labor-intensive.
Then Wi-Fi becomes a more convenient option. You don't have to worry that a wireless connection will degrade the quality of video transmission — the bit rate created by the camera is extremely small compared to the throughput of Wi-Fi 802.11n, even in the 2.4 GHz range.
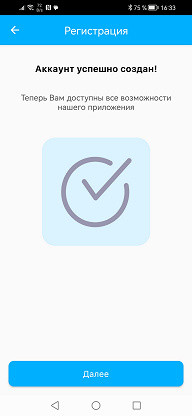
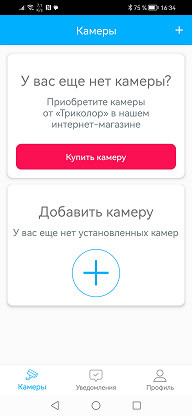
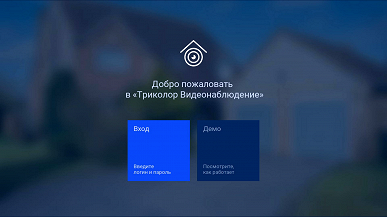
After choosing the installation method, let's move on to connecting the cameras. To work with them, you need to install the Tricolor Video Surveillance application on your mobile device, available for Android and iOS. After installation, you need to create an account by registering using the phone number to which an SMS with a code will be sent. The application will offer to choose a login method: by PIN code or using biometrics. It is better not to ignore these security measures, otherwise you will have to enter the phone number and password every time.


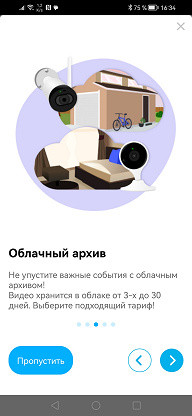
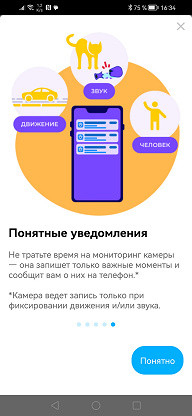
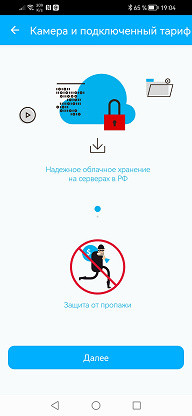
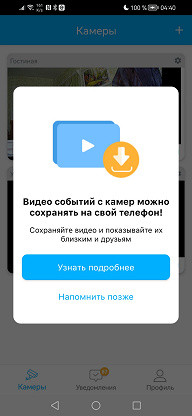
When you first launch the app, it will show a short slide show demonstrating the capabilities of the service. Particular attention is paid to the fact that all data transferred to the cloud is stored on Russian servers, which is an important factor these days.


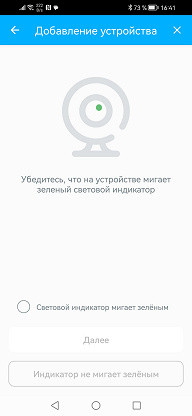
Connecting cameras takes several steps. First, turn on the camera and wait until the green indicator starts flashing. Then, in the application, click on the add camera icon and scan the QR code located on the device body. Please note that the camera does not support Wi-Fi networks in the 5 GHz range.

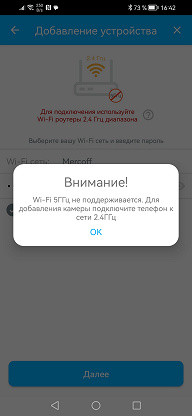
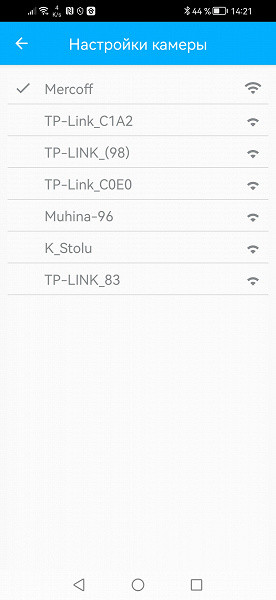
But the process doesn't end there. The next step is to transmit information about your Wi-Fi network to the camera. To do this, you need to temporarily connect to the Wi-Fi hotspot that the camera itself created.
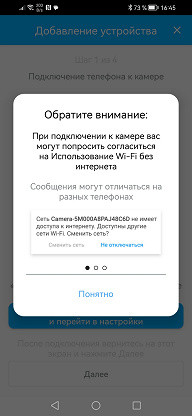
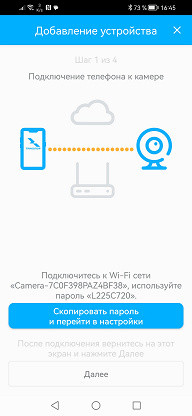
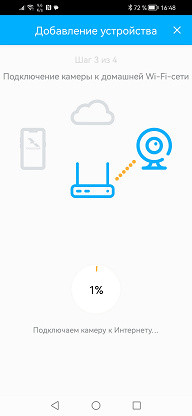
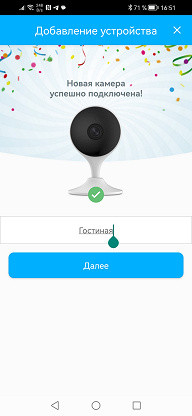
There will be no difficulties, as the mobile application provides step-by-step instructions on the screen.
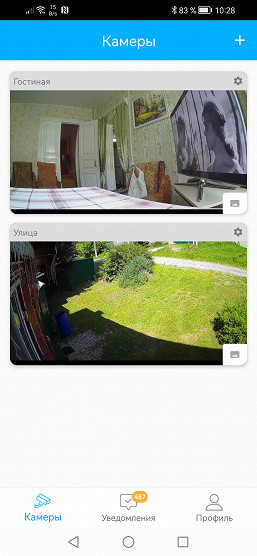
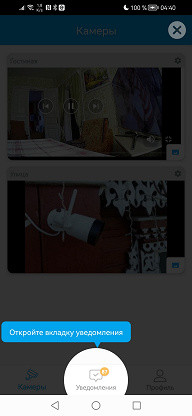
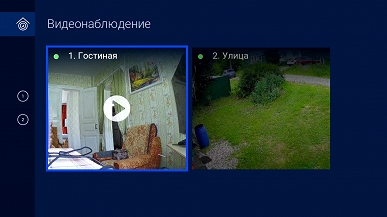
The second camera, an outdoor one, is connected in the same way. As a result, two windows will appear on the main page of the application, each representing a static image from the camera. These images can be replaced with others. To view streaming video from the camera, you need to open its page.
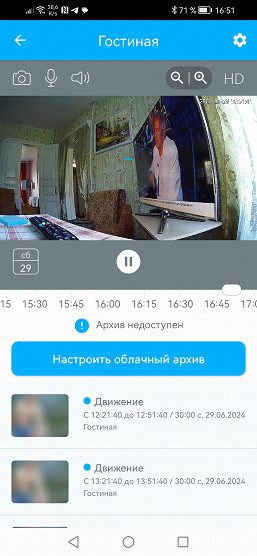
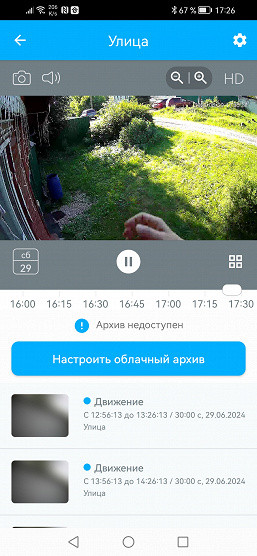
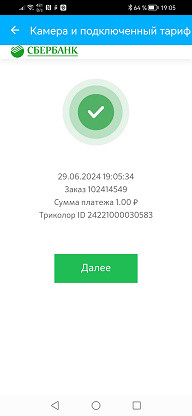
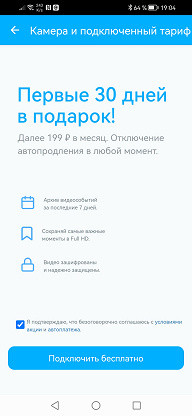
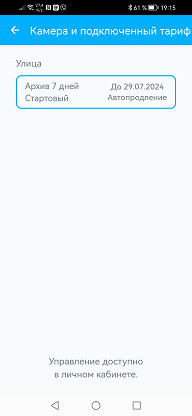
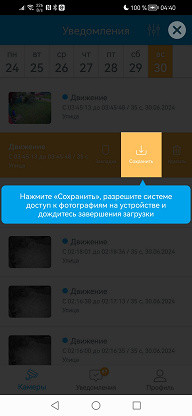
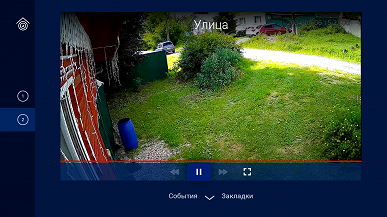
Please note: under the live stream window there is a list of events recorded by the camera. These events have already been uploaded to the cloud, but you cannot view them, as even the still frames are «blurred». To access these recordings, you need to activate archiving in the cloud. This is done in a few clicks, and the tariff can be selected during the connection.
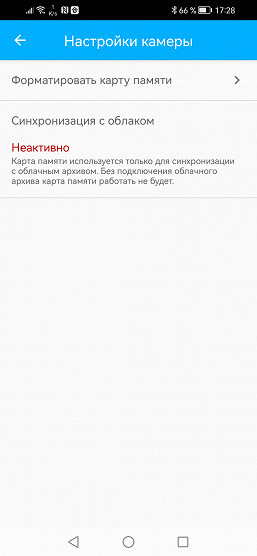
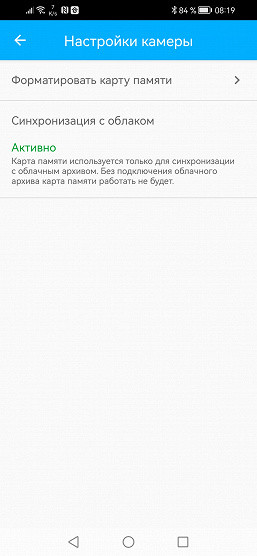
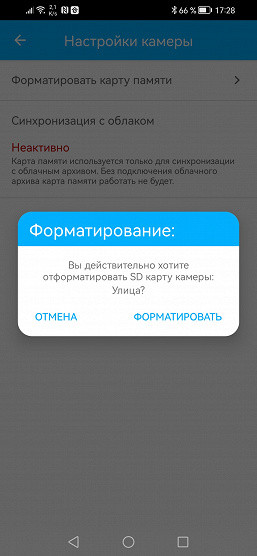
As for the memory card, if you do not connect cloud storage, you do not need to insert the card into the camera. Without a subscription, the camera will only use part of the card's capacity, and new recordings will overwrite old ones. According to the manufacturer, the memory card only serves as a temporary buffer for recording the archive when there is no Internet connection. That is, when there is no Internet, the camera will record events on the memory card, but as soon as the connection is restored, this offline archive will be moved to the cloud. The manufacturer openly indicates this feature in the camera settings.
Thus, when viewing the archive of recordings or a live broadcast, the data does not come from the camera or from the memory card installed in the slot. All data is always transmitted from the cloud, regardless of where the user is — next to the camera or on a remote island with satellite Internet. Therefore, there is a noticeable delay in the broadcast, which is four to five seconds.
However, if you remove the memory card from the camera and view its contents, you can find a system of folders: year / month / date / hour. Each of these folders stores recorded video events.

It doesn’t matter whether the camera was connected to the internet during recording or whether a cloud storage plan was activated. The camera always records events to the memory card, although they cannot be viewed remotely. This viewing method can be considered a small life hack, but it requires that the memory card be removed and connected to a PC or smartphone on a regular basis. This is not a difficult task, but if the camera is installed outdoors, it can be problematic. In addition, the memory card has a limited capacity, while cloud storage provides much more space.
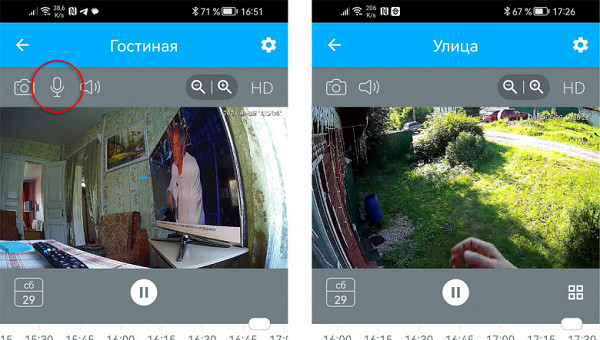
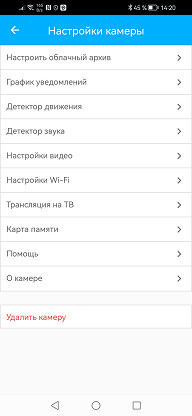
The camera settings are almost identical, except that the indoor camera supports two-way audio, while the outdoor camera does not have a built-in speaker. The indoor camera is equipped with a speaker and microphone, allowing you to communicate with those nearby. The loud speaker clearly reproduces speech, and the sensitive microphone picks up even a whisper from the interlocutor.
About the microphone: it is very sensitive both in the indoor and outdoor camera. There is a separate section in the settings to adjust the sensitivity of the microphone when detecting sound. Note that even when setting the maximum level to 90 dB, the camera will react to almost every sound.


If you enable sound and motion detection in the settings at the same time, the sound detector will work faster than the motion detector. For example, if the camera is pointed at the road, it will be able to detect the sound of a passing car or a pedestrian before the motion detector works.
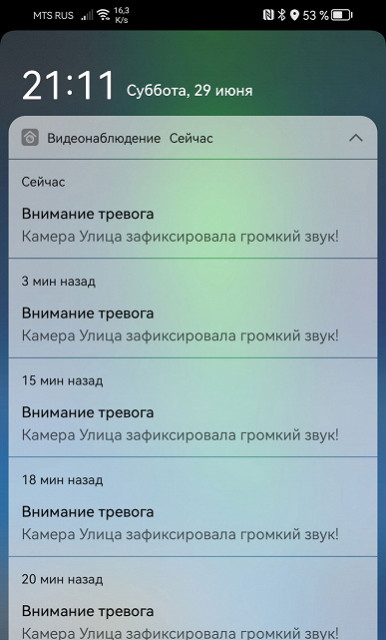
This is logical, since the camera has a limited viewing angle, and the microphone picks up sound from all directions.
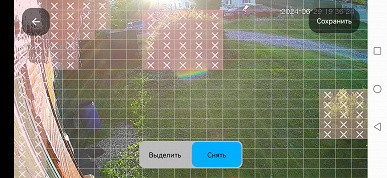
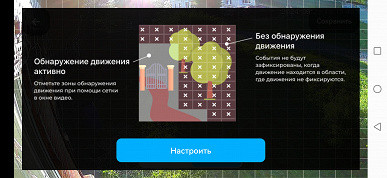
Motion sensor settings allow you to select zones in the frame in which movement will be ignored. These zones usually include objects that can cause false alarms: bushes, trees, wires, shadows, etc. Built-in tips in the program will help you avoid errors during setup.
It is worth noting an important setting in the application that most cameras do not have: the ability to change the Wi-Fi point to which the camera is connected. This is useful if you change the router, connect the camera to a second router, or move it to another location with a different router.
In regular cameras without this function, you need to remove the device from the application, reset it to factory settings and configure everything again, which leads to the loss of all previous settings, such as detection parameters and notification schedule, and possibly the loss of the archive.
Our cameras allow you to change the network «on the fly»: just start the scanner, select a new network and enter the password. This can be done while the camera is still connected to the old network and available for control.
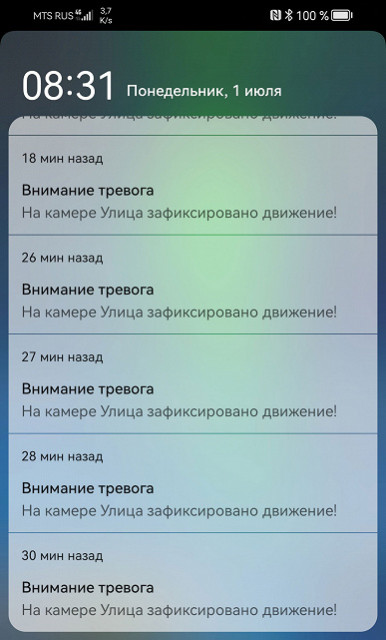
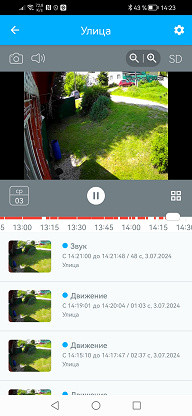
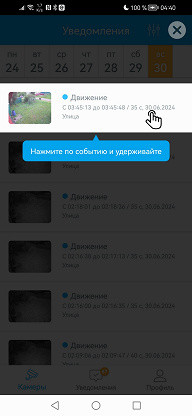
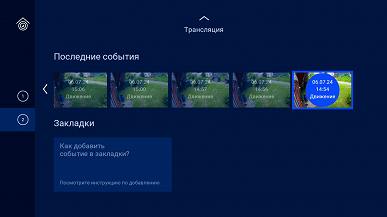
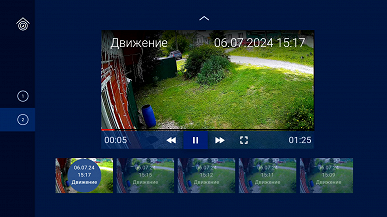
Notifications and working with the video archive is a separate topic that deserves attention. If you have one of the cloud tariffs activated, each push notification received on your mobile device leads to the corresponding video. Just tap on the notification, and in the opened application you will see a list of events. Each event can be expanded to reveal a menu with icons for protection against deletion, downloading or deleting the recording.
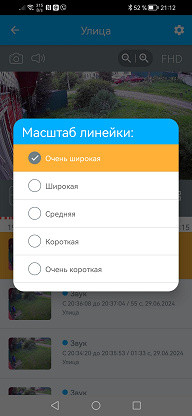
You can view alarm recordings both by individual files and via a timeline, the scale of which can be adjusted in the application. It is also possible to select a date for studying the archive.
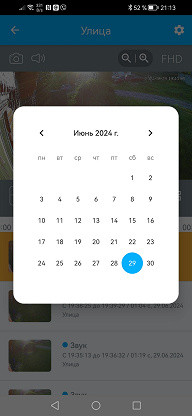

Here again, the built-in training elements in the application help, demonstrating the procedure.
You can work with cameras not only through the mobile application. If you have a computer, you can go to the Tricolor Video Surveillance website, log in, and see a list of connected cameras with a window for live broadcasting. You can also view archived recordings and configure cameras directly on the web page.

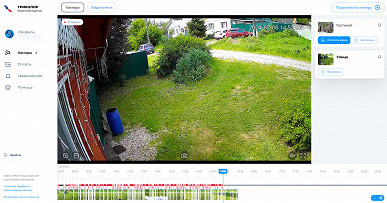
You can work with cameras not only through the mobile application. If you have a computer, you can go to the Tricolor Video Surveillance website, log in, and see a list of connected cameras with a window for live broadcasting. You can also view archived recordings and configure cameras directly on the web page.

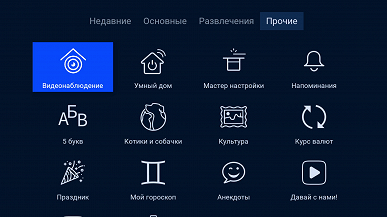
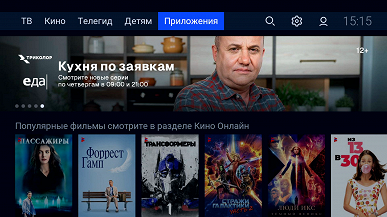
All modern models of Tricolor set-top boxes can receive broadcasts both from satellite and via the Internet. Therefore, the software of the set-top boxes includes many services, including interactive ones, such as Smart Home and Video Surveillance. These applications can be found in the main menu of the set-top box in the «Applications» section.
When you first launch the program, you need to log in using the pair «phone number + password». The same one that you use to log in to the mobile application.
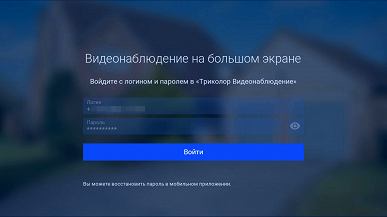
If authorization is successful, the user will immediately see images of both cameras on the TV screen — these will be static screensavers made at the moment of entering the application. To view live video, select the camera using the arrows on the remote control and press OK.
Unlike the mobile and browser versions of the application, there are no settings here. You can only view the archive, but it is limited to the last ten events.
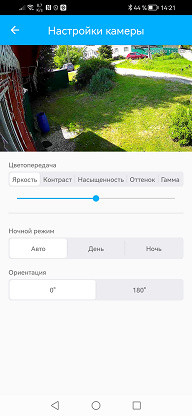
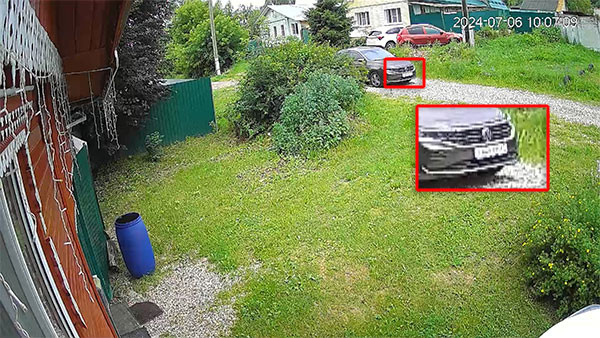
The maximum frame size with which the camera can broadcast and record video is 1920x1080 pixels with a maximum frequency of 25 frames per second. The bit rate of the stream is floating, on average about 1500 Kbps. In most cases, this bit rate is enough, since the picture in video surveillance is usually static. The camera's sound is recorded in mono with the AAC codec. The resolution of the cameras can be called very good for such a frame size. If the bit rate were slightly increased, three times, then the license plate of a passing car, located ten meters from the camera, could be distinguished.
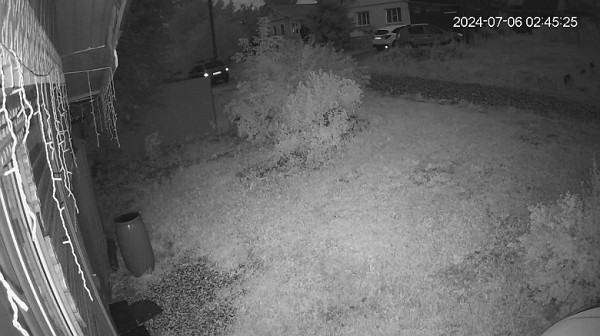
The infrared illumination, which turns on automatically in the dark, has a fairly long range — the 30 meters specified in the passport are quite accurate.
Most IP cameras using the proprietary cloud do not support ONVIF standards. Such cameras can only work with their own applications via the cloud service using a closed protocol. This means that you will not be able to connect them to other recorders (DVR) or receive a video stream directly, bypassing the cloud service. Our cameras also have this feature: when connected to a local network, they are visible, but attempts to access the camera's web server via an IP address will be blocked.

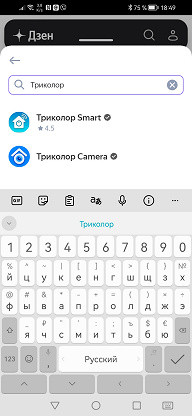
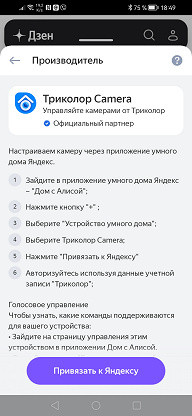
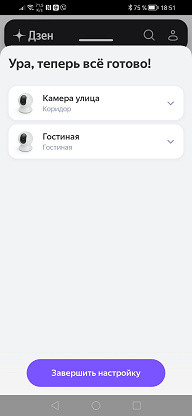
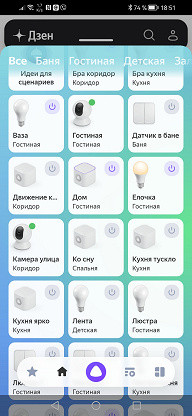
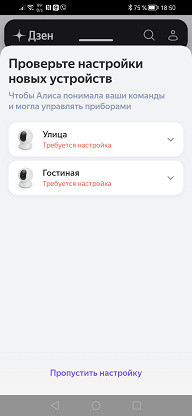
Finally, it is worth mentioning the ability of cameras to integrate into a smart home with Alice. This is done as quickly and easily as connecting cameras from scratch. To find cameras among the huge number of devices supported by Alice, it is easier and faster to enter the name Tricolor in the search field.
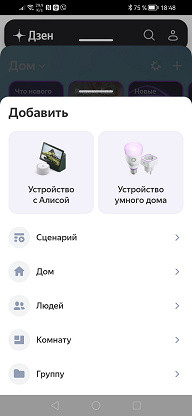
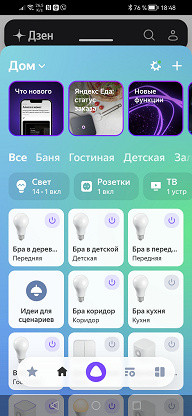
A simple setup, and two new residents, two Tricolor cameras, will appear in the list of devices in your Home. The number of commands performed by Alice is still quite modest.
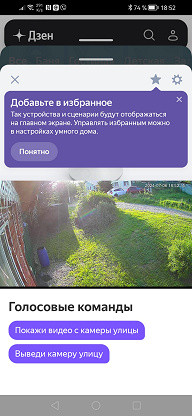
What is clearly missing here is the archive search function, as well as the ability to include cameras in the list of devices for creating scenarios. For example, it would be convenient to set up automatic switching on of the light when motion is detected in the house. This is not science fiction, but a completely common feature in modern smart home systems.
Conclusions
The indoor IP camera SCI-1 stands out for its compactness and ease of installation, while the outdoor camera SCO-1 is designed to operate in any weather conditions, be it heat or frost. Both devices are equipped with sensitive sensors that provide detailed images even at low light levels, thanks to effective IR illumination. The cloud service works stably, providing access to cameras from anywhere in the world.
Pros:
- motion and sound detector
- highly sensitive sensor
- effective IR illumination
- availability of cloud service with viewing of broadcast via mobile application
- wide operating temperature range
- outdoor camera supports wired connection
Cons:
- lack of PoE support (power over local network)
- incompatibility with equipment that supports ONVIF standards
- a cloud subscription is required to view the archive