
Robot vacuum cleaners are one of the most dynamically developing segments of modern household devices. Just a few years ago, household assistants with infrared sensors that navigate in space by touch were considered a rarity. However, over time, “blind” models have given way to vacuum cleaners with LDS laser sensors that instantly navigate the room, avoiding obstacles.
The first models with wet cleaning capabilities required refilling with water before each cycle and manual cleaning of the wipes. However, developers quickly automated these processes, and models appeared with base stations capable of washing and drying floor rags themselves.
Recently, automatic waste bin emptying robots have appeared on the market, capable of dumping waste into a disposable bag. But until now, the owner had to manually maintain the water level and empty the container of dirty liquid.
However, manufacturers seem to have solved this problem. The Dreame L30 Ultra robot vacuum cleaner with a self-cleaning system, washing and drying napkins provides the option of connecting to water supply and sewerage. This accessory was a logical step in the development of technology, providing automatic replenishment of clean water and removal of dirty liquid.
The Dreame RAW4 kit, compatible with the Dreame L20 and Dreame L30 robotic vacuum cleaners, is designed to automate the replenishment of the station tank with clean water and the removal of dirty liquid into the sewer. Today we will conduct an experiment by connecting it to our L30 Ultra robot and report on the results obtained.
Characteristics
| Manufacturer | Dreame |
|---|---|
| Model | RAW4 |
| Type | water supply connection kit for automatic water filling and draining for L20/L30 robotic vacuum cleaners |
| Country of Origin | China |
| Guarantee | 1 year |
| Power | 12 W |
| Voltage | 12 V |
| Equipment | container for clean water; container for used water; details: connection components, adapters; user guide |
| Water pressure range | 0.14—1.0 MPa |
| Container material | plastic |
| Fastener material | plastic |
| Clean water tube length | 9.5 m |
| Dirty water tube length | 9.5 m |
| Network cable length | 9.5 m |
Equipment
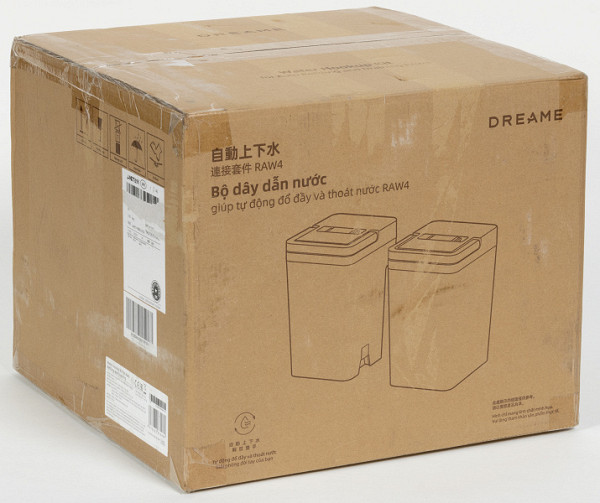
The connection kit comes in a simple brown cardboard box. All information on the packaging, with the exception of the logo and model index, is written in Chinese and Vietnamese. However, on one of the sides the manufacturer added a sticker with short text in English.
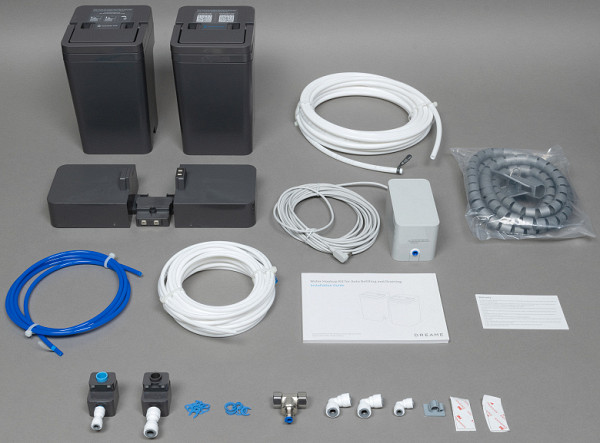
Having opened the box, inside we found:
- two water tanks: clean and dirty
- mounting base
- two adapters for connecting communications to the base station
- a coil (9.7 m) of white plastic hose with a diameter of 3/8″ for connecting to the sewer
- a coil (9.5 m) of white hose with a diameter of 1/4″ for connecting to the water supply
- short (1.9 m) 1/4″ blue hose for connecting to the water supply
- L-shaped elbow 3/8″ (2 pcs.)
- L-shaped elbow 1/4″ (1 pc.)
- solenoid valve controller with interface cable
- three-way valve 1/2″ for connection to the water supply
- plastic clip for attaching a sewer hose
- spiral organizer (2 m) for hoses and wires with termination device
- 14 clamps for fixing hoses in fittings: 7 of each size
- installation manual
- warranty card
At first sight
Most of the packaging is taken up by two opaque plastic reservoirs designed for clean and dirty water.
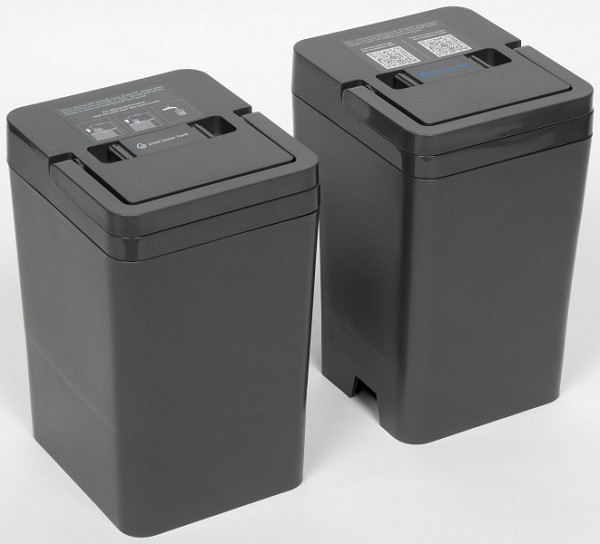
The capacity of the tanks is slightly smaller than the similar tanks included in the original kit of the vacuum cleaner base station. They also differ from standard ones in design.
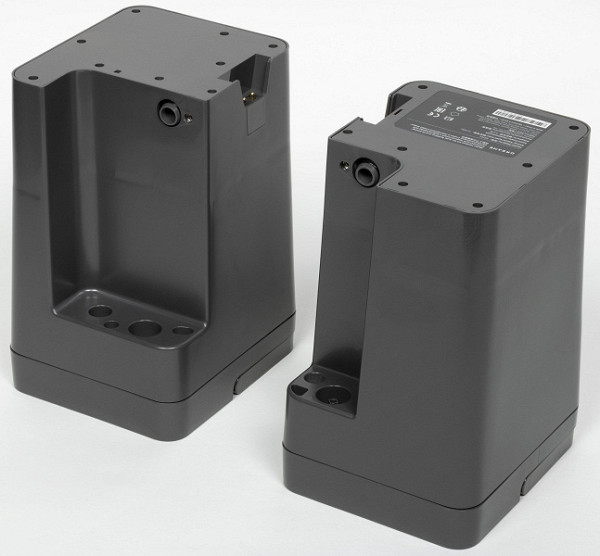
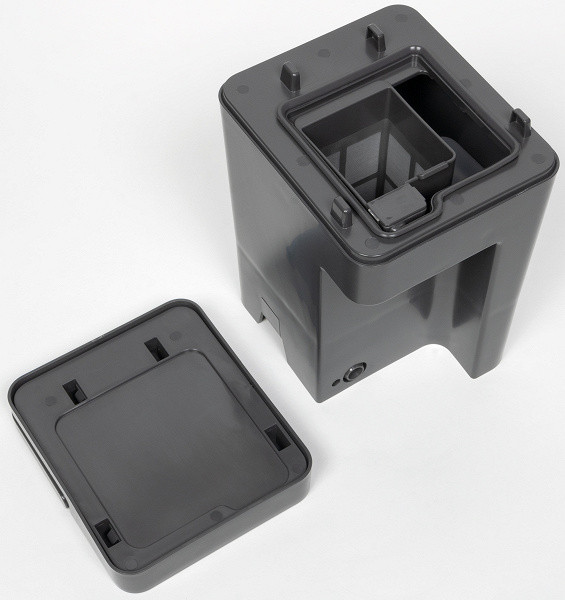
For filling and emptying, special holes are provided in the bottom of the tanks, equipped with rubber gaskets. The dirty water compartment contains two electrical contacts that power the built-in pump, which pumps the liquid into the sewer.
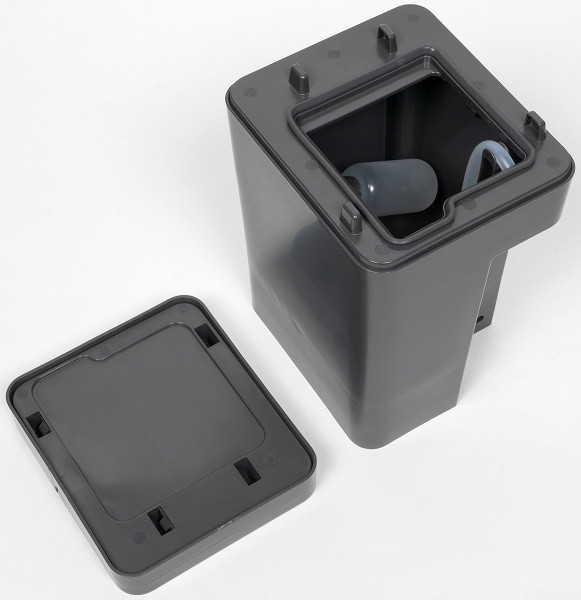
Inside the clean water tank we found a float with a sealed contact, designed to control the liquid level.
A pre-filter is inserted into the dirty water container to protect the sewer from large particles of debris.
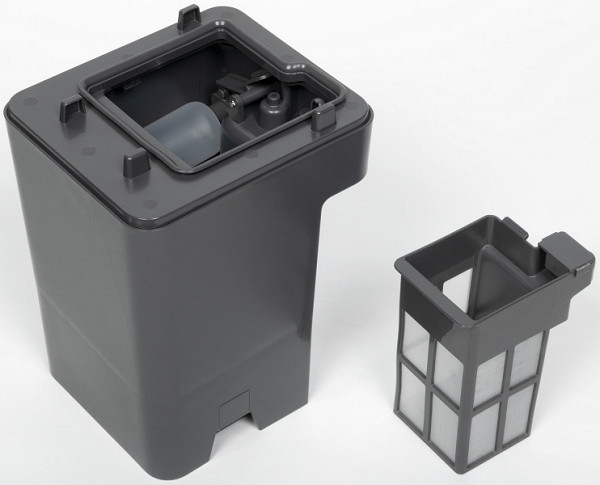
This is a removable plastic basket with a fine nylon mesh.
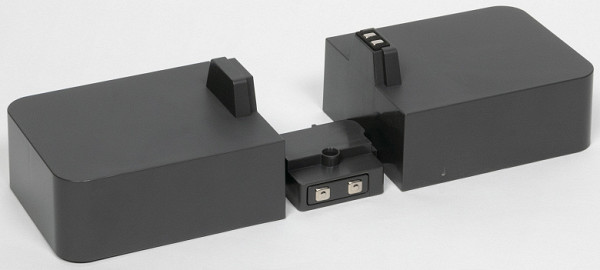
The tanks are installed in the base in place of the standard ones, and the difference in size is compensated by a plastic mounting base.
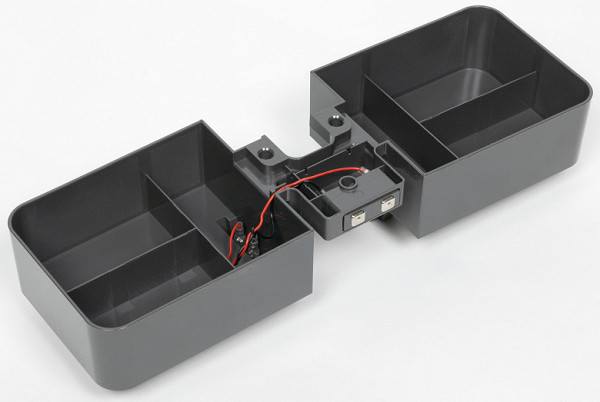
There is a wire running inside the base that powers the dirty water tank pump. Clean water enters the device by gravity, due to pressure in the line.
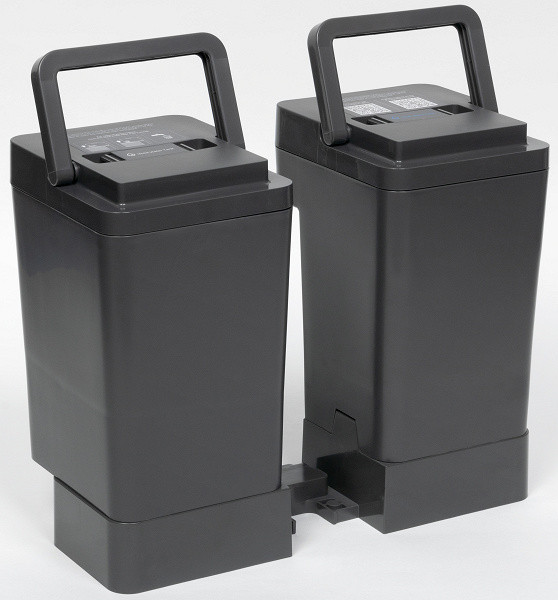
The container lids are equipped with folding plastic handles for easy removal.
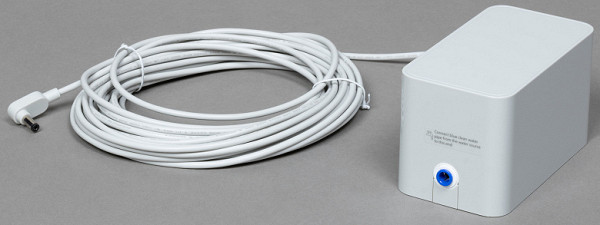
A solenoid valve mounted in a rectangular plastic housing is responsible for the water supply. It is connected to the base station with a long wire.

At the ends of the controller we notice two inlet fittings for connecting a pipe with a diameter of 1/4″. It is almost impossible to make a mistake in the direction of connection: the blue connector is directed to the main water supply, and the white connector is directed to the base station.
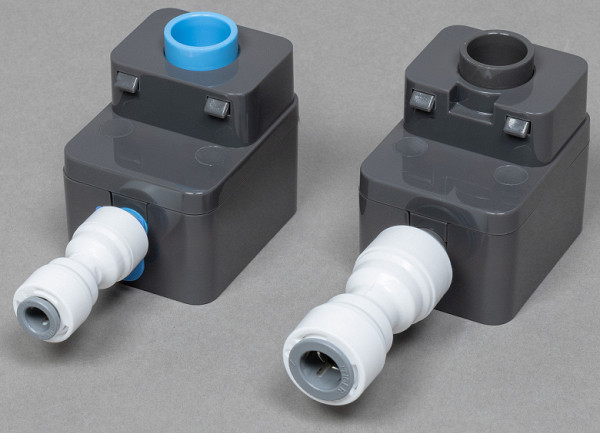
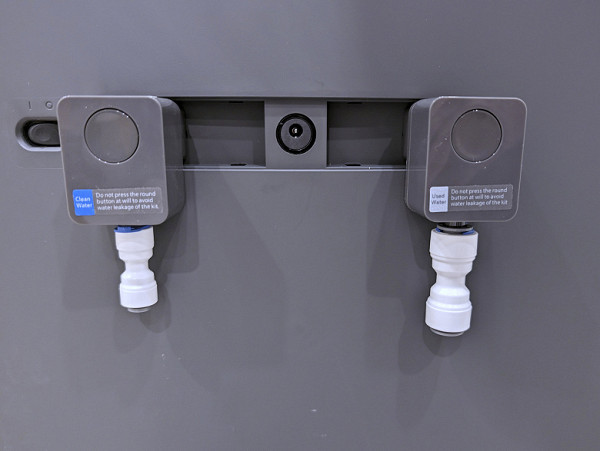
To connect the hoses to the base, use two adapters with quick-release connectors. Let us remind you that the diameter of the hoses is different: 3/8″ is for dirty water, and 1/4″ is for clean water.
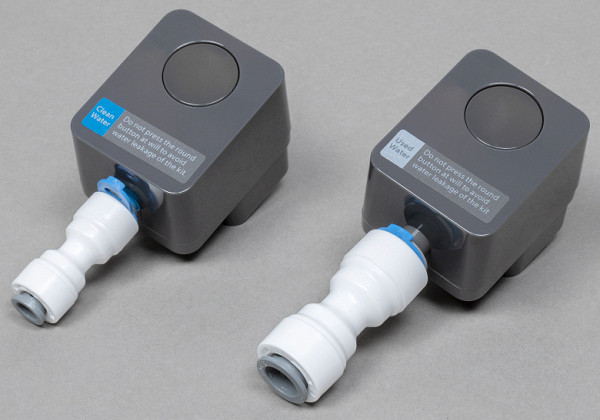
The adapters are inserted into the corresponding holes on the back of the base station and secured with internal latches. To release them, you need to press the round buttons (this operation should be avoided on a device connected to the bus).

The kit includes three coils of plastic tubes. The large white one is designed to carry dirty water down the drain, while the device is connected to the water supply through thin hoses. All three bays are marked with self-adhesive labels.
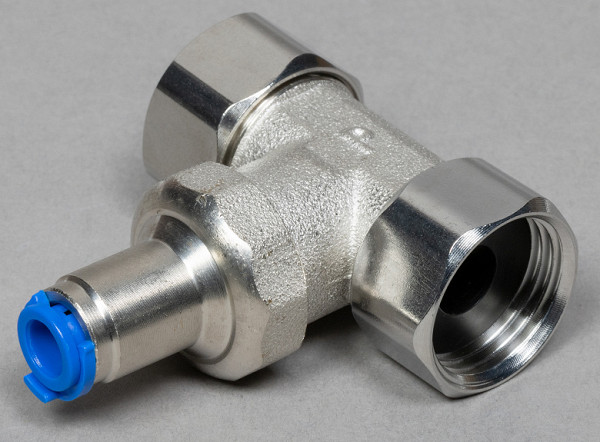
To connect to the water supply, a tee with a diameter of 1/2″ is used, which for some reason is called a three-way valve in the instructions. The internal thread is intended for connection to a water supply point, and the external thread, with a plug, can be used to connect to another consumer, such as a water tap or, for example, a washing machine.
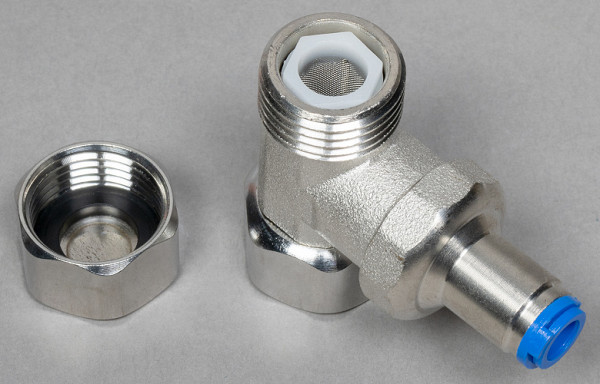
A removable mechanical filter with a steel mesh is installed on the plug side.
For the L-shaped connection of the tubes, the device is equipped with three fittings: two for the sewer hose and for some reason only one for the water supply.
Instructions
The installation manual is a thick (156 pages) A5 book.
The manual is written in six languages: English, Russian, Chinese, Thai and Vietnamese. The Russian-language part of the document is 26 pages and contains many clear and understandable illustrations and photographs that explain in detail all the nuances of the installation.
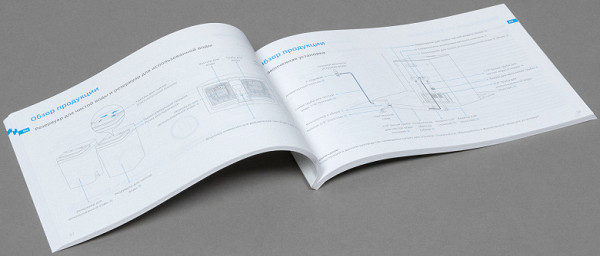
The manual contains detailed instructions for kit installation, assembly inspection and maintenance. The last section of the document details the procedure for dismantling the connected system (however, as the document emphasizes, this may only be necessary if the product is returned).
Assembly and connection
The first step before installation is to determine the location of the vacuum cleaner base station. It is important to remember that for normal operation of the robot, a free space of at least 1.5 meters in front of the base and five centimeters on both sides is required. An electrical outlet is also required (the length of the supplied wire is 1.6 meters).
Then you need to think over the route for laying the water supply and sewer hoses, choose a location for the controller with a solenoid valve and make sure that the pressure in the water main corresponds to the specifications of the device (not less than 0.14 and not more than 1.0 MPa). It is worth noting that the minimum permitted value is higher than the standards for cold water supply (the lower pressure limit in the cold water supply line according to the current SNiPs is 0.03 MPa).
When installing the line, avoid kinking both hoses. Unfortunately, the manufacturer does not provide information about the minimum permissible bending radius of the tubes, so you have to rely on common sense and experience. In case of limited space or the need to bend hoses at right angles, it is recommended to obtain additional L-shaped connectors of suitable diameters in advance, since the equipment may not be sufficient.
To connect to the water supply, a tee with an internal thread with a diameter of 1/2″ is used. If the water socket in the apartment is designed for a different size (for example, 3/4″ with external thread), an additional adapter will be required.
During the installation process you will need the following tools:
- Phillips (Philips) screwdriver with a blade length of at least 120 mm.
- Flat head screwdriver.
- Ruler or tape measure for marking pipes.
- Construction knife for cutting pipes.
- Adjustable wrench.
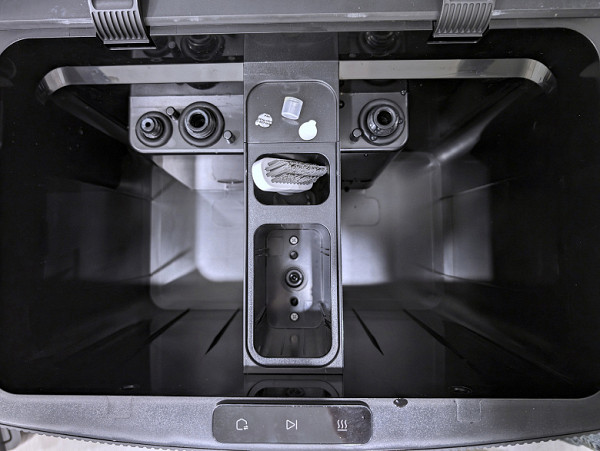
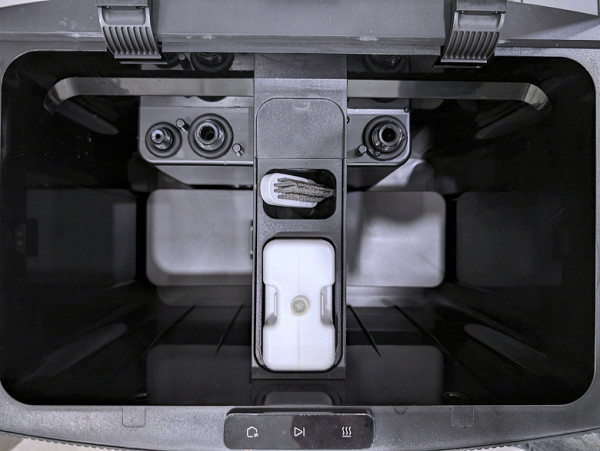
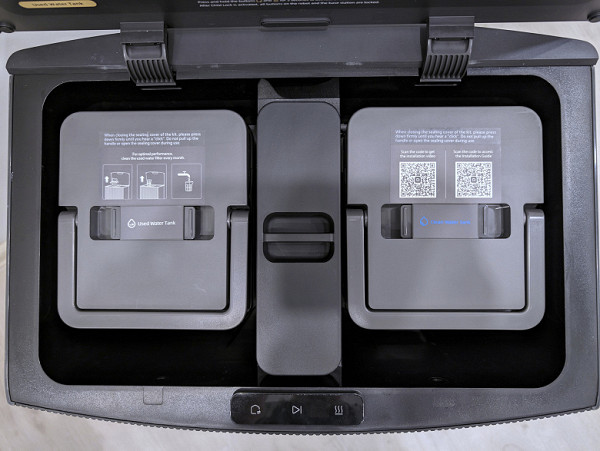
First of all, you need to open the base part, remove the built-in clean and dirty water tanks and put them aside as they will no longer be needed. Then, after removing the cover of the central compartment, remove the bottle of detergent and a brush to clean the working chamber.

There are two screws at the bottom of the detergent compartment: unscrew them and remove the central partition by pulling it up.
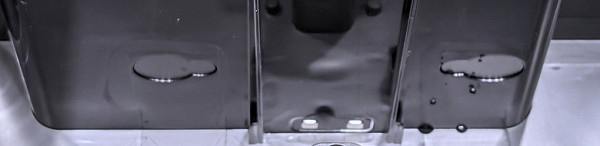
At the bottom of the container compartment there are two holes for connecting new containers. They are closed with plugs with an adhesive layer, which should be removed using a knife or flat-head screwdriver.
The included mounting base is installed at the bottom of the compartment.
After that, we put back the compartment partition, screw in both screws that secure the structure, and return the bottle of detergent and brush to their place.
After this, you can install new tanks for clean and dirty water, tightly closing their lids.
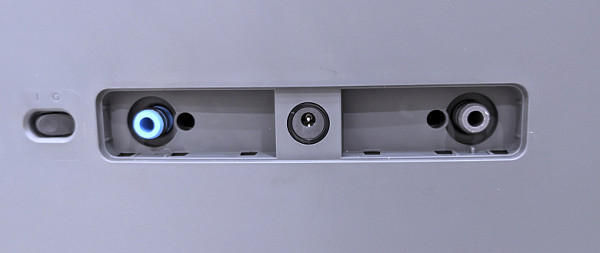
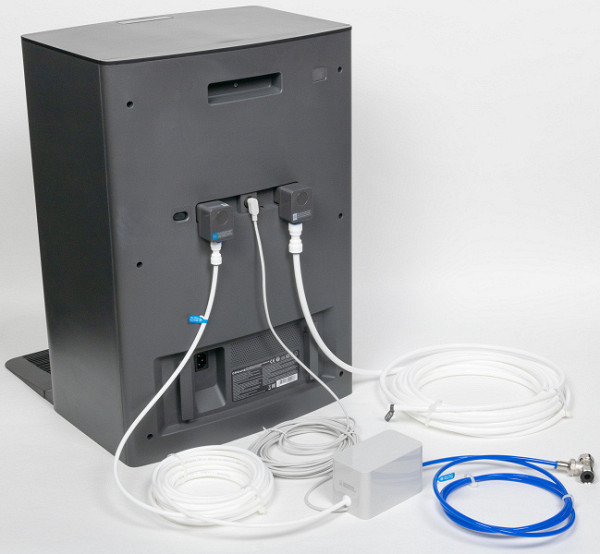
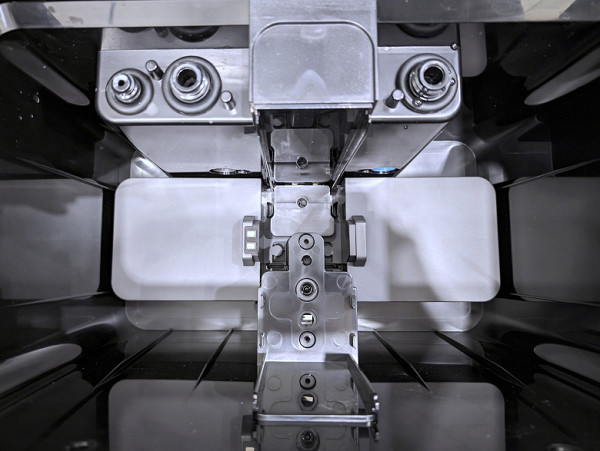
Behind a long plastic plug on the back of the base there are two fittings for clean and dirty water, and between them there is a connector for connecting the solenoid valve. Next to the fittings there are holes intended for fixing the internal tanks. After installing the containers, it is necessary to tighten the hidden screws using a long (at least 120 mm) Phillips screwdriver until they stop. This will ensure a strong connection between the containers and the valves and securely fasten the containers. To check the installation is correct, you should try to remove both tanks from the base: if everything is done correctly, this will be difficult.
After this, install the adapters by pressing them until they click. The round buttons on both cases are designed to remove the structure — you should not press them now.
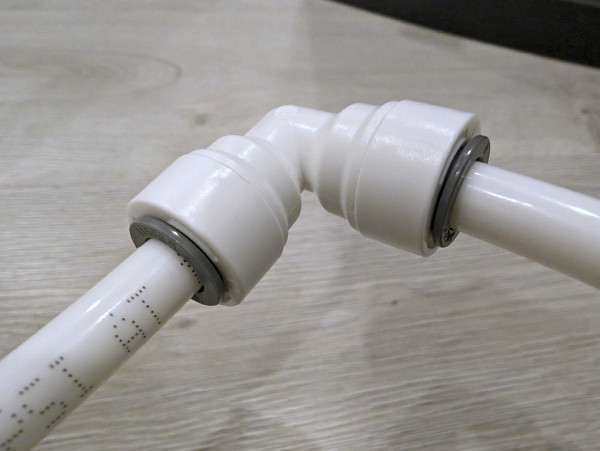
To connect plastic hoses, a convenient collet connection is used: to securely secure the tube in the fitting, just insert it into the hole until it stops. To dismantle, you need to press on the plastic ring and pull the hose in the opposite direction.
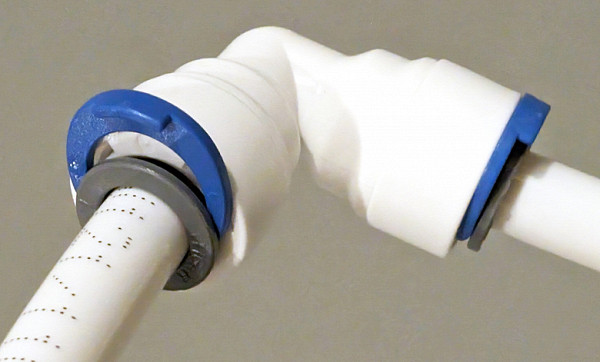
After connection, the rings of each fitting must be secured with the included plastic clamp.
Having measured the required length of the sewer hose, insert one end into the adapter on the base body, and the other into the L-shaped fitting. Then we secure the structure using a snap-on holder with a self-adhesive base. For some reason, the device includes only one holder, since the clean water hose does not require fixation.
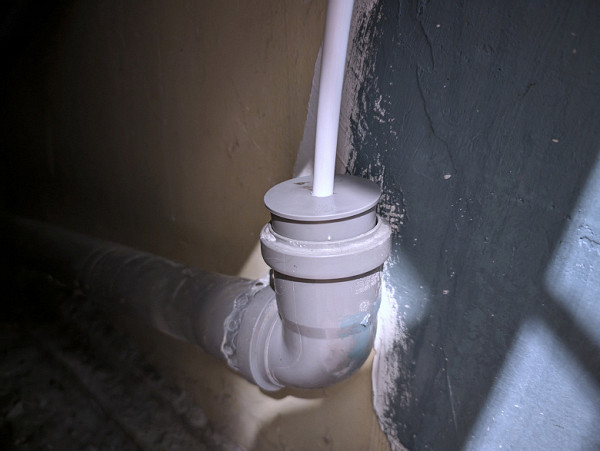
We insert the other end of the sewer hose into the drain pipe. Having not found a suitable adapter, we used a regular plug, drilled a hole of the appropriate diameter in it and sealed the connection with sealant. According to the instructions, the height of the wall drain should not exceed 38 cm above the floor, and we met this condition.
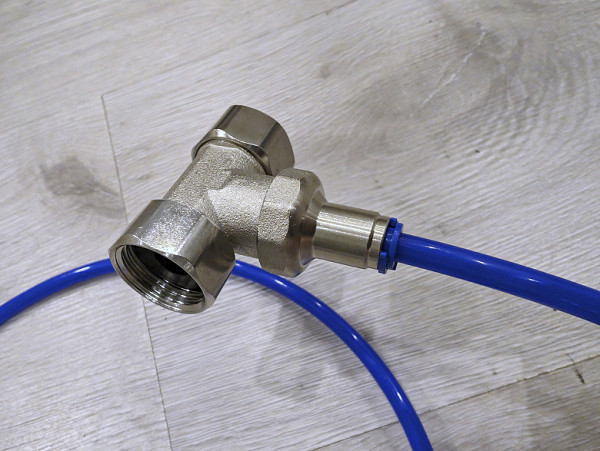
The tee used to connect to the water supply is equipped with a collet connection that is already familiar to us. We insert a blue tube into it.
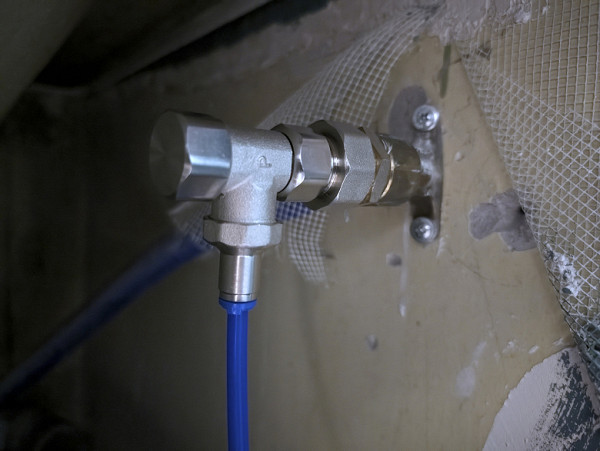
Having installed a suitable adapter on the water socket, we attach the tee to it using an adjustable wrench. The manufacturer notes that the device should be connected exclusively to cold water supply, and the use of hot water from hot water supply is prohibited.
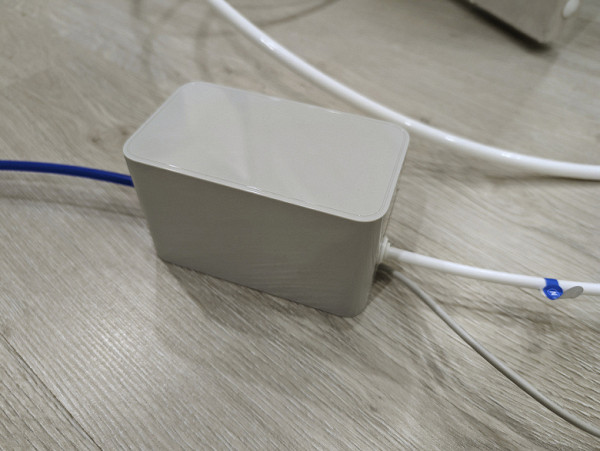
Having cut the blue hose to the required length, we insert the hoses into the solenoid valve body: blue into the blue hole, and white into the white hole.
All the installed connections seem reliable and do not allow a drop of water to pass through, but we would be more confident in the safety if the design included protection against possible leaks. In addition to the solenoid valve, it would be reasonable to implement a water sensor — either electronic or, at a minimum, mechanical.
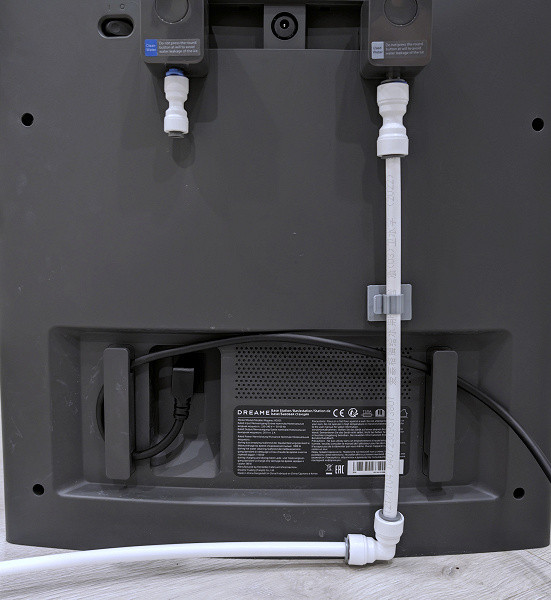
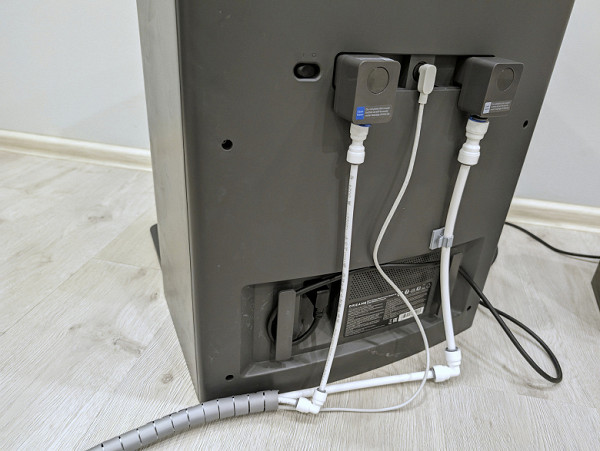
We lay the white tube coming out of the valve box parallel to the sewer pipe and fix it in the second adapter on the base body.
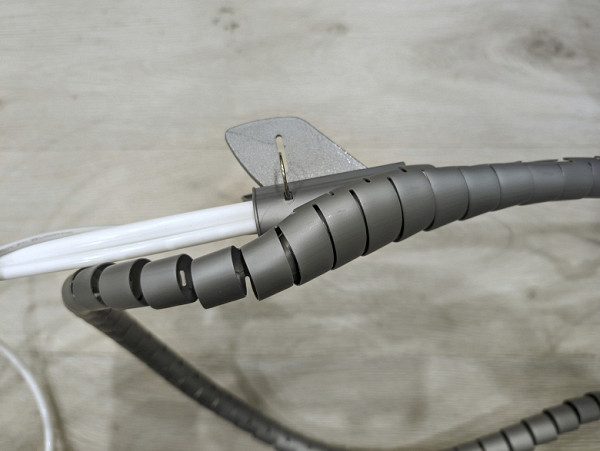
We collect both hoses together with the electrical cable that leads to the valve, and connect them using the plastic organizer supplied. Securing the route can be conveniently done using the simple tool included with the organizer.
After installation, both hoses remain slightly curved, but over time they gradually straighten. However, it is advisable to include additional self-adhesive clips with the device: a single fixation holding the sewer hose is clearly not enough.
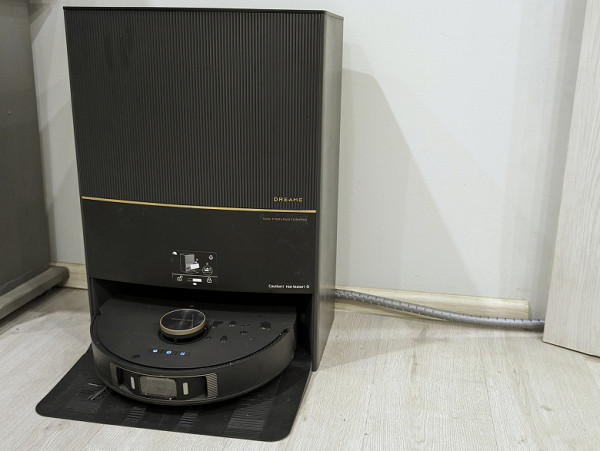
The base station of the vacuum cleaner with the electrical cable and hoses collected in the organizer looks neat, the route is not too noticeable and does not interfere with cleaning.
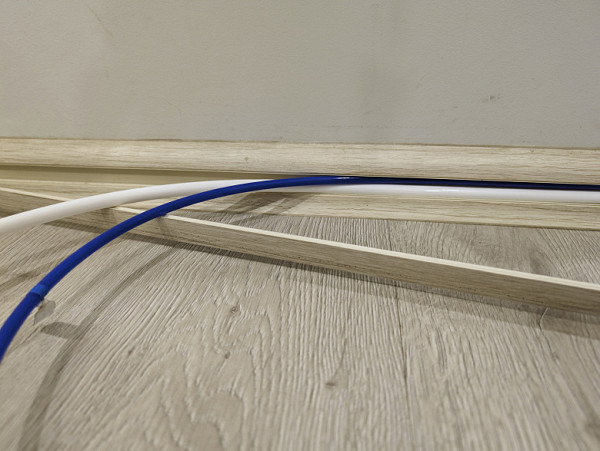
If necessary, you can arrange a hidden installation of hoses and wires inside the baseboard: both tubes, neatly folded together, easily fit into a standard cable channel. Unfortunately, there is very little space left in the channel for the electrical cord: it will need to be sealed under the baseboard. This arrangement will ensure complete invisibility of the established route from prying eyes and protect it from possible damage.
Exploitation
After switching on, the vacuum cleaner base station automatically recognizes the installed kit.
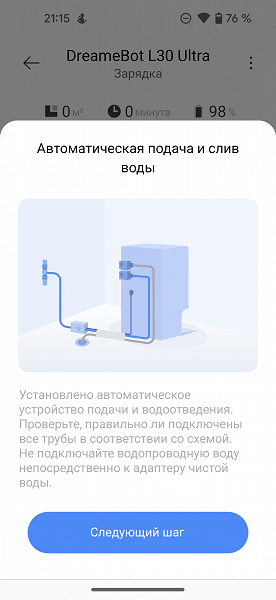
When you launch it for the first time, the mobile application offers to test the operation of the new accessory.

Before performing a test run, the vacuum cleaner must be placed on the base station. The device supplies a small volume of water from the water supply, initiates a short-term cycle of rinsing mops and eliminating dirty liquid into the sewer.
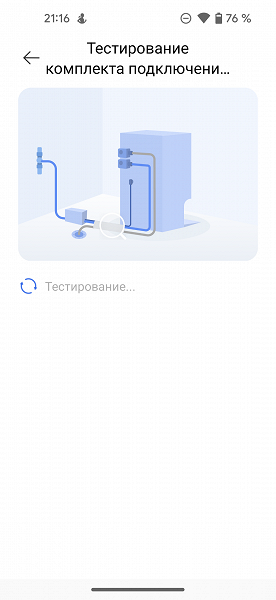
Testing takes about three minutes.
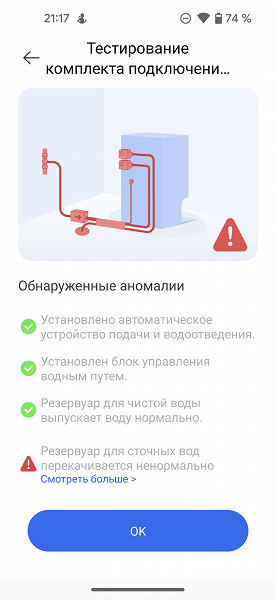
When I first turned on the application, I received a message about an error connecting the wastewater tank. The reason turned out to be our mistake: one of the screws on the back of the station was not tightened completely, the base station fitting did not fully fit into the hole in the tank, which led to a small water leak.
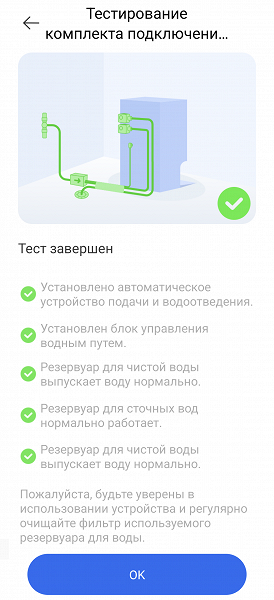
After fixing the problem, we re-tested (this can be done in the base station settings section) and made sure there were no faults.
As already noted, the assembled system looks reliable, and we have not identified any weak points in the design. However, we were concerned about the lack of monitoring for possible leaks: the solenoid valve is not equipped with appropriate sensors, which makes it powerless to detect damage. There is also no control over leaks at the base station: in case of problems, the user will not receive timely notification.
A simple and effective way to eliminate this disadvantage is to install mechanical valves at the joint gap. An option would be the JM-1001 controller, compatible with 1/4″ and 3/8″ pipes. A more reliable, although more expensive, solution would be to install wireless sensors that are compatible with various smart home systems—there are many such devices on the market.
After the implementation of the system, using a vacuum cleaner has become much more convenient: now there is no need to worry about timely cleaning the tank with dirty liquid and filling the tank with clean water. The station automatically performs pouring and draining, and the user requires only minimal care, which we will discuss in the next section.
Care
With the base station connected to water and sewer, there is almost no need for additional maintenance. Regular maintenance of the system boils down to periodically inspecting the internal filter of the dirty liquid tank and emptying it when overfilled. After this, it is recommended to rinse the nylon mesh under running water before installing it in place.
Naturally, installing the kit does not eliminate the need to perform standard procedures for caring for a vacuum cleaner: periodically replacing a disposable dry waste bag every few weeks, regularly cleaning the tray of the base working chamber and keeping the robot's sensors clean. However, these procedures require minimal time and effort.
conclusions
The kit discussed today for connecting Dreame L20 and L30 robotic vacuum cleaners to water supply and sewerage seems to us to be an integral addition to these models. The ability to automatically fill the station with clean water and autonomously remove dirty water will relieve the owner of some monotonous responsibilities for caring for the robot and significantly increase its autonomy.
The RAW4 kit is easy and quick to install, requires no additional maintenance and, last but not least, is available at a reasonable price compared to the basic unit.
The only noticeable drawback during installation and use is the lack of a built-in leakage protection system. This design clearly lacks water sensors compatible with the base station and mobile application. However, you can always solve this problem yourself by installing devices from other manufacturers.
Pros:
- relieving the owner of routine monitoring of liquid levels in tanks and the need to regularly fill and empty them
- a significant increase in the autonomy of the robot vacuum cleaner
- simple and reliable design
- easy installation
- low (relative to the cost of the basic device) price
Minuses:
- lack of a liquid leakage monitoring system