
Design, technical characteristics
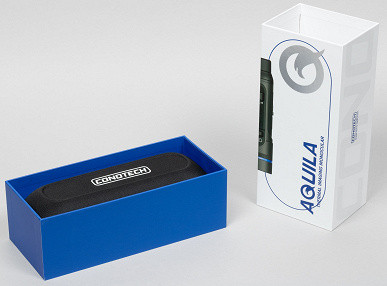
The thermal imager comes in a durable cardboard box with a minimalist design that lists all ConoTech Aquila thermal imager models. There is no technical information about the device on the box.
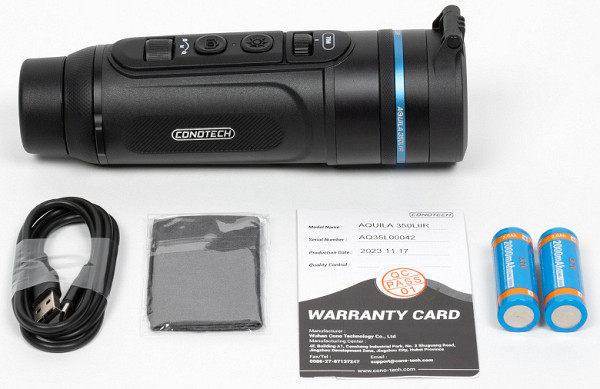
The delivery set includes the ConoTech Aquila 350LIIR thermal imager itself, a USB Type A — USB Type C cable, a cloth for cleaning the optics, two half-charged additional ConoTech 18500 batteries with a capacity of 2000 mAh each, a warranty card and a user manual in Russian.
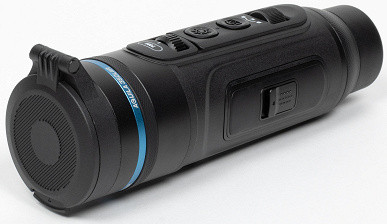
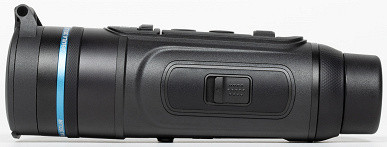
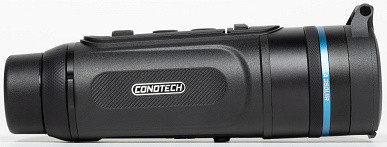
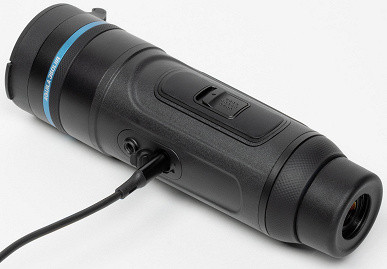
The body of the thermal imager is made of high-strength aluminum alloy and has ribbed inserts that make it easier to hold the device in your hands, including when using gloves.
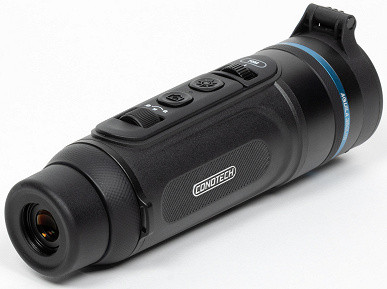
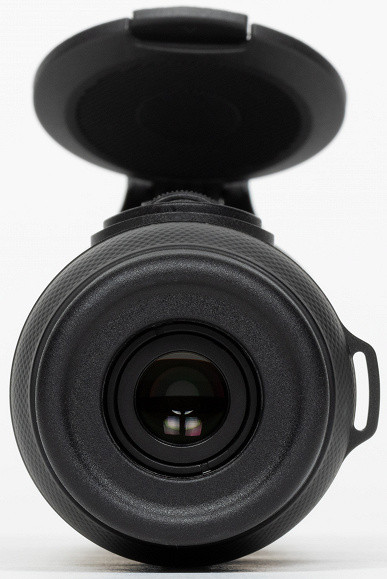
Between the body of the thermal imager and the eyepiece there is a cone-shaped ring, which serves to adjust the diopter value from -5 to +5 diopters in one full revolution. The eyepiece is made of soft plastic or hard rubber and can extend up to one centimeter by simply turning it counterclockwise. The extended eyepiece is convenient for use without glasses, allowing you to rest it against your eye and fix the eye relief, making observation easier.
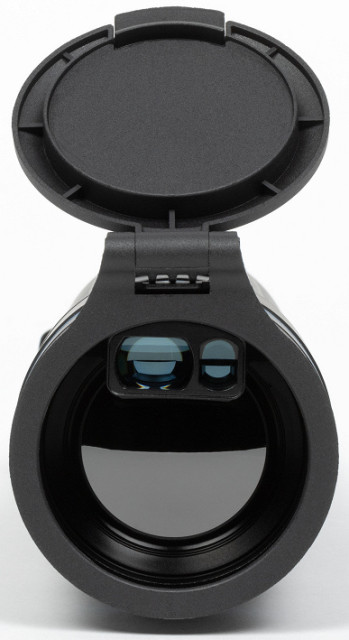
The thermal imager lens is protected by a spring-loaded flip-up cover, which is secured with a latch when closed. At the top of the lens there is an Aquila LIIR laser rangefinder unit, consisting of a laser emitter and a reflected laser beam detector.
The thermal imager uses manual focusing, carried out by a roller located closer to the lens. The minimum focusing distance is two meters, and the maximum is infinity. In addition, it is possible to quickly focus at a distance of up to 70 meters without visual control: just turn the wheel to the middle position until slight resistance appears.
The second roller wheel, located on the opposite side of the body closer to the eyepiece, is intended for changing the focal length, that is, for zooming. However, this wheel is also a button, similar to the wheel on a computer mouse. The thermal imager recognizes different types of presses on the wheel: a short press opens a quick menu with frequently used functions, and a long press launches the main menu of device settings, including system ones. To work with the menu, this wheel is also used, which navigates through items and confirms selections.
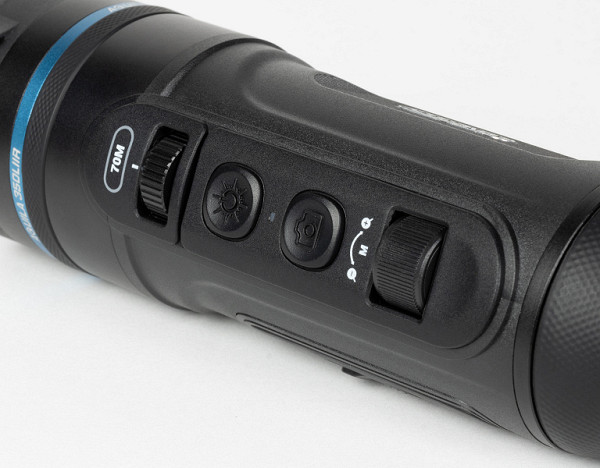
In addition to the wheels, two buttons are used to control the thermal imager. A long press of the first button turns the device on or off, and a short press activates the laser rangefinder. It is important to note that to turn off the device, you must hold down the first button until the OLED display in the eyepiece goes out, which can take up to 5 seconds. If the button is released earlier, the shutdown process will be interrupted and the thermal imager will continue to operate, consuming battery power.
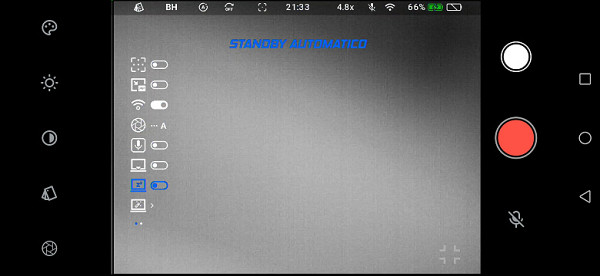
The sleep mode feature can be useful to save battery power. When using it, the thermal imager screen becomes inactive, which reduces energy consumption, although the battery still discharges.
The second button is responsible for recording material into the built-in memory: a short press creates a photo, and a long press starts video recording.
It should be noted that the thermal imager operates absolutely silently, thanks to both the technical design of the buttons and control wheels, and the software, which does not make any sounds. This is especially important for hunters and other users who require stealth.
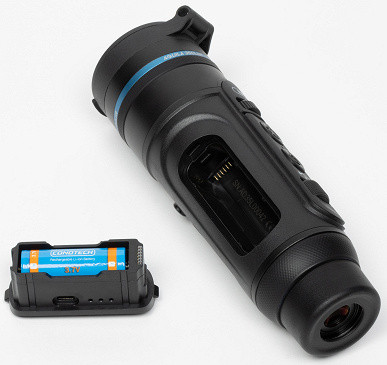
The thermal imager is powered by a built-in main battery. However, it is possible to use an additional battery; for this purpose, there is a folding pocket on the side of the thermal imager. The additional battery is charged only in its container, not inserted into the body of the thermal imager.
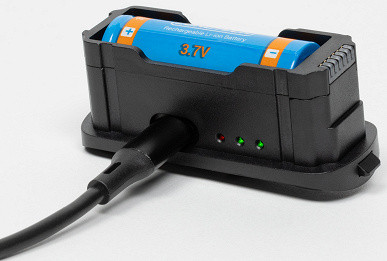
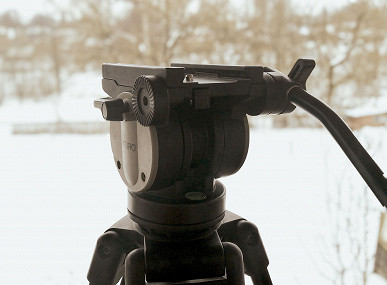
To charge the built-in and spare batteries, a USB Type-C connector is used, which is protected by a rubber plug. Next to it there is a threaded hole for mounting the thermal imager on a tripod — this is a very convenient tool, especially for long-term observation.
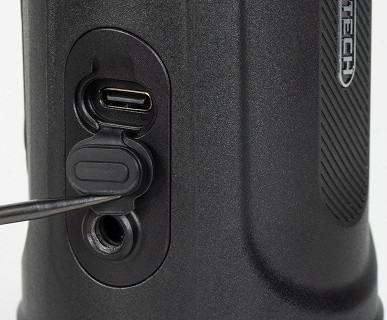
A small feature to consider here is that the threaded hole is shallow, usually two or three threads long. Therefore, installing a thermal imager on a standard tripod head may require the use of rubber gasket rings.
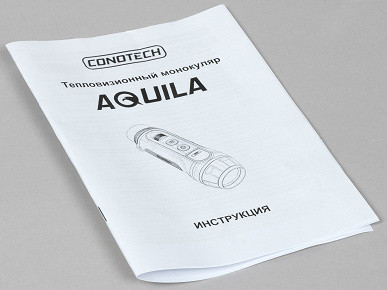
As for the user manual, it is, unfortunately, quite sparse and contains a minimum of information. It is intended for several models of ConoTech thermal imagers and does not fully disclose individual aspects. For example, it does not discuss how to connect a thermal imager to a smartphone. In this case, experience with similar devices, such as cameras or players, may be useful. If you have such experience, then you can easily connect a thermal imager to your smartphone by finding a device with a characteristic name in the list of available networks and entering the standard password that is usually used by manufacturers — 12345678.

The technical characteristics of the thermal imager are shown in the following table.
| Model | ConoTech Aquila 350LIIR |
|---|---|
| Dimensions (W×H×D), weight | ∅60×200 mm, 610 g with additional battery |
| Device type | thermal imaging monocular with laser rangefinder |
| Lens | 50 mm, F1.0 |
| Magnification factor | 4.8× – 20× |
| Focusing | fast, minimum focusing distance 2 m |
| line of sight | 9.2°×6.9° |
| Laser rangefinder | built into the lens, LIIR technology, from 5 to 1200 m, accuracy ±1 m |
| Sensor | uncooled VOx, spectral range 8-14 µm, resolution 384x288 with temperature sensitivity (NETD) <25 mK, top in class |
| Display | 1024×768, frost-resistant OLED |
| Diopter adjustment of the eyepiece | from −5 to +5 diopters |
| Extended eye point | 17.8 mm |
| Focus system | smooth mechanical |
| Battery life | Dual power, built-in 3500mAh battery and removable 2000mAh battery, up to 10 hours |
| Video format | .MP4: AVC, 2 Mbps, 1024×768 (4:3), 50 fps + AAC audio two channels 128 Kbps |
| Photo format | JPEG, 1024×768 (4:3) |
| Built-in memory | 32 GB |
| Interfaces |
|
| Protection, temperature conditions | IP67 (waterproof up to 1 m), −20 to +50 °C |
| Protection |
|
Exploitation
A question that often arises among those who are not familiar with the topic is why thermal imagers are so expensive? Even the most advanced cameras often cost less than thermal imagers, despite their modest photo and video capabilities.
The main reason is that the production of thermal imaging equipment uses extremely rare and expensive materials, as well as complex production technologies. For example, thermal imaging sensors are manufactured using complex methods that require multiple layers and the difficult task of sputtering vanadium oxide to create microbolometers.
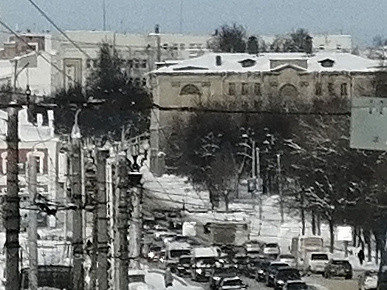
Another problem is that regular glass does not transmit infrared radiation. While a regular camera (on the left) sees the landscape outside the window, a thermal imager (on the right) perceives the glass as an opaque wall of a certain temperature.
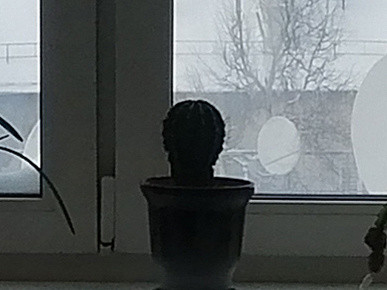
For this reason, germanium single crystal is used to create the optics of thermal imagers, since it is transparent in the required range of infrared wavelengths (from 1.8 to 23 microns). However, this single crystal requires growth to obtain a complete optical system. And the larger the size of the optics, the higher the production cost, which is especially important for serious devices.
The operating principle of any thermal imager is generally simple: it is similar to the operation of conventional digital cameras, except that it records longer electromagnetic waves that are in the range inaccessible to the human eye. This allows the thermal imager to see thermal radiation that is not visible to conventional cameras. It is important to note that the resolution provided by a thermal imager is much higher than that of thermal receptors in animals, allowing for a clearer and more detailed picture.
From the first attempt, it becomes obvious that the device lacks a stabilizer for observations without the use of a tripod. The video demonstrates shooting at maximum magnification (an image of a lonely plane high in the sky) and at the same time shooting without zooming in, at the minimum focal length. In both cases, the thermal imager was held in the hands.
But here you must immediately be disappointed in the possibility of using a stabilizer. The limitation lies not only in the complexity and cost of the optical stabilizer, but also in the fact that its presence would interfere with the operation of the laser rangefinder. Why is that? Let's look at this statement in more detail.
When the user activates the rangefinder, he sees a kind of sight on the screen, pointing to the point where the narrow laser beam is directed. However, if the device had a built-in image stabilizer, the sight would point to a different point. Because the operation of any stabilizer involves some “floating” of the image across the screen. The direction of the laser beam remains strictly fixed.
The result is a mismatch: the user sees a target on the screen, but the laser rangefinder measures the distance to another target located in a different location. This occurs because the stabilizer moves the image while the laser beam remains stationary.
For clarity, we will add animation to illustrate what will happen if an optical stabilizer is built into our thermal imager with a laser rangefinder. We used footage of an airplane flying at high altitude (although due to the shaking this material is not suitable for this article) and simulated the operation of the stabilizer. You can see that the plane always remains in the center of the frame (that's how the stabilizer works), but the frame with the laser rangefinder sight moves across the visible area. Would such a rangefinder be a useful tool?
Technically, it is possible to some extent synchronize the operation of the stabilizer with the laser sight so that the scanning laser beam is deflected along with the image on the screen. However, this is an extremely difficult task that will significantly increase the cost of the device, which is already high.
The situation is completely changed by using a high-quality tripod with a durable design that eliminates shaking. This is especially important if the observation is carried out over a moving object. In such cases, the tripod head must be specially adapted for video shooting. Unlike conventional photo heads, these heads use a special mechanism with oil liquid as a shock absorber.

Using such a tripod, even at maximum magnification, the image in the thermal imager will remain quite smooth, without sharp fluctuations and trembling. In the following video, you can evaluate the effectiveness of the tripod, and also see how far you can magnify the image using the presented thermal imager. We were even able to photograph the Moon. After all, it not only emits light, but also emits heat — this is what the thermal imager sees.
Although the tripod performed flawlessly, it should be noted that at maximum magnification, artifacts characteristic of digital zoom are noticeable in the image of the thermal imager. This may indicate that while the thermal camera likely has optical zoom, its 20x power is questionable. It seems that after a certain focal length threshold, normal digital zoom kicks in, which can result in a loss of image quality.
Having listened to the advice of experienced hunters, we set off with a tripod and a thermal imager outside the city, closer to nightfall. It turned out that the hunters were right: hares and other animals do indeed come out of the forest towards residential areas in search of food. The meeting with them was successful, and these brave creatures even came within 30 meters of us!
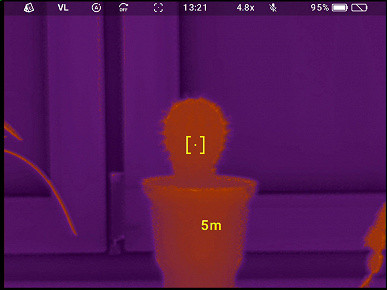
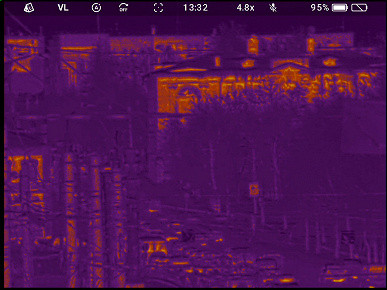
It is not possible to evaluate the resolution of a thermal imager, since the device is not able to distinguish lines on the test target. However, high detail is not critical for a thermal imager: its task is to determine the shape of an object and its approximate dimensions. In this regard, the thermal imager copes quite well, since it can distinguish between the car nameplate and the radiator grill quite clearly.
There are no questions regarding the operation of the laser rangefinder, as well as complaints about its accuracy. However, it is important to consider that the rangefinder can operate in both static and dynamic modes. Let's clarify this.
There is a scanning mode switch in the device settings. When it is turned off, pressing the rangefinder button leads to single measurements, while when the mode is on, the distances to various objects are continuously scanned from the first press of the button, and turns off when pressed again.
The quality of the built-in microphone and audio recording system in the thermal imager leaves much to be desired. This may only apply to the specific instance provided for testing. The sound recorded during video recording is likely to sound more like noise than clear sound. However, in the context of monitoring distant objects, the microphone is unlikely to be of significant benefit. Having a microphone might be useful just in case, but most likely won't be used.
Software
Using the software built into the thermal imager, its Wi-Fi adapter is activated, the color scheme changes, the sensor is calibrated, the microphone is turned on, etc.
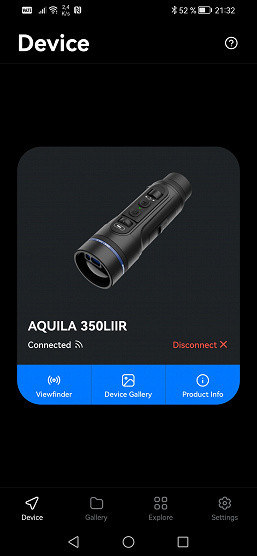
The ConoTech mobile app, available for both Android and iOS, is an example of a concise, lightweight, and effective program. It is an excellent tool with two main functions: remote viewing and control of recording or snapshots, as well as access to information stored in the device's built-in memory.

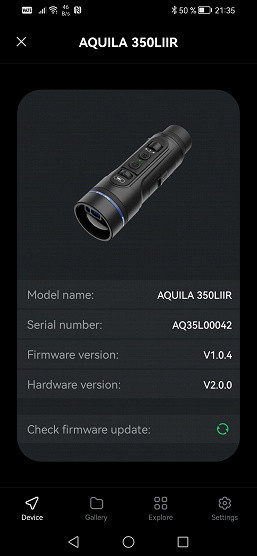
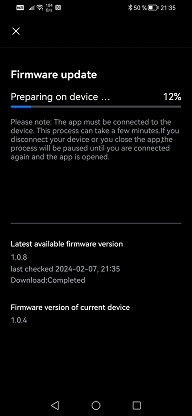
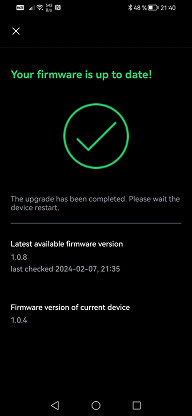
However, the mobile application also includes an important system function — updating the firmware of the thermal imager. This process is organized very conveniently: you do not need to switch between networks to download and transfer the firmware to the thermal imager’s memory. The program automatically updates the firmware, which eliminates unnecessary headaches.


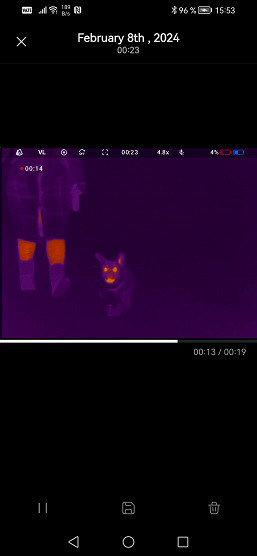
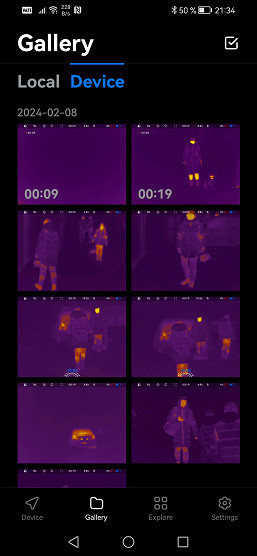
Using a mobile application on a smartphone, the user can carry out remote monitoring through a thermal imager while in a shelter at a distance of up to 30 meters (in the absence of obstacles). During remote monitoring, it is possible to start video recording or take pictures, which are saved in the internal memory of the thermal imager. Using the built-in gallery of files stored in the thermal imager’s memory, the user can transfer material to their smartphone. Videos stored in the thermal imager's memory can be viewed in the gallery without first downloading to a smartphone, thanks to the use of streaming video.
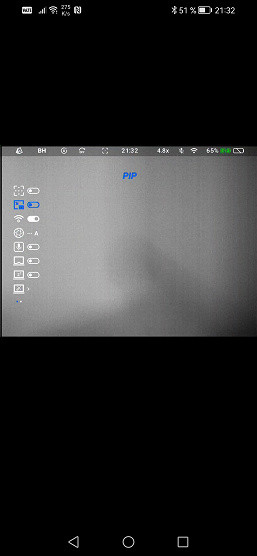
During observation, the user can expand the image to the full screen of his smartphone or tablet in landscape orientation. In this mode, various functions are available, such as changing the display color palette, adjusting contrast, and others.
conclusions
When using the ConoTech Aquila 350LIIR, you will appreciate its compactness and convenience. The device easily fits into a jacket pocket, despite its light weight. The rugged housing and waterproof design allow you to use the thermal imager in all weather conditions, even rain or low temperatures. Here are some more benefits:
- Compact and protected housing for silent operation.
- Precise focusing for clear images.
- 20x zoom for extra detail.
- Has a threaded hole for mounting on a tripod.
- Ability to use both main and backup power.
The only drawback is the high cost, but this can be explained by the complexity and high cost of producing such devices.