
Today our guest is an amazing thing — a compact corded circular saw Worx WX439. We chose the networked model of this device to avoid battery drain issues that could reduce performance. We were also interested in how light this tool (the weight of the corded saw without accessories is only 1.9 kg) would be convenient for everyday use with one hand, for both men and women.
The manufacturer promises us that cutting wood at an angle of 90° will be up to 46 mm. The kit also comes with discs for metal and tiles, and we'll be sure to check how they cope with their task.
Characteristics
| Manufacturer | Worx |
|---|---|
| Model | WX439 |
| Type | corded circular saw |
| Engine | brushed |
| Power | 480 W |
| Country of Origin | China |
| Guarantee | 2 years (+1 year when registering the device on the site and using it exclusively for domestic purposes) |
| Life time | not specified |
| Speed | 0-4200 rpm |
| TCT cutting blade diameter | 120 mm |
| HCS cutting blade diameter | 115 mm |
| Diamond blade diameter | 115 mm |
| Cutting depth |
|
| Smooth start | There is |
| Speed adjustment | There is |
| Additionally | Vacuum adapter, parallel guide, storage case |
| Dimensions (W×H×D) | 41×25×12 cm |
| Weight | 2 kg |
Equipment
The mini-saw arrived to us in a convenient plastic case.
It is roomy, reliable, with large plastic latches. Inside there are compartments for the saw itself, a parallel guide and spare blades.

Inside the case we found:
- the saw itself
- parallel guide
- vacuum adapter
- 3 replaceable discs (HCS, Diamond Coated Disc, TST 24T)
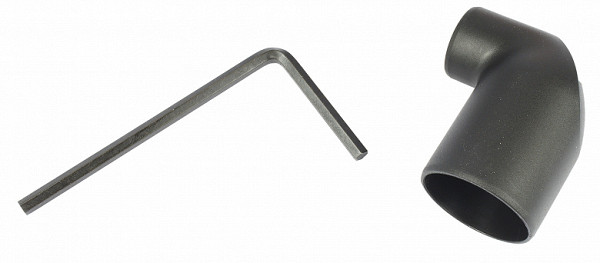
- hex key
- instructions and warranty card

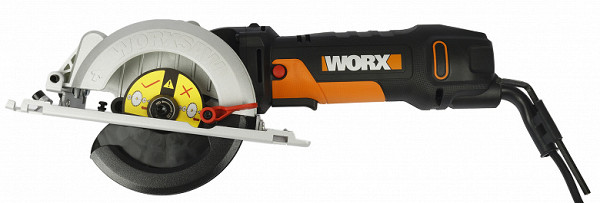
At first sight
An important aspect in any circular saw is the location of the saw blade, which determines whether the tool is right-handed or left-handed. Our saw has a blade located on the left, making it an ideal choice for right-handers.
In addition to high power (almost 500 W), this saw is also compact: it is 20% thinner than its analogues thanks to the narrow SlimBody body, which has been patented. This makes it comfortable for both men and women. The weight of the saw is pleasantly minimal — only 2 kg.
Another advantage of the saw is the high-quality cast sole with a slight upward bend (ski). Thanks to this shape, the saw can easily overcome any obstacles, be it a knot or an edge with bark.
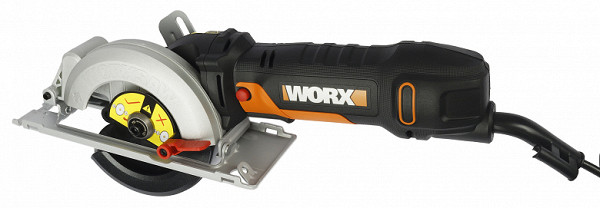
The plastic case in the corporate color (black and orange) is equipped with black rubber inserts. These inserts prevent the tool from slipping from your hands, even if you work with gloves made of unbleached cotton material. Bright colors also make it easier to find tools in sawdust and outdoor work.
The saw is equipped with a single control button — a start button located on the inside of the handle. Before pressing it, you must press the red safety button on the left, which locks the lever. This location of the lock release button clearly indicates that the tool is intended for right-handed users only.
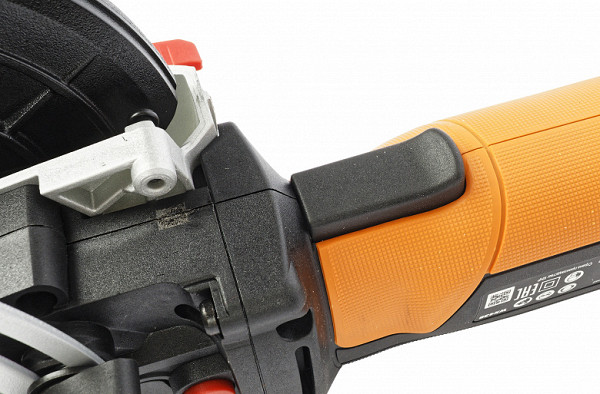
Start button
Safety button
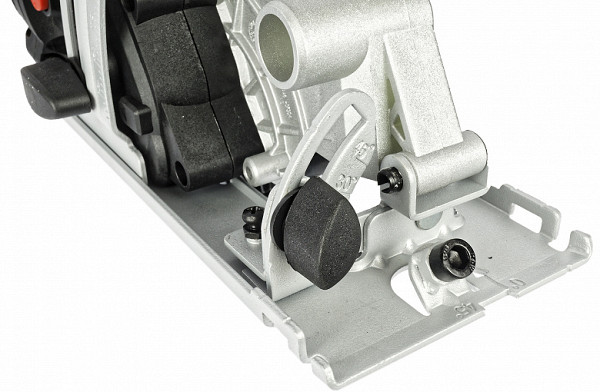
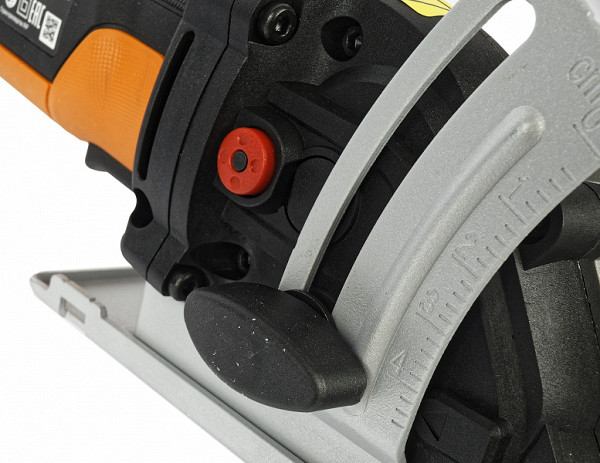
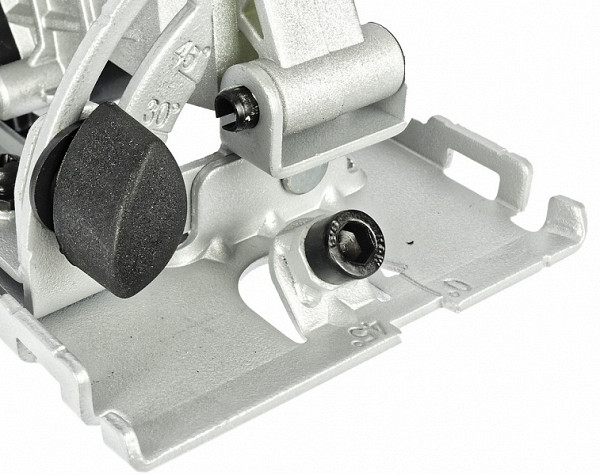
The saw sole allows you to change the inclination of the saw blade from 0° to 45°. On the front of the sole there is a special black stopper in the form of a rotary handle.
There is also a small cutout on the front of the sole with marks “0” at the beginning and “45” at the end. These markers help determine the location of the future cut depending on the selected angle of the sole. When sawing without tilting, the cutting line should coincide with the first mark (it is convenient to navigate along this strip). When selecting a 45° bevel, the cutting line will be parallel to the right mark.
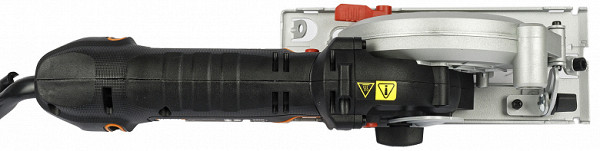
The cutting depth is adjusted using the tightening lever located in the lower right part of the body (when viewed from above along the sawing path).
The blade can be raised so that the teeth of the saw blade are level with the bottom edge of the sole, which means there is no cutting at maximum lift. By lowering the blade, the cutting depth can reach 46 mm when sawing at right angles. Adjusting the depth is useful, for example, for trimming a profile or cutting quarters.

Fully raised disc
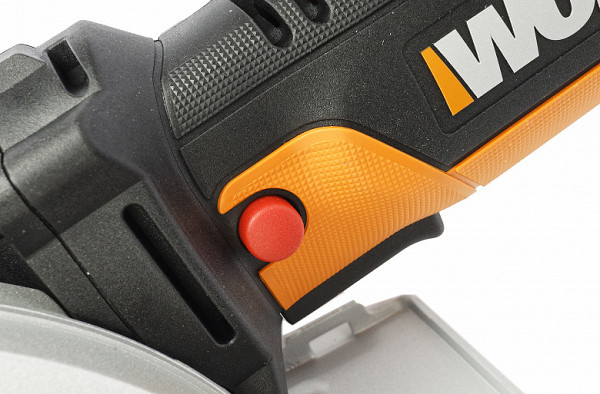
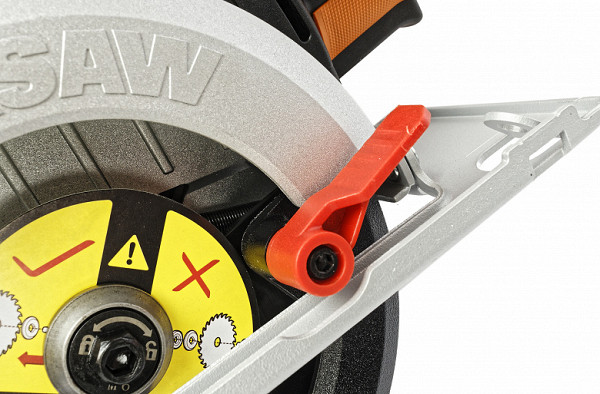
There is also a red button protruding forward.
This is a spring-loaded spindle lock button required to remove and install saw blades to secure their position. Additionally, the tie bolt on the saw blade is reverse threaded, meaning it must be turned clockwise rather than counterclockwise.
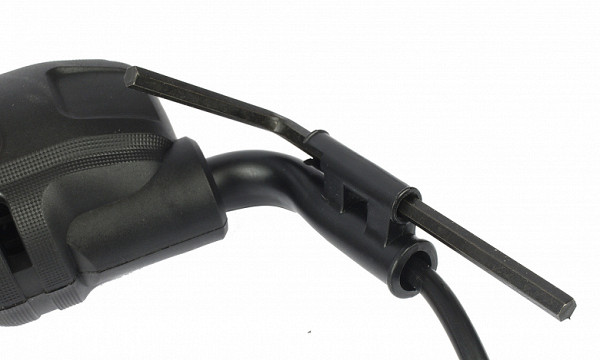
The hex key, designed to unscrew the bolt that secures the disk, is located on the power cable casing. It is inserted with the long end into a special recess and is securely fixed without affecting the behavior of the cable itself.
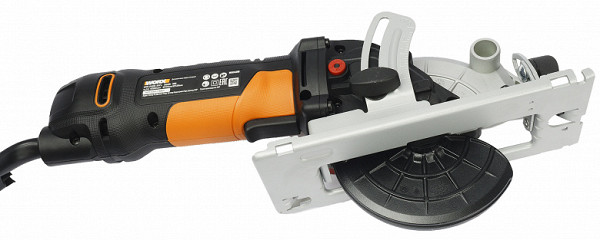
The connection pipe for a vacuum cleaner allows you to keep your workplace clean. It is installed in a special recess on a stationary metal protective casing and secured with the supplied bolt. It is important to ensure its safety, as the pipe can easily be lost.
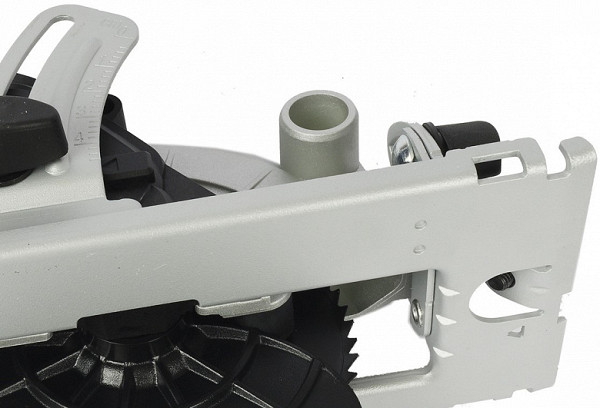
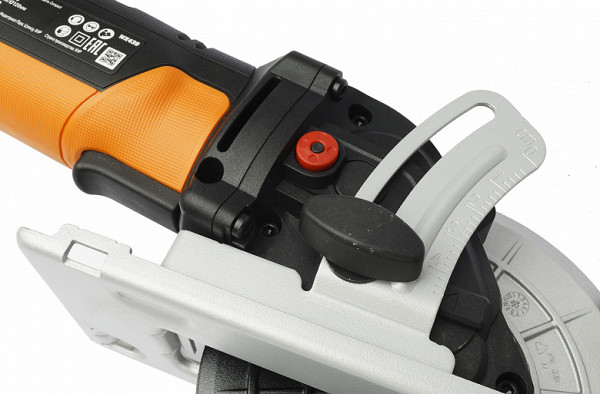
The included guide bar allows you to make precise straight cuts. To do this, simply secure the bar with a thumbscrew, pointing it in the desired direction and extending it to the required distance. Then you can make sawing, resting the guide on the side edge of the sawn or auxiliary board. In addition, the guide allows you to make repeated cuts of the same width.
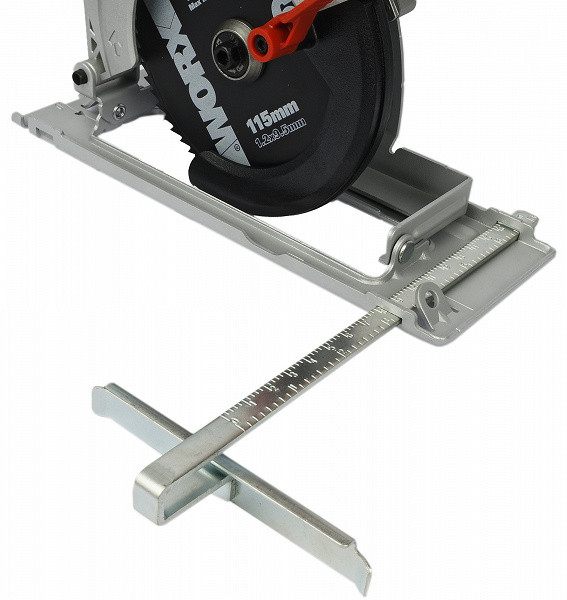
One screw included. It can be used to attach the guide bar to the soleplate in front or behind the saw blade.
In the saw in question, safety is ensured by the presence of a protective casing with a spring. This sliding lower guard is made of plastic and always covers the teeth of the saw blade, which prevents accidental injury when used correctly. However, it would be preferable if it were made of metal, given the increased strength requirements for working with rough materials.
On the outside of the casing there is a handle designed to lift the casing. This is necessary for making special cuts, such as gradual plunges. Under normal conditions, when cutting a part starting from the end, it is recommended not to touch the casing — it will automatically rise, coming into contact with the material being processed.

Plastic casing
Handle for lifting the casing
The tool comes with 3 replacement discs: HCS for metal, TST 24T for wood, and diamond-coated for tile/concrete.


Instructions
The instructions supplied with the saw follow the current trend of saving paper: technical illustrations are located on the first pages, followed by explanations in several languages in turn. In Russian, it takes up 9 pages, with the main focus being on safety instructions. However, we were able to find answers to all our questions.

Written in clear language, without strange or incorrect translations. Good.
Management, operation
The circular saw in question has a minimum of controls: a lock switch and a trigger switch that supplies power to the motor. However, before starting work, you should familiarize yourself with several safety rules.
First of all, the part that is planned to be sawed must be securely fastened. The shorter and smaller the part, the more important it is to secure it correctly. Supports for the workpiece should be located closer to the cut to prevent the workpiece from bending under its own weight, which can lead to the saw blade getting stuck and causing vibration.
Before starting sawing, it is also important to make sure that the teeth of the saw blade do not come into contact with the material being processed. After turning on the saw, start sawing slowly and without significant force.
To prevent unwanted kickback, the following rules should be observed:
- Hold the saw firmly, positioned to the side of the saw blade, but not in line with it.
- Do not allow the saw to be pulled out of the workpiece or pulled backward while the blade is rotating.
- Avoid applying strong forces when moving the saw forward, ensuring uniform sawing without sudden acceleration or deceleration.
It is also important to consider dust generation during operation. Sawdust and dust can accumulate significantly, especially in small spaces. It is recommended to connect the vacuum cleaner through a special adapter to collect dust from the outlet of the upper protective casing.
For a better understanding, it is recommended to watch the official video from the manufacturer. This will help you visually master the rules of working with a saw and avoid potential mistakes.
Miter sawing is basically the same as regular peeling. The main difference is the angle of the saw body and saw blade, while the sole remains horizontal. It is important to note that to achieve a clean cut, the depth of cut must be adjusted so that only one tooth of the blade remains under the workpiece. This not only improves the quality of the cut, but also reduces the likelihood of dangerous kickbacks and kickbacks.
Choosing the correct cutting depth requires some experience or a little calculation. It is recommended to practice on scraps of material to achieve optimal results.
Care
A circular saw, like any tool that produces a lot of waste, requires mandatory cleaning after each use. It is also recommended to check the tightness of the bolts that secure the metal pad to the sole from time to time. The instrument should be stored in a dry place, protected from freezing.
Our measurements
The power we measured corresponds to the parameters declared by the manufacturer. Obviously, the power can vary depending on the complexity of the material being processed (on average from 300 to 400 W).
The noise level reaches up to 89 dBA.
Testing
So, after getting acquainted with the appearance and capabilities of the saw, it’s time to start practicing and sawing something. Let's start with the simplest and most common material — laminate boards. Often such tools are purchased for renovation work in city apartments, where it is necessary to cut laminate flooring, door frames, countertops… This is one of the most common scenarios for using circular saws.
Laminate
We take a laminate board, place it on a flat horizontal surface (we didn’t have one on hand, but we did find two chairs) and start sawing.
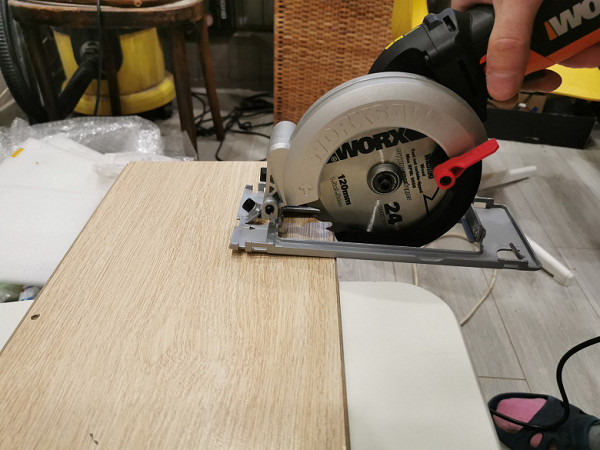
Using a parallel guide, you can easily and quickly set the desired size of the piece that needs to be sawed off. This will greatly simplify the process of creating “offcuts” that will need to be laid along the walls.
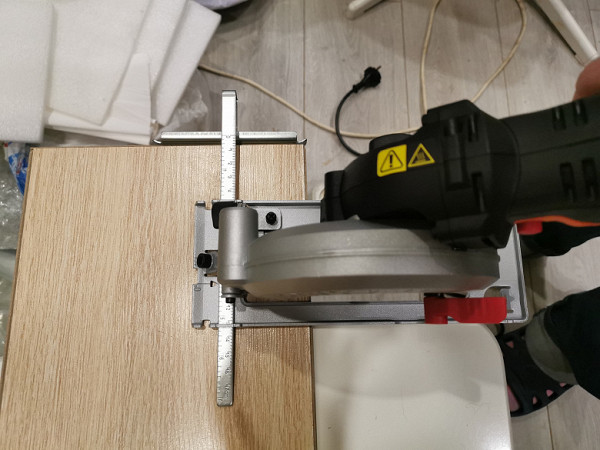
The saw copes with the task effortlessly. One cut takes literally a few seconds.
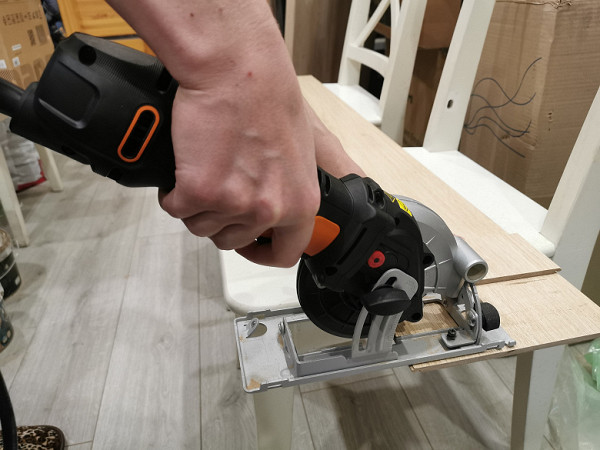
It took us a couple of test runs to get used to the tool, after which the cut began to turn out smooth, without chipped edges.
The amount of dust and chips is relatively small.
With proper dexterity, you can even cut out not too small rectangular holes right inside the board. However, in this case, you must manually lower the saw blade and make sure that the cut is not longer than necessary.
To be honest, we didn't do it very well. We tried several times, but we couldn’t get a neat and even cut out rectangle on the first, second, or even third try.
The edges were not very smooth, and it was difficult to follow the markings exactly. However, we admit that it is our own fault, because our hands are not very steady. We are sure that with some training everything will definitely improve.
LDSP
The next test is laminated particle board. We were confident that the saw would cope with this task without any problems. We were interested in whether chips would appear along the edge of the cutting area.
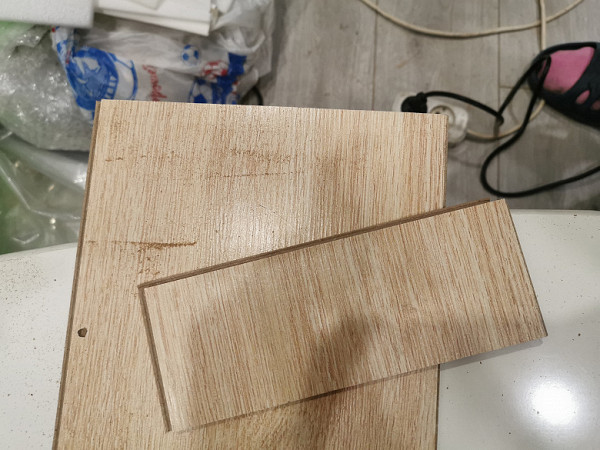
We took a small piece of laminated chipboard and made several test cuts.

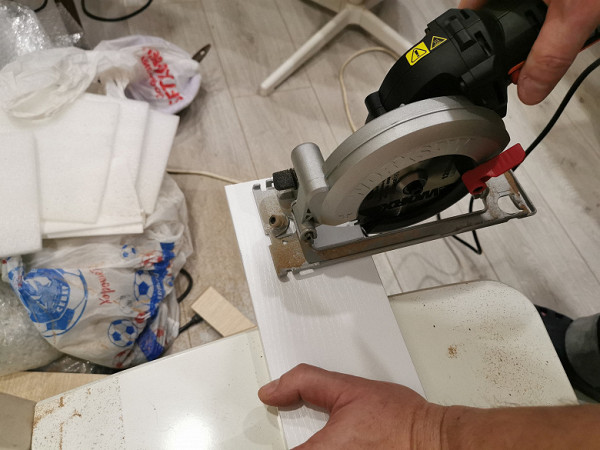
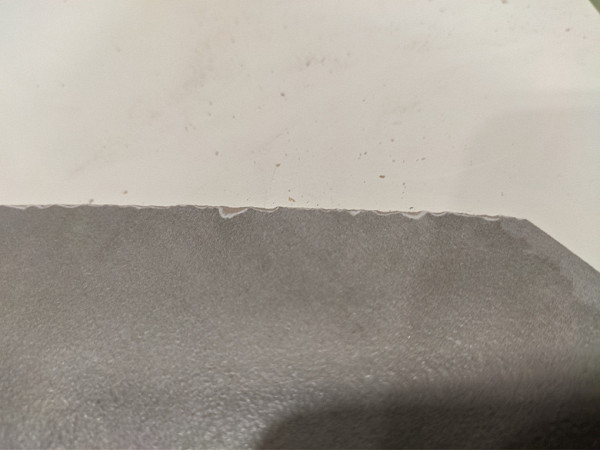
The first result is not ideal. The decorative coating is chipped along the edge.
A little later it became clear that the sheet needed to be secured more carefully (to prevent even the slightest movement). Observations also showed that chips more often occur on the front side, so it is better to saw laminated chipboard from the back side.
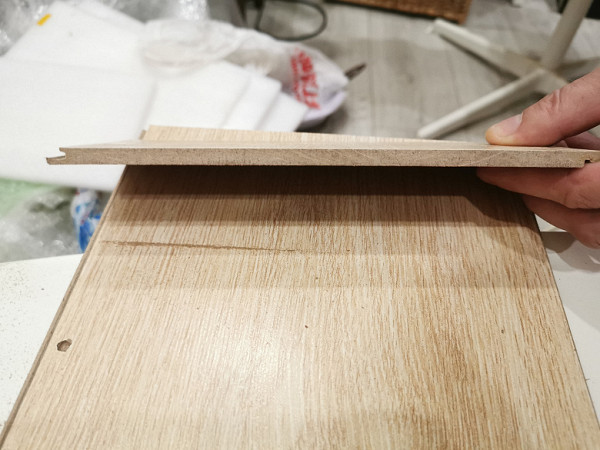
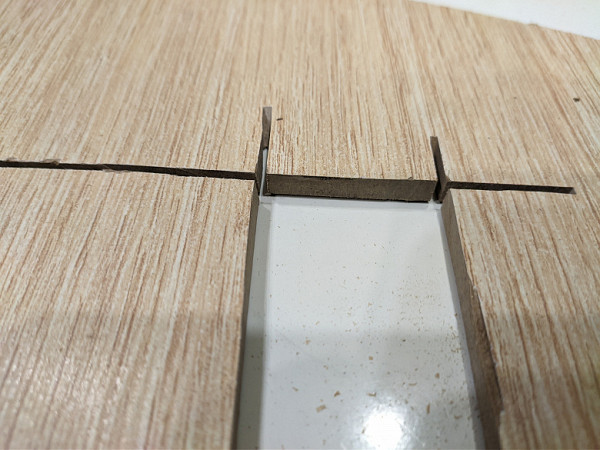
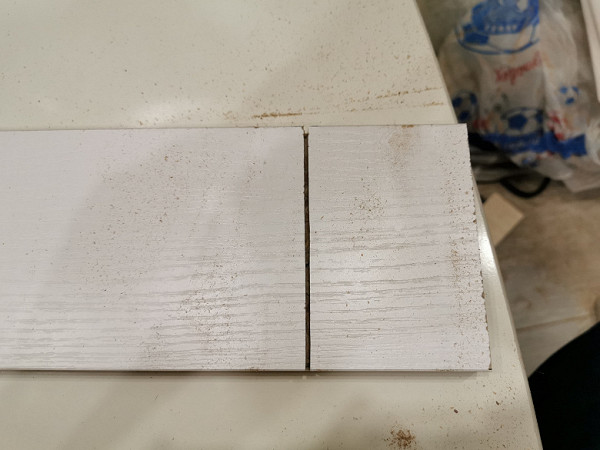
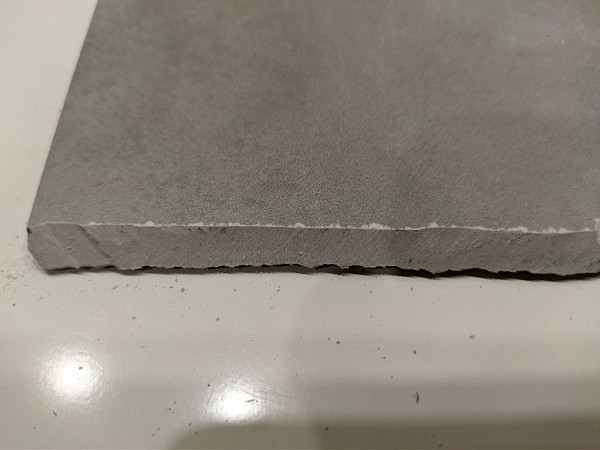
We also checked how the saw copes with cutting to a given depth on laminated chipboard.
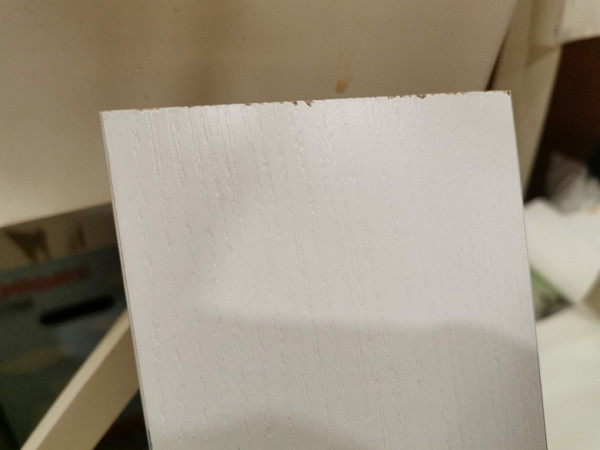
The result turned out to be almost perfect: there were almost no chips, the cut came out smooth.
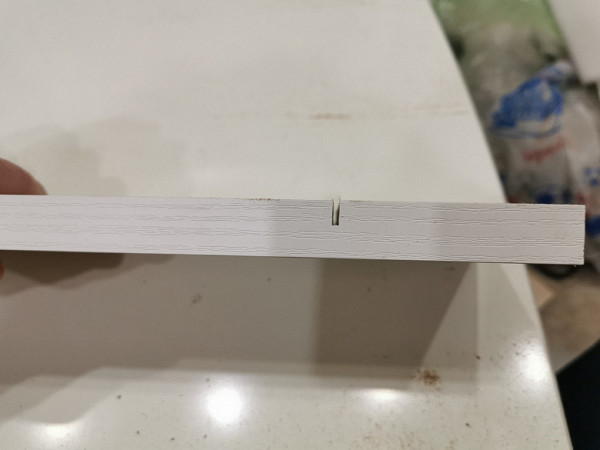
This is what the result looks like from the side.
Tile
Working with tiles requires experience, quality tools and the ability to use them. Therefore, we began cutting the tiles with caution.
And our fears turned out to be justified: the first cut was not entirely successful. Despite the relatively smooth cut, a chip appeared on the corner of the tile.
Let's try again. It's already better, but we couldn't avoid small chips along the edge of the cut. We noticed that chips occur when we accidentally change the speed of the disk along the edge of the tile.
We fix the tile as securely as possible and try it a third time. Again, not perfect, but no more large chips. After this, you can start sanding the edge using a “turtle” type grinding wheel, and the result will be quite decent. If you need to cut the tiles at an angle of 45 degrees, then even larger chips can be removed during subsequent sanding.
Our experience has taught us (again) that to achieve a quality result when working with tiles, securing them securely before cutting is key. Fixing large tiles was relatively easy, but with small tiles like ours it can be difficult. Keeping her completely still without the use of additional devices was not so easy.
Metal tube
The manufacturer's video shows that the saw can easily cope with various metal and plastic structures — building profiles, plastic water pipes and other materials.
We had a blackout curtain with a metal fastener, which we successfully sawed off using our saw.

Pre-cut the curtain fabric to the desired width...
Then they sawed off.
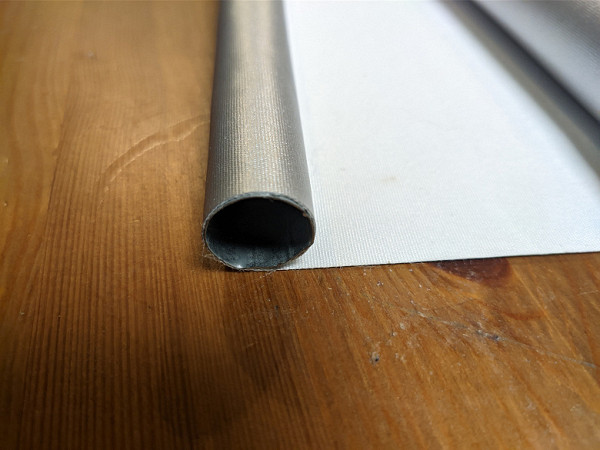
As we can see, the cut turned out to be smooth and quite neat.
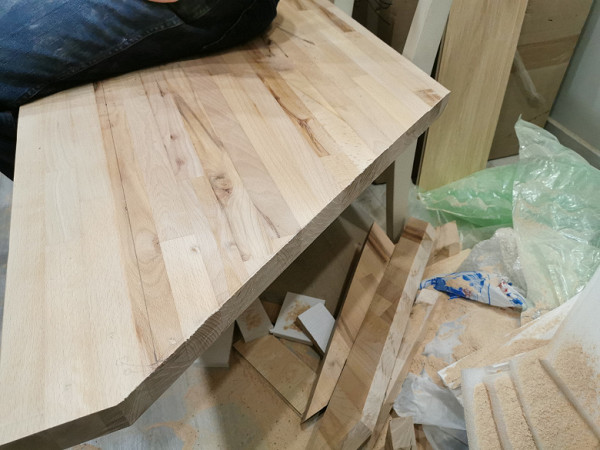
Tabletop
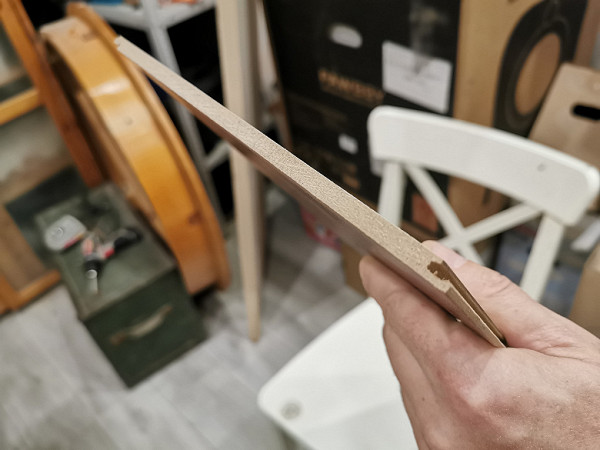
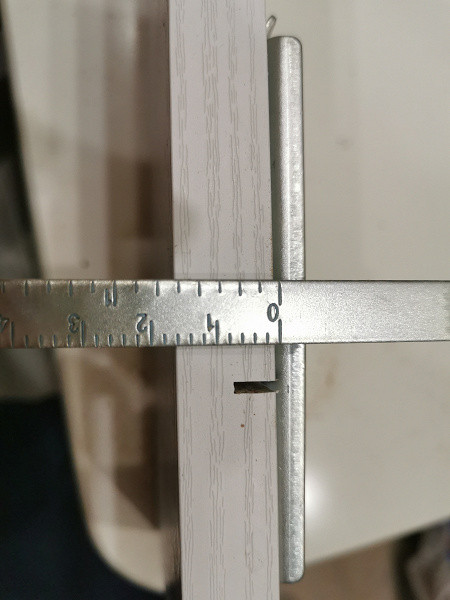
Finally, let's do the main test for the saw. Let's cut a wooden tabletop about 3.5 cm thick.
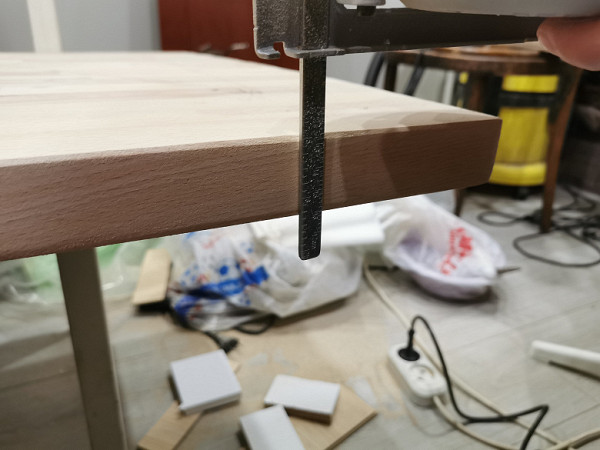
It must be said that we are not exactly sure what kind of wood was used here. Solid oak? Ash? Perhaps one of the readers can tell us.
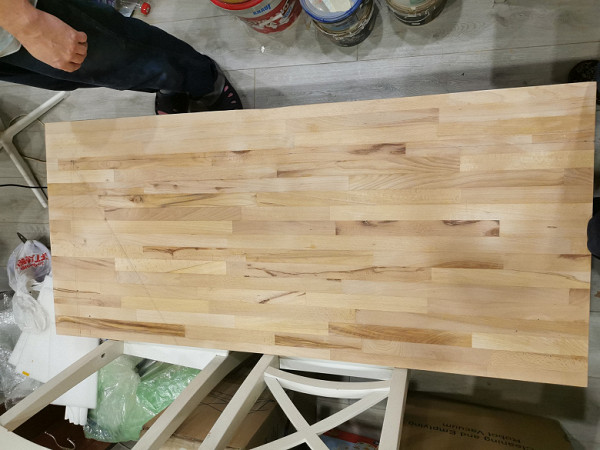
The tabletop is supposed to be used to make a corner “bar” counter. We need to make two saws — one at a right angle, the second obliquely.
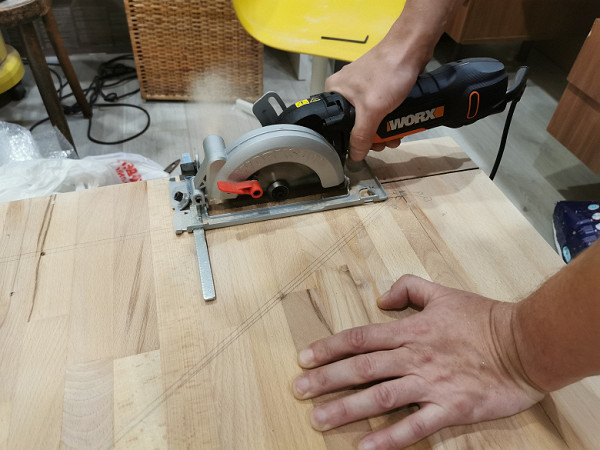
The first sensations are that it is not sawed quickly, but evenly and without noticeable loads on the saw.
The saw moves forward confidently.
The first result is excellent.

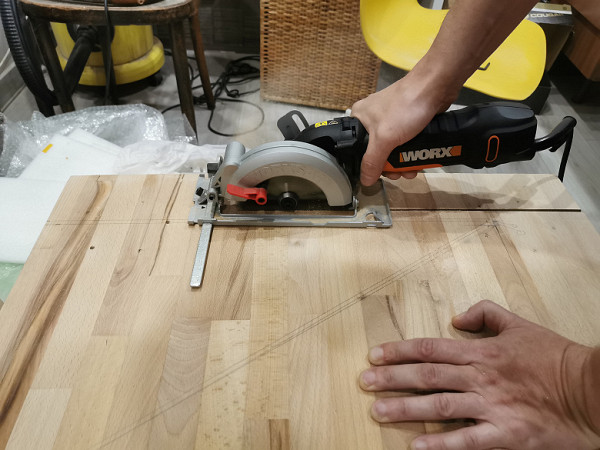
Thanks to the large mass, the tabletop did not move or shake during cutting, so everything turned out almost perfectly.
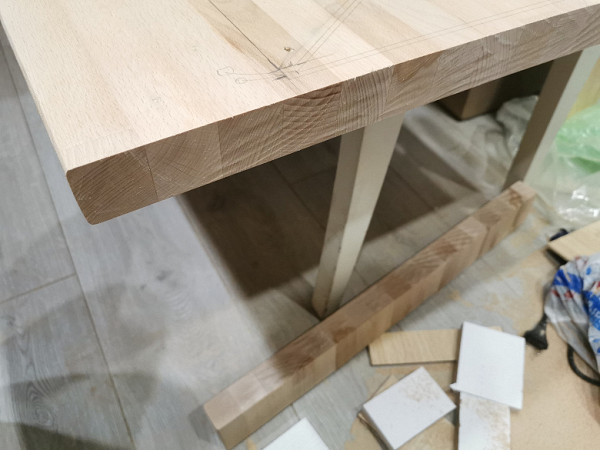
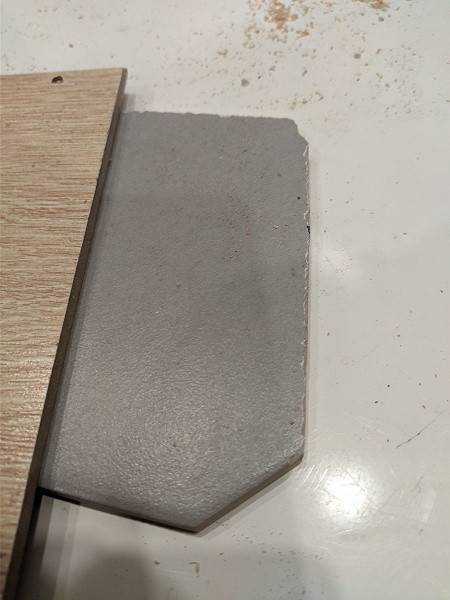
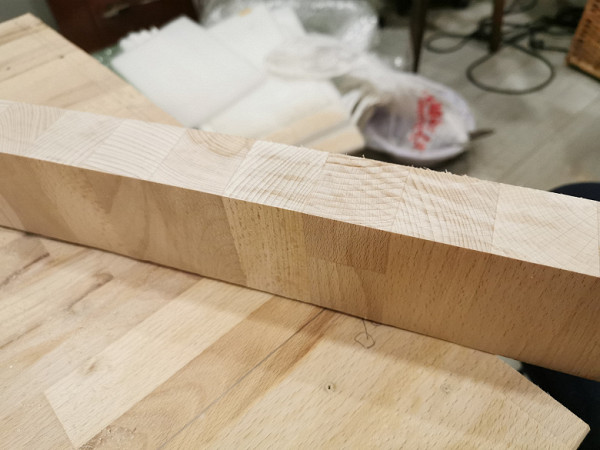
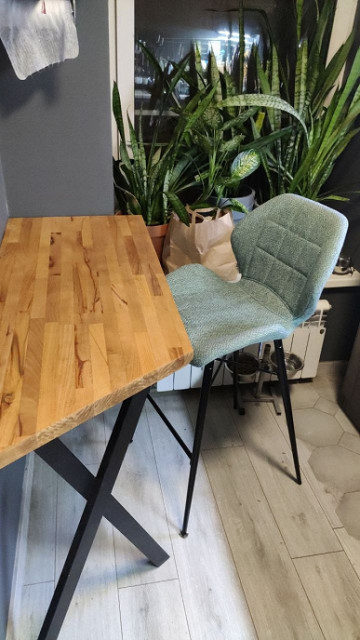
We make the second cut at an angle close to 45 degrees. And again almost perfect. All that remains is to polish off a couple of burrs.
Here's another close-up photo of the edges.
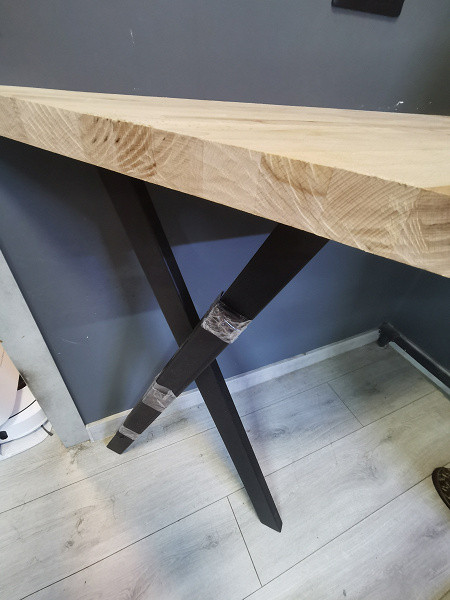
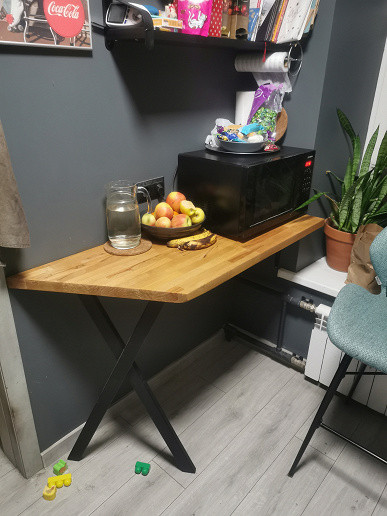
Well, everything is ready for the production of the kitchen counter. We place the tabletop on the base and attach it to the wall...


Then cover with oil.
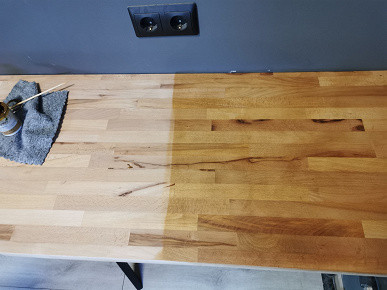
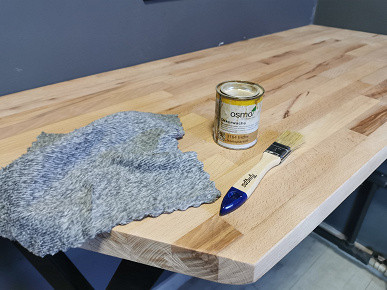
Here is the final result.
conclusions
The Worx WX439 is a compact circular saw with a narrow body designed for cutting materials such as wood, metal and tile. The saw is mains powered and is ideal for use in both the workshop and home repairs. It is compact and easy to store, allowing for quick and easy disc changes. Due to its weight and size, it is easy to take out and comfortable to hold in your hand, unlike large tools.
During testing, we used the saw in both male and female hands, and both options were comfortable. Operating the tool was a pleasure, and the ability to connect to the network eliminates possible problems with speed during long-term work.

This device will appeal to novice craftsmen, those who regularly perform small jobs around the house, as well as professionals who need a convenient and compact tool without unnecessary complications.
We were very pleased with this model of saw, although it's worth noting that our tile and metal working skills still need some improvement to achieve neater results.
Pros:
- compactness
- stylish appearance
- quite high power
- ability to work with wood, metal, tiles
- ability to cut at an angle
Minuses:
- not the most common type of disk