
The DreameBot L10s Pro Ultra [Heat*] robot vacuum cleaner at first glance seems to be just a slightly modified version of the popular DreameBot L10s model. This is partially true, since most of the functions and capabilities of these two robots are similar. However, there are significant and interesting differences between them.
* on the manufacturer’s website the same model is mentioned both with and without the “Heat” prefix.
Both models perform dry and wet cleaning, automatically empty the dust bin, and automatically clean and dry mops. For navigation, they use lidar, supplemented by a built-in video camera.
Let's take a look at the «pro» version of the L10s and check it out!
Characteristics
| Manufacturer | Dream |
|---|---|
| Model | L10s Pro Ultra |
| Type | robot vacuum cleaner with self-cleaning station |
| Country of Origin | China |
| Guarantee | 1 year |
| Life time * | 3 years |
| Sensor type | LDS (lidar), infrared, mechanical |
| Type of cleaning | dry, dry/wet |
| Power | 75 W |
| Suction power | 7 kPa |
| Maximum noise level | 59 dB |
| Self-cleaning station | There is |
| Battery | Li-Ion, 5200 mAh |
| Working hours | up to 170 minutes |
| Wireless control | Wi-Fi, 802.11a/b/g/n, 2.4 GHz |
| Dust collector capacity | 300 ml |
| Dust container capacity of the docking station | 3.2 l |
| Water tank capacity | 0.08 l |
| Dock station water tank capacity | 4.5 l |
| Dirty water container capacity | 4 l |
| Weight | robot weight — 4.1 kg, station weight — 9.2 kg |
| Dimensions | robot: 350×350×97 mm, base station: 457×340×591 mm |
| Length of network cable | 1.5 m |
* Contrary to popular belief, this is not a period after which the device will necessarily break down. However, after this period, the manufacturer ceases to bear any responsibility for its functionality and has the right to refuse to repair it, even for a fee.
Equipment
The vacuum cleaner comes in a double box. The outer one (made of technical cardboard) is intended for transportation and storage of the device.
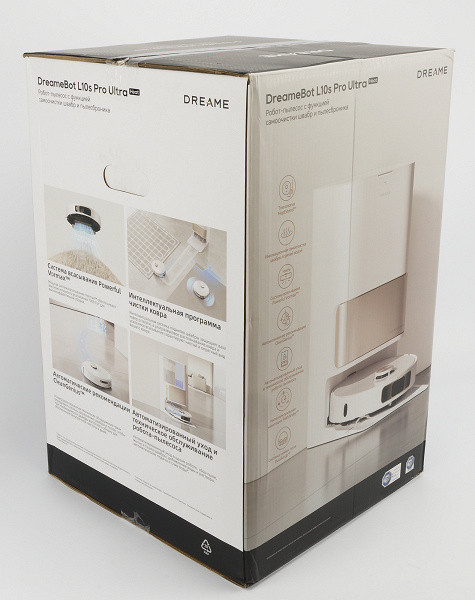
The internal, front box is decorated in gray and white colors with full-color printing and slotted handles for easy carrying. The front side shows a robot standing on a base, and the side faces list the main features of the model and images of the key elements of the vacuum cleaner.
Inside the box there is a base and another box with the robot, accessories and removable parts.
Opening the box we found:
- the vacuum cleaner itself with a garbage container
- base for cleaning and charging
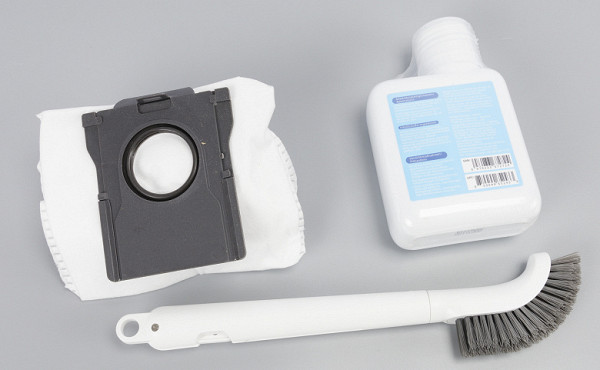
- spare disposable garbage bag (the first one is already installed in the base)
- one side brush
- two mop holders with mops installed
- container with cleaning agent
- brush for cleaning the robot
- electrical wire
- user guide
As you can see, the manufacturer did not include many replacement accessories, except for a spare garbage bag.
Although the retail price of the device is quite high, brushes, bags and mops will have to be purchased as they wear out. If you plan to use the vacuum cleaner for a long time, it is better to immediately stock up on consumables while the model is current and they are available for sale. First of all, you should check the availability on the Dreame website, and if necessary, you can contact Aliexpress if you are satisfied with non-original consumables. At the time of testing, original accessories were also available on Ozone and Yandex.Market.
At first sight
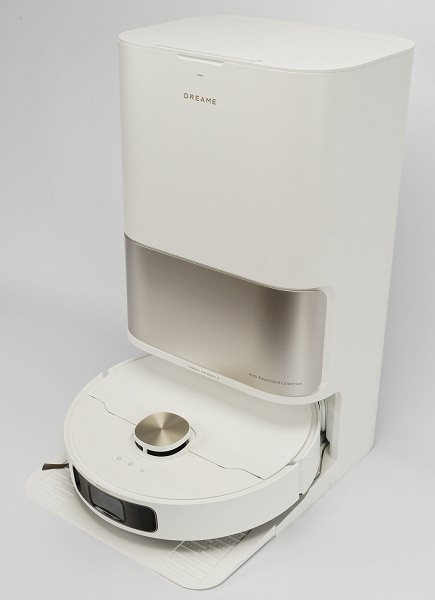
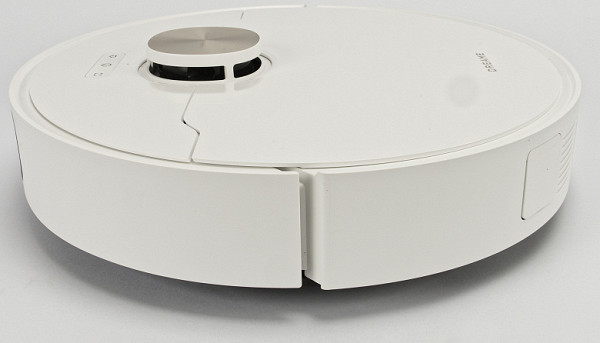
Like most robot vacuum cleaners, the Dreame L10s Ultra has a round body. It is made of white plastic, pleasant to the touch and visually attractive.
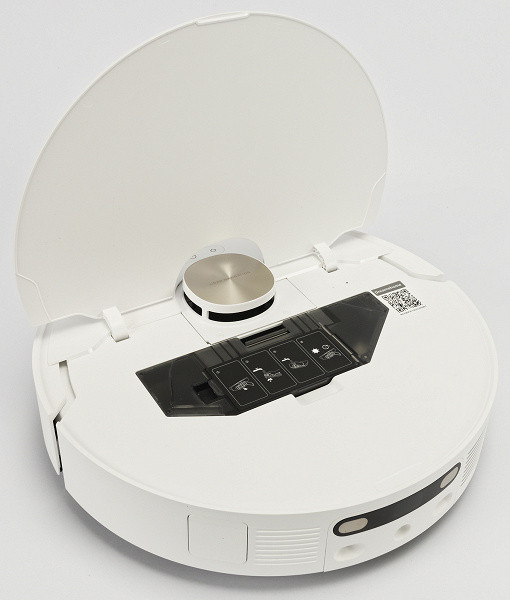
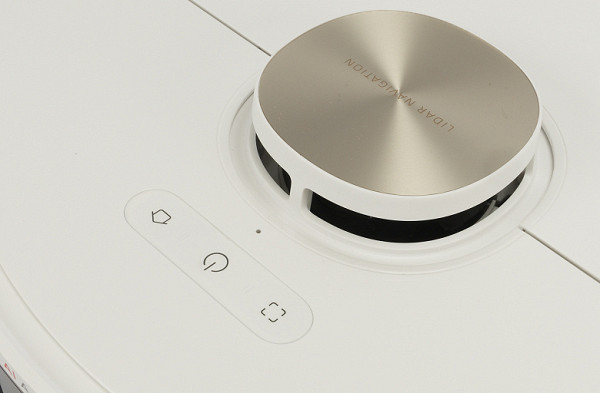
The robot is slightly larger than standard sizes: its diameter is 35 cm. The manufacturer’s logo is located on the top panel, and in the upper part there are three buttons with white LED backlighting.
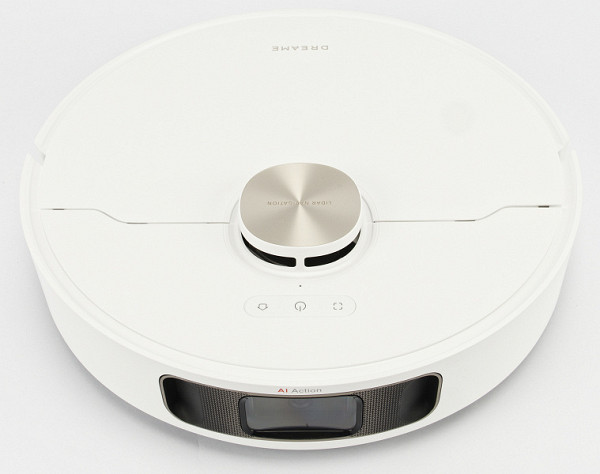
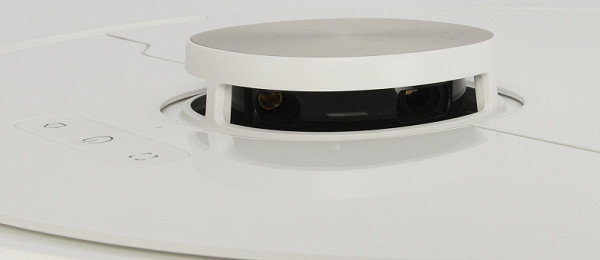
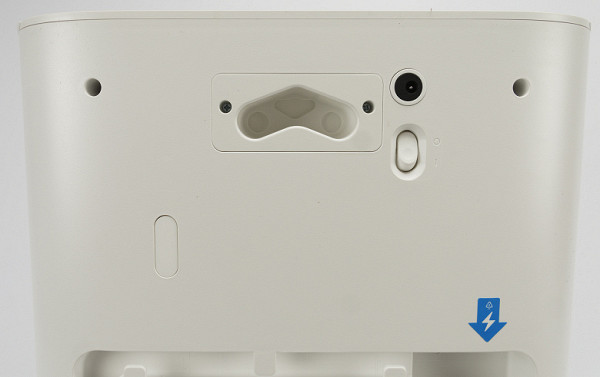
Inside the central turret, a laser pair of emitter and receiver rotates at high speed. Using an LDS system, this model determines room boundaries and the location of obstacles, creating an accurate and detailed map in a matter of seconds. On the turret itself there is the inscription Lidar Navigation, which allows even uninitiated users to understand its purpose and what is inside.
Between the lidar turret and the control buttons there is a microphone that looks like a small hole in the body.
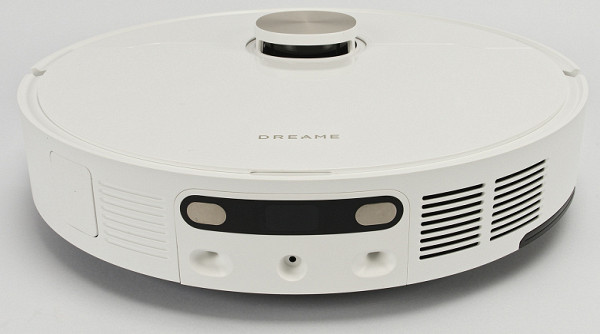
The robot has a movable bumper on the front, which also serves as a physical collision sensor. More budget models have a bumper equipped only with infrared sensors, but our model has a video camera between them, which acts as an intelligent sensor. Traditional sensors are located to the right and left of the camera.

The user can access the camera using a mobile application, which we will talk about later.
Let's continue to look at the sensors. On the brush side there is a special sensor that helps the robot determine the distance to the walls. Thanks to this, he can move along the walls almost closely.
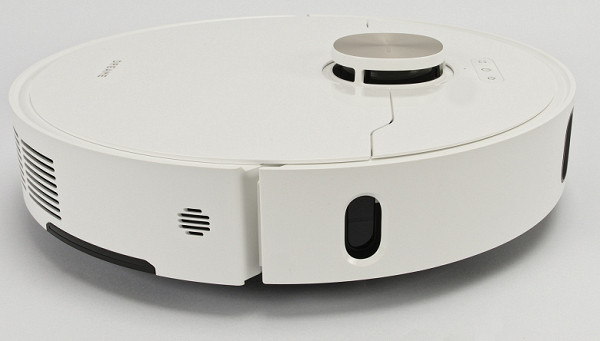
From the same side we see the speaker grille.
There are no sensors on the opposite side. Here we see, perhaps, a hole for discharging collected garbage.
The air outlet grille is located in the “feed” of the robot, and under the body you can see a nozzle for wet cleaning with an installed microfiber cloth.
On the back of the robot there are charging contacts (top), a hole for automatic refilling with water (in the center), and connectors for docking with the base (right and left).
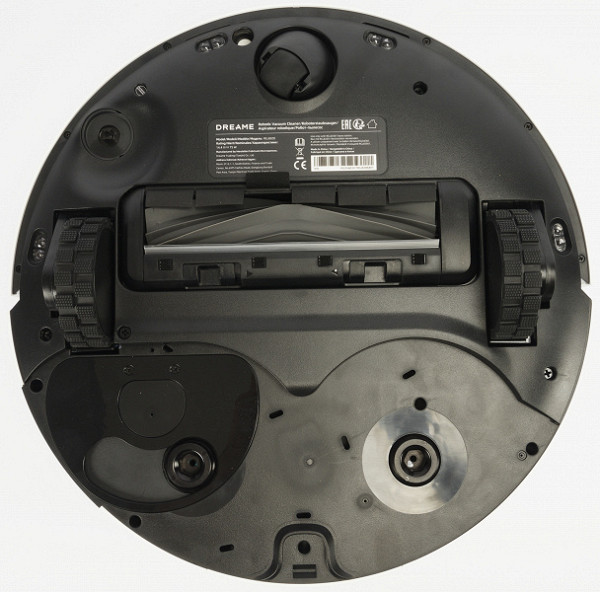
The robot's chassis has a traditional design. The robot is driven by two drive wheels, complemented by a third support wheel at the front. The suspension pitch of the drive wheels ranges from 7 to 36 mm. Pronounced treads provide good grip on all types of floor coverings.
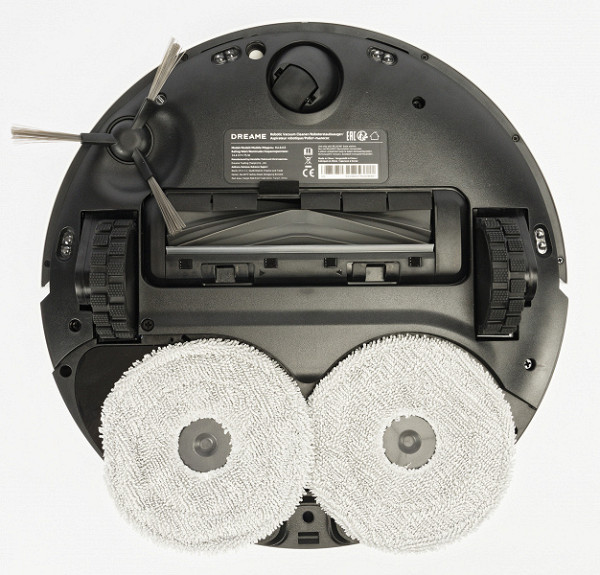
Let's immediately mention the sensors. On the bottom of the robot (front and sides) there are four surface sensors that detect height differences, preventing the robot from falling, for example, from a ladder. In front, to the left of the drive wheel, there is a sensor responsible for recognizing carpets.
The only side brush is located on the right (when looking at the vacuum cleaner from above). It is attached without special tools using a regular latch and is securely held on the axis.

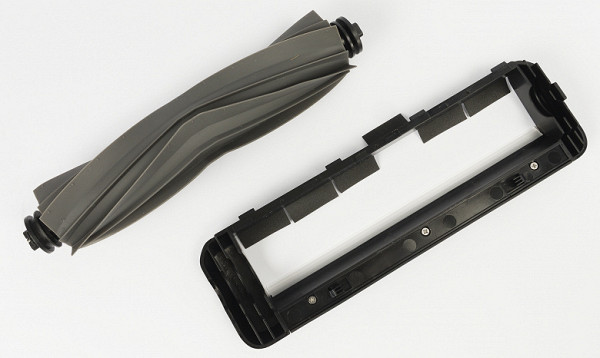
The central brush lacks the usual rows of bristles; instead, soft V-shaped slats are used, arranged in six rows. The brush mounting frame does not have jumpers or other obstacles, which avoids threads, wires, laces and similar objects from getting tangled.
The brush is slightly spring-loaded, which should provide better grip on the surface being cleaned.
For wet cleaning, two “mini mops” can be attached to the bottom of the vacuum cleaner, consisting of a plastic base and a fabric napkin, which is secured with Velcro.
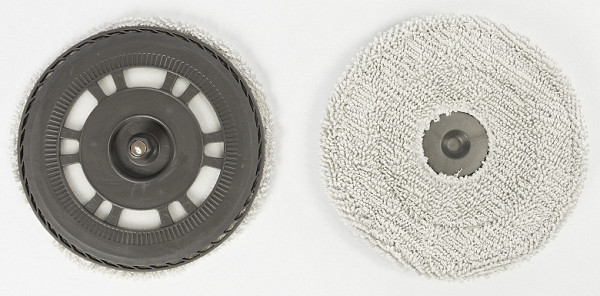
The mop bases are held in place using magnets, making them easy to install and remove.
Looking ahead, we note that the robot automatically recognizes the presence of mops and blocks the wet cleaning mode if they are not installed.
Note that one of the mops is equipped with a retractable system that allows it to protrude beyond the robot body. This improves the quality of wiping the floor along the walls. While the second mop is fixed in place and does not move out.
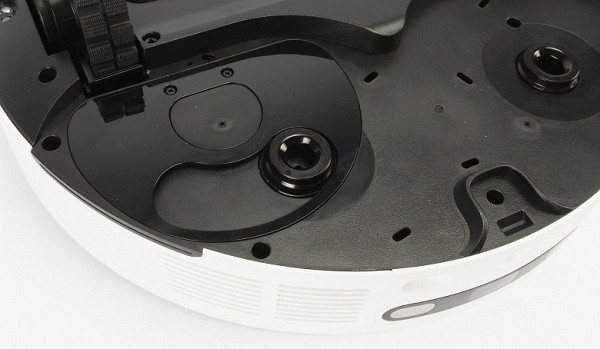
There is no need to pour water into the robot, as it is automatically refueled at the base.
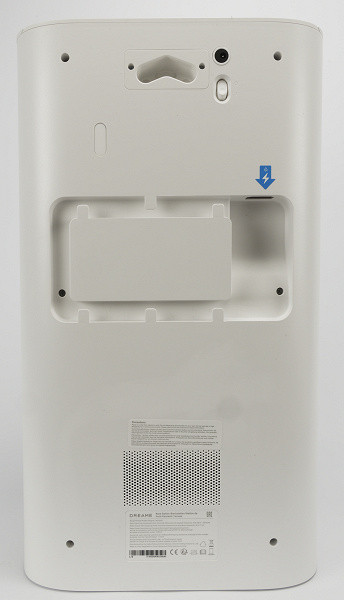
The battery compartment is located at the front of the robot. To access it, you need to remove the bottom panel completely.
The battery is an assembly of eight AA cells covered with shrink film, with a nominal capacity of 5200 mAh.
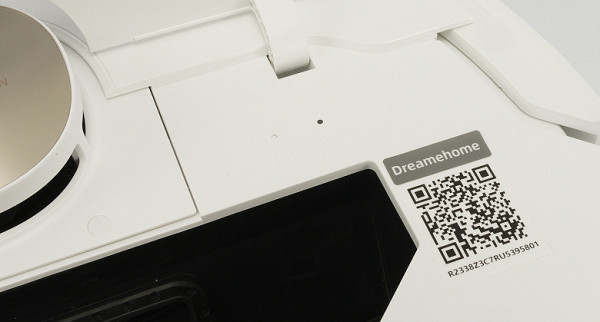
Under the top panel there is the device serial number and a QR code for installing the Dreamehome proprietary application. There is also a Wi-Fi connection indicator and a recessed reset button.
There, under the lid, there is a garbage container.
The container is made of translucent gray plastic.
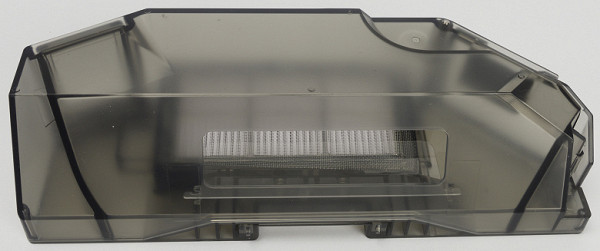
On the top panel there is a sticker with brief care instructions.
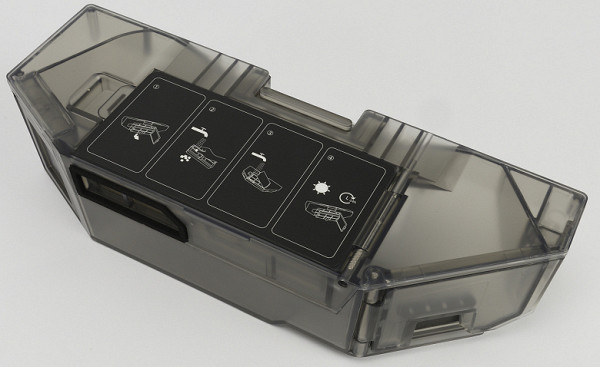
If you remove the container, you can see two additional holes on its body through which debris is sucked into the self-cleaning station.
The container can also be emptied manually. To do this, you need to open the side cover and pour out the garbage.
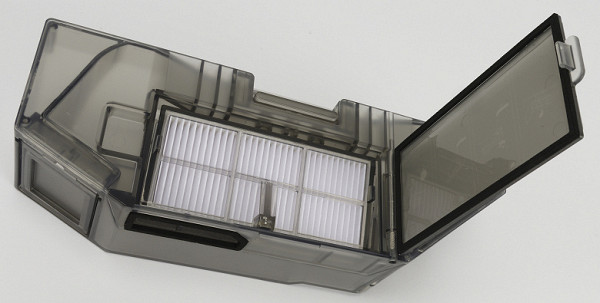
Filtration is performed using a fine cleaning module, which includes a fine nylon mesh and a rectangular HEPA filter. These items will need to be removed and cleaned manually from time to time.
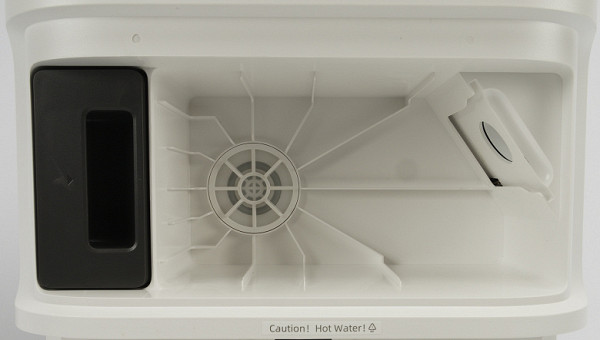
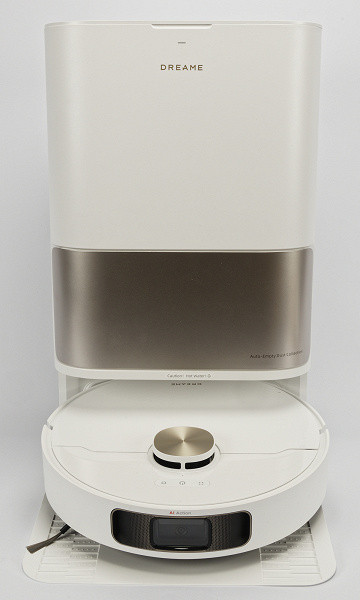
Now let's look at the base station.
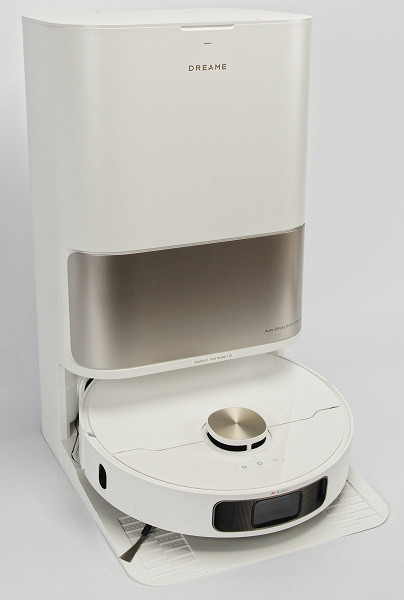
Let's say right away that she looks more than impressive. Largely due to its size. At the top there is a logo and an LED indicator for network connection.
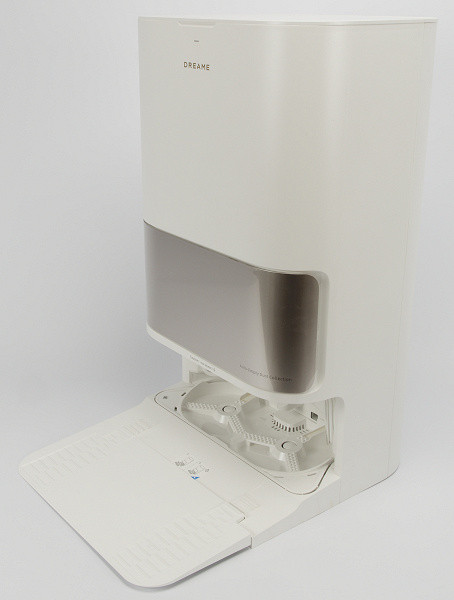
On the back there is a power button, a connector for connecting an electrical wire and a compartment for winding its excess.
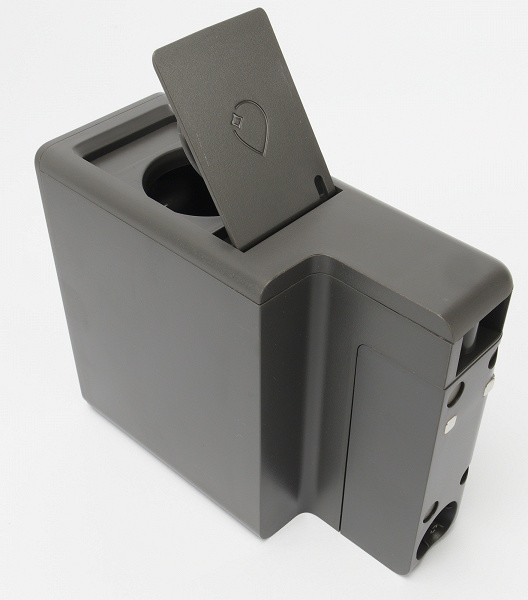
At the top of the base there is a special socket for connecting an installation kit for automatic water supply and drainage.
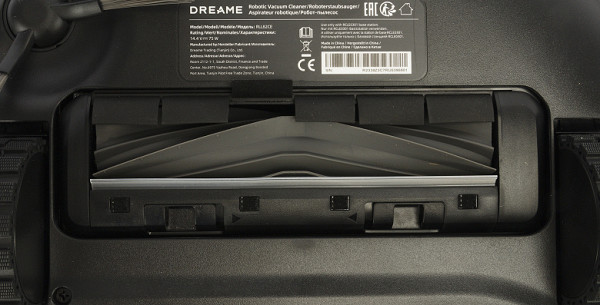
At the bottom of the base station there are anti-slip foot stickers and a sticker with technical information about the model.
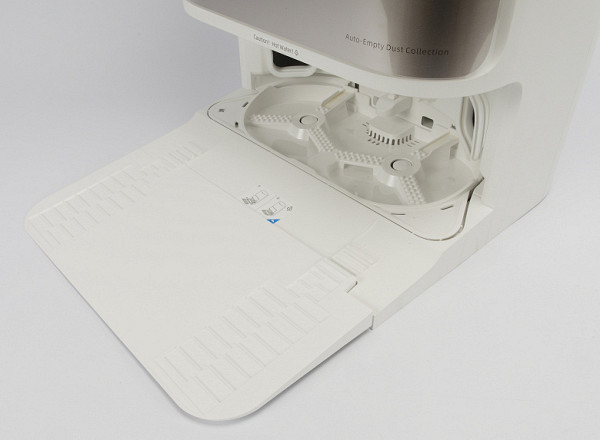
The base station is equipped with a wide console for the robot to enter. In the center of the parking niche there are contacts for charging, on the sides there are two holes for self-cleaning (debris disposal). Between the charging contacts there is a connector for automatically refilling the vacuum cleaner with clean water. There are also two small holes at the bottom for cleaning mops.
At the bottom of the base station there is a self-cleaning system for mops. After completing wet cleaning, the mops are automatically washed, wiped on a special plastic frame and even dried with warm air. The station is capable of heating water for cleaning mops up to 58 degrees — a new feature not found in previous models.
The ladder for the robot to enter and the device for cleaning mops are removable, so they can be easily dismantled and washed separately, for example, in a sink.
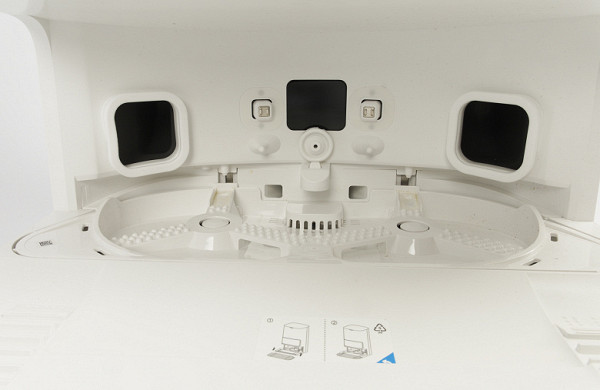
A little higher, under the removable side cover, there is a trash compartment.
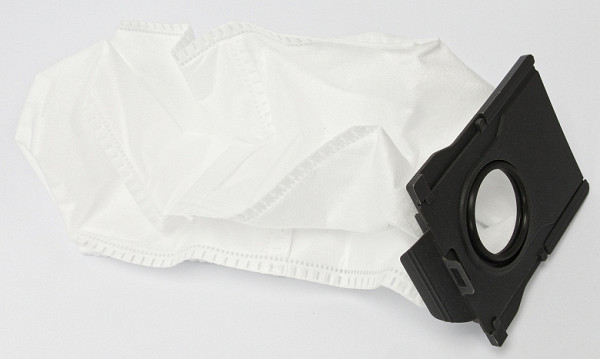
A disposable bag is installed here, into which the collected dust will fall.
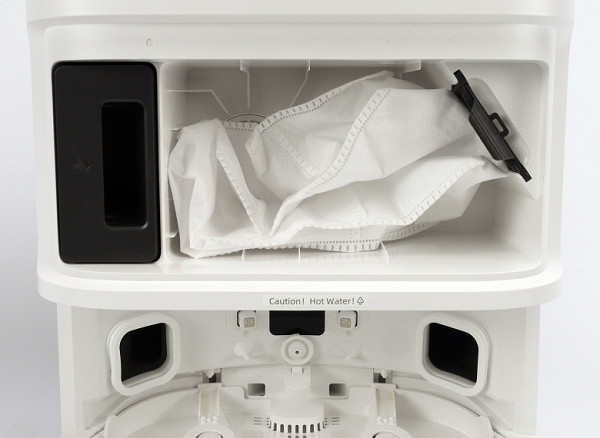
The bag is equipped with a plastic frame (instead of the usual cardboard), which ensures quick and convenient installation. The frame has a latch that securely closes the bag when removed, preventing the contents from spilling on the way to the trash can.
In the base, the frame installation location is equipped with a mechanical sensor that will not allow the self-cleaning process to start without a correctly installed bag.
The grille covering the stationary vacuum cleaner is protected by a thick nylon mesh, which prevents damage to the built-in vacuum cleaner by random debris if the bag breaks.
On the left side of the waste compartment there is a container for detergent. Cleaning solution should be added as needed, although you can do without it.
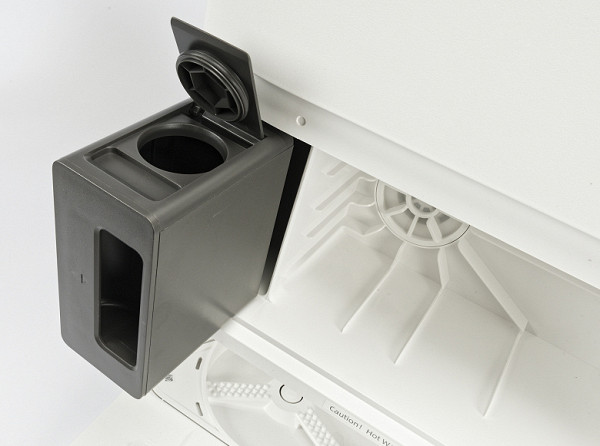
It's nice that you can simply add detergent from the bottle rather than using disposable cartridges. However, it is worth remembering that the use of cleaning products not approved by the manufacturer is prohibited. An attempt to save money and fill a container with non-certified products can lead to unexpected problems.
At the top of the base there is another (this time a hinged, rather than removable) cover. A brief instructional hint is pasted on the inside of the lid.
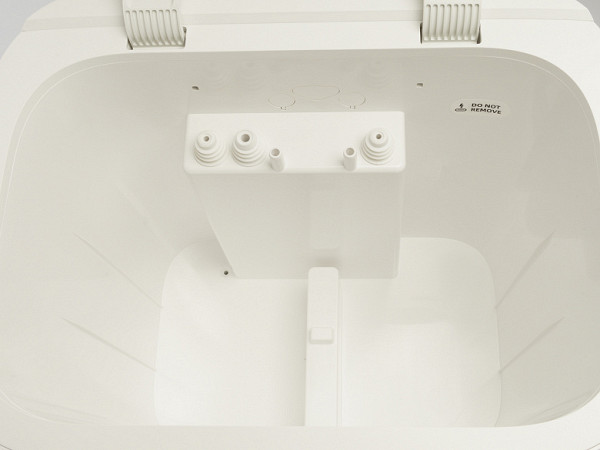
Under the lid there are compartments for installing containers with dirty and clean water.
The containers are made of light and dark translucent plastic, respectively, which makes them easily distinguishable and prevents confusion. Dirty water does not spoil the appearance of the device, since the inside of the base remains clean and tidy even if the container is not completely clean.
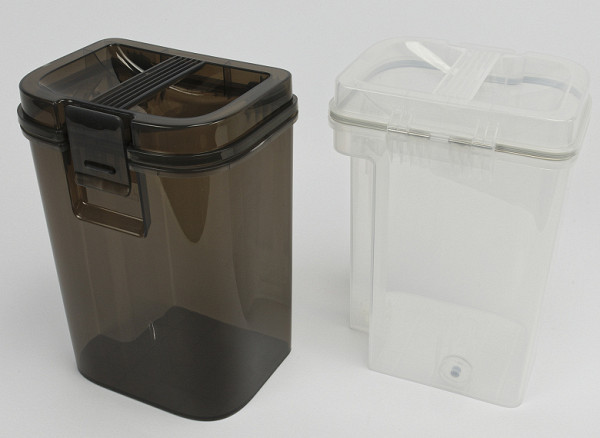
For ease of carrying, both containers are equipped with handles. The clean water container additionally has a float at the bottom, which signals the robot when the water level is low.
The dirty water container is equipped with a float on top, which notifies you when the dirty water needs to be drained. If you do not use the robot daily, it is better to drain dirty water immediately after use to avoid stagnation.
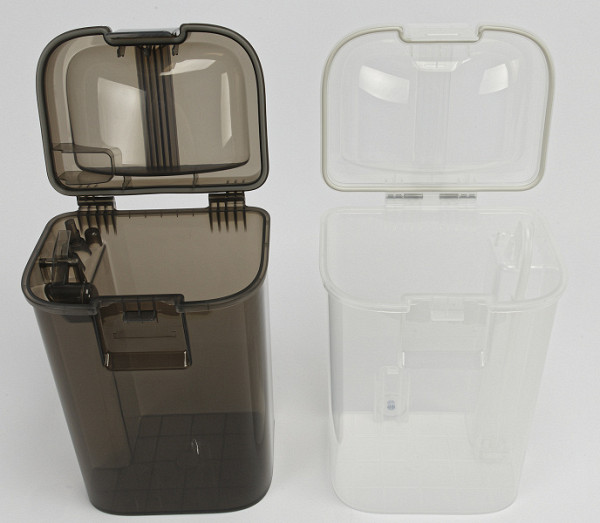
Both containers have a lid with a rubber gasket and a plastic latch, opening which you can easily pour or drain water, as well as rinse the inside of the container.

What else was included in the kit? Spare garbage bag, cleaning agent and brush for cleaning the vacuum cleaner.
To sum up the external inspection, let's say that the robot looks and feels like a solid five. It is immediately clear that this is a premium, expensive and, most likely, high-quality device.
Instructions
The user manual is a fairly large book, printed on thin white paper with many clear and detailed illustrations. The Russian-language part of the brochure has 28 pages.
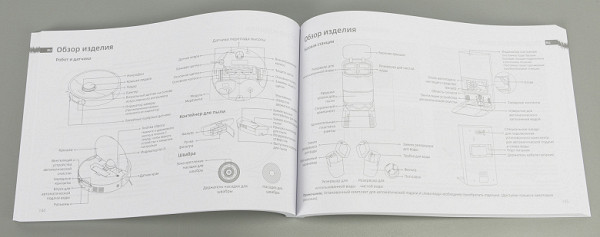
The instructions describe in detail the structure of the robot and the base, operation of the device and care for it. It contains many illustrations with captions and a table for troubleshooting typical faults. Reading this manual is highly recommended as it will help you understand how to properly use and clean the robot and understand its functions.
The kit also includes a small “quick start” leaflet. If you are too lazy to read the full manual, and the user already has experience, you can simply read the summary.

Management
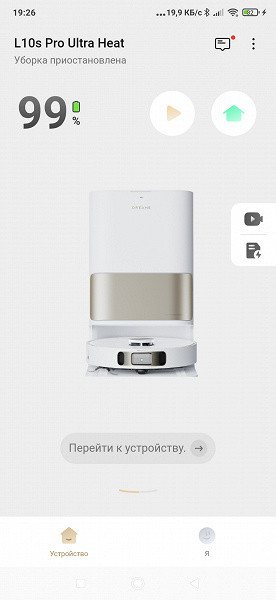
The robot has few physical controls. There are three LED-backlit buttons on the top panel. The first button starts local cleaning, the second turns the device on and off (also starts regular cleaning), and the third sends the vacuum cleaner to the base. The active mode is illuminated by a white LED.
As already mentioned, under the robot's lid there is a factory reset button that can be pressed with a fountain pen or similar object, and a network interface activity indicator.
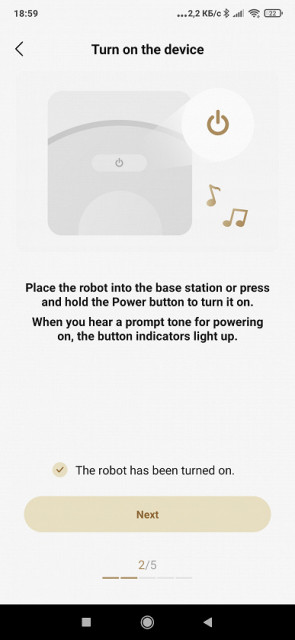
To enter pairing mode with a mobile application, you need to press and hold the “Power” and “Home” buttons until a signal appears.
Smartphone control
To control Dreame robots, the manufacturer offers the Dreamehome application. At the time of writing the review, the application has more than 100 thousand downloads and is not the highest rating — 3.1 based on 2 thousand reviews. However, the rating is gradually increasing, which may indicate that the developers are actively correcting shortcomings.
Despite the low rating, the application is rich in functionality and capabilities. At the initial stage, you can easily get confused in the multitude of modes and options, but this is not so bad. After the initial setup of the device to suit your needs, there will be no need to frequently access the settings.
To get started, you need to register and confirm your email address or mobile phone number.

You can also log into the application using your Google or Facebook accounts. To function correctly, the application requires permission to send notifications and access information about the device's location.
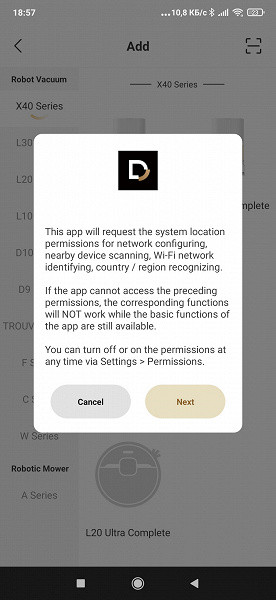
To start synchronization, you can use the “Add device” link and select the desired model from the list of supported robots, or simply scan the QR code on the device body (this will require permission to access the smartphone camera).
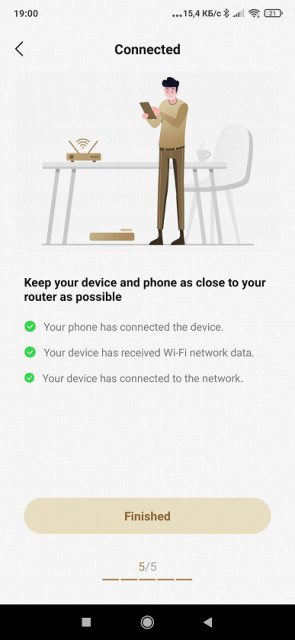
The pairing process is activated by simultaneously pressing the “Power” and “Home” buttons. The app will then ask for your home network's SSID and password. Transferring network settings takes about a minute and goes without problems.
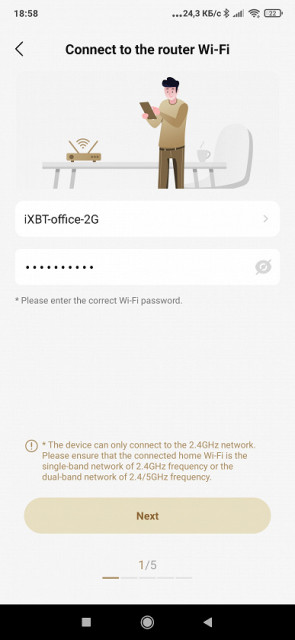

Note that by default the process of pairing with the robot takes place in English, but switching to Russian is available immediately after the setup begins. This should not confuse potential users.
When you first launch the application, the user is offered a number of recommendations to improve the efficiency of the vacuum cleaner. It is recommended to remove possible obstacles, wires, small objects and toys that may interfere with cleaning. You can also indicate if there are pets in the house so that the vacuum cleaner can avoid their tracks and not spread them across the floor. This feature is especially useful for dog and cat owners who have encountered situations where the vacuum cleaner gets dirty.
Additionally, during initial setup, you can set the mop to rinse with hot water, set the mop to rinse again if the water is too dirty after the first rinse, and enable automatic re-cleaning in areas with residual dirt. All these settings can be changed at any time in the appropriate sections of the menu.
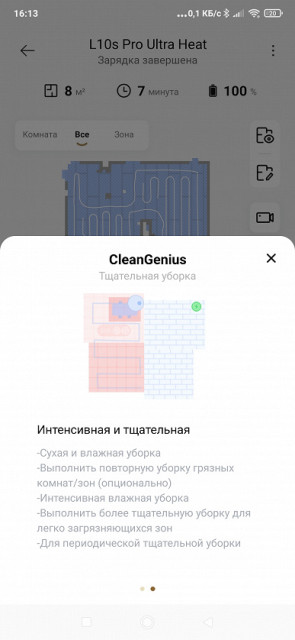
In addition to the standard sections for setting up cleaning parameters and the base station, it is worth noting the CleanGenius mode. This mode allows you to slightly automate the settings for different zones, which should help achieve the best results.

It makes no sense to list all possible settings and options due to their large number. However, we will mention the main ones so that the reader can appreciate how flexible robot control can be.
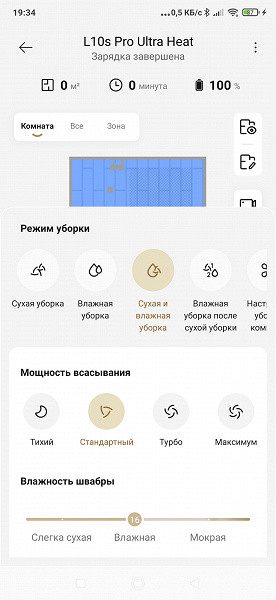
For dry cleaning, you can choose one of three suction powers, and also activate the fourth, maximum power for one cleaning — useful for the initial cleaning of a heavily soiled room. In wet cleaning mode, you can adjust the water supply speed, the frequency of rinsing the mop (by area, time, or upon completion of cleaning each room), and also select the cleaning route, from the fastest to the most thorough.
A nice addition are two cleaning modes: combined dry and wet cleaning, as well as “wet cleaning after dry.” This is convenient for those who prefer to vacuum first and then mop the floor. For each room or zone, you can set individual parameters or use automatic recommendations.
For the base station, rinsing settings are available, the ability to turn on hot water washing, adjust the duration of drying the mop and the frequency of emptying the waste container.
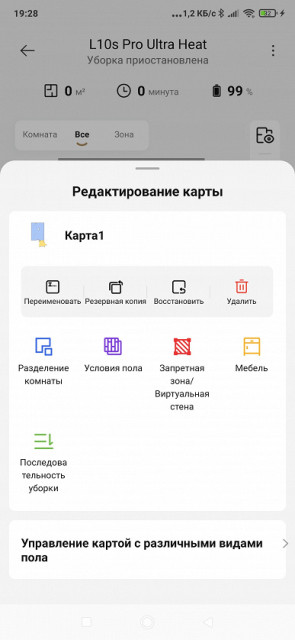
In map editing mode, you can divide rooms, set restricted areas, specify the type of flooring, set the cleaning sequence and arrange furniture (various sofas, chairs, tables and cabinets). All this can be viewed in three dimensions.
In this case, of course, you are allowed to create several cards.

In the application, you can also set the time when the robot will work at a minimum noise level. This is convenient if you prefer to start cleaning at night, and other household members go to bed early. In this mode, the robot will not turn on the noisiest process — automatically emptying the garbage container — when returning to base.
A separate section of the menu is dedicated to carpet cleaning settings. You can turn on the carpet avoidance mode so that the robot does not wipe them with a wet mop, or the adaptation mode, in which the carpet will only be cleaned using the dry method. There's a «carpet booster» option that increases suction power on carpets, as well as an «ignore carpets» option that allows the robot to ignore them (which is useful for rubber bands). For other types of flooring, you can specify the direction in which the laminate is laid to minimize scratches on the floor.
Also available are settings for cleaning schedules, viewing the history of completed tasks (including information about the area covered, duration and route), child protection, the ability to share access to the robot with other family members and many other functions. Since the app is constantly being updated, new features may appear after a review is published.

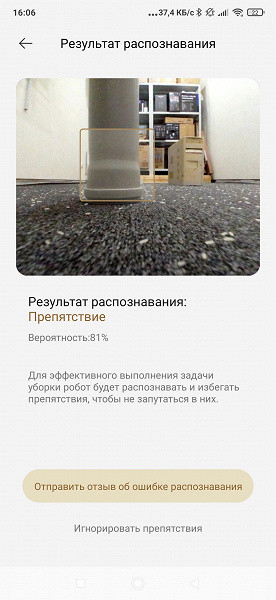
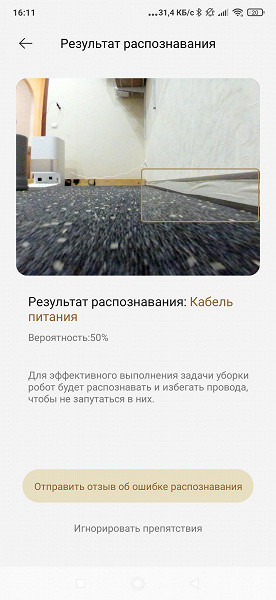
A little about working with the camera. The robot's artificial intelligence is able to recognize obstacles by taking photographs of them. This may include people, so this mode can be disabled if necessary.
If you want, you can help improve the recognition system by telling developers how accurately the robot has identified objects.
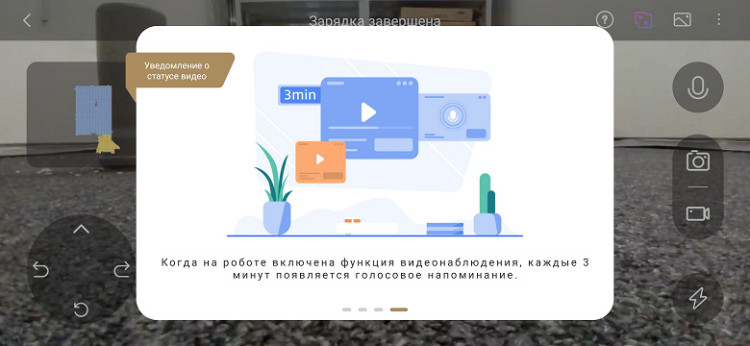
A remote viewing mode via the robot's camera is also available. Every five minutes, the device will voice the phrase “broadcast” so that those present in the room know that they can be watched through the camera, even if the owner is not at home.
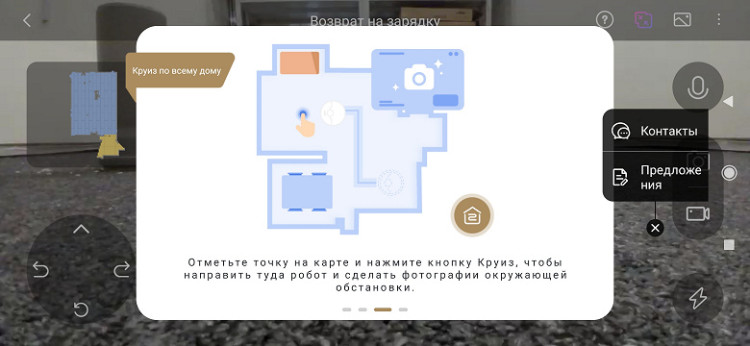
In the “Remote control” section, you can use the application as a remote control to move the robot around the apartment. It is especially interesting to control the device with the camera turned on, which allows you to see what is happening in real time.
You can also record a short video and immediately download it to your smartphone. The image quality is average, but the functionality is quite satisfactory. Additionally, you can communicate with someone who is at home thanks to the “video call” function on the vacuum cleaner.
Exploitation
Before using the vacuum cleaner and base, you must remove the packaging materials and stickers, and also remove the shipping pads from under the movable bumper.
When choosing a place to install the base station, you should provide a free space in front of it of at least 1.5 m, on the sides — at least 0.5 m, and on top — at least 30 cm. It is also important that the vacuum cleaner is located in an area of stable Wi-Fi reception Fi signal.
The side brush must be installed until it clicks, and a garbage bag must be inserted into the base. It is recommended to fully charge the device before turning it on; The first charge may take longer, so it is best to leave the vacuum cleaner on the base overnight.
Although the vacuum cleaner can be used without the app, it is highly recommended that you install the app on your smartphone to get the full experience.
Using an LDS sensor, the vacuum cleaner quickly navigates the room, accurately determining its configuration and detecting obstacles.
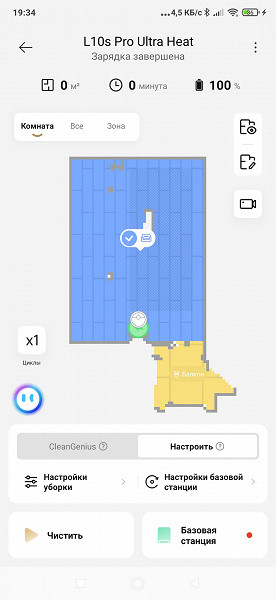
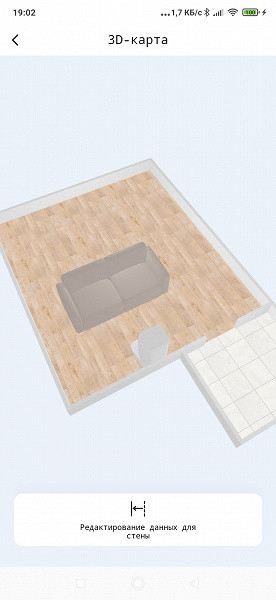
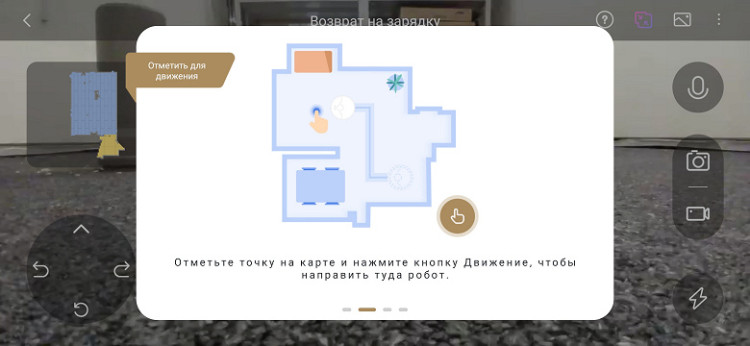
In our test room — an ordinary apartment with shoes, chairs and wires left in place — the robot, entering a new environment, immediately begins to scan and build a map. A map appears on the screen of the mobile application displaying all detected obstacles, which will be added to during the cleaning process.
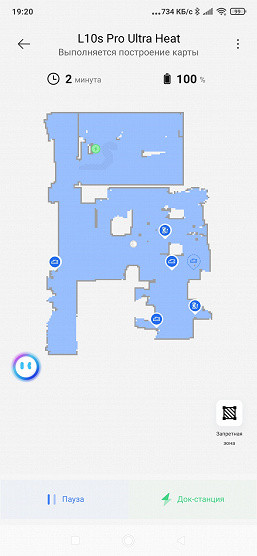
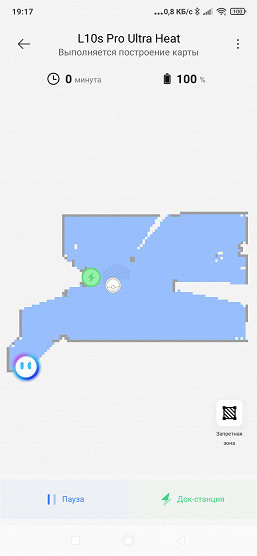
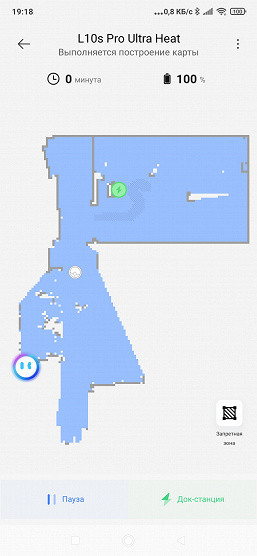
This is what the finished map looks like. Obstacles are marked and the surface is identified as carpet. The corridor and kitchen are automatically detected, and detected obstacles such as shoes, wires and chair legs are displayed on the map. Interestingly, shoes found on people's feet were initially displayed on the map, but were later marked with a different icon when the robot noticed that the obstacle had disappeared because the person had already left the room.
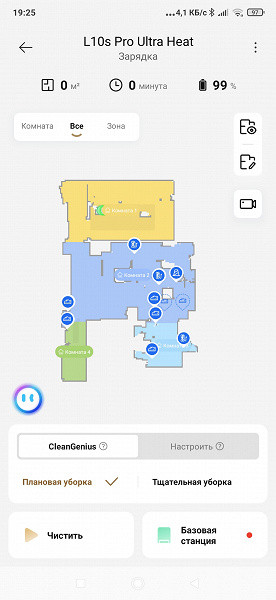
At this point, you can enter manual editing mode to correct errors or reassign rooms and zones.
During cleaning, the robot cleans the premises sequentially: first it passes along the perimeter, then cleans the entire area with a snake. We were especially pleased that in good lighting, the robot effectively identifies obstacles: it bypasses wires, avoids clothes dryers and children's toys. However, in low light conditions, since the robot does not have a backlight, it begins to encounter obstacles. Therefore, it is best to start cleaning during the day and turn on the lights at night.
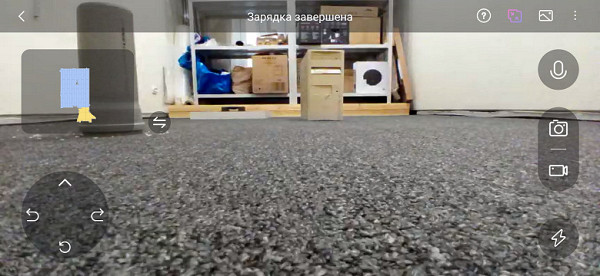
Upon completion of cleaning, the vacuum cleaner returns to the base, where it aligns the plates on the body with the contacts on the base. Then the stationary vacuum cleaner is turned on, which blows through the garbage container and removes dust and debris into a disposable bag. When the bag becomes full, it needs to be replaced. Thrifty users can remove debris through the special opening, but it's not too difficult.
The self-cleaning process takes about 20 seconds and is accompanied by increased noise due to the powerful vacuum cleaner inside the base.
In wet cleaning mode, the robot evenly wipes the floor without leaving streaks. Although the volume of the water tank is not large, it is enough to clean a medium-sized apartment. The retractable mop helps when cleaning along walls, which we find to be a useful feature.
After wet cleaning, the robot returns to the base, cleans the mops, rinses them and, if necessary, dries them. The user can only drain the dirty water from the container and refill with fresh water, which does not need to be done every day. You can also connect the robot to the sewer.
The robot reports on the progress of cleaning using a voice interface and smartphone notifications in case of problems.
Overall, we liked the robot. It is well oriented in the room and allows you to flexibly configure operating modes, making operation comfortable. The application has improved significantly since our previous review, with new features added and bugs fixed, which shows the active work of the developers.
Care
Our robot requires minimal user interaction during cleaning and maintenance. In everyday use, it will be enough to drain the dirty water. More often you will need to fill the tank with clean water and throw out the garbage bag from the self-cleaning station. It is rare, but necessary, to clean the HEPA filter and remove entangled hair and threads.
The trash bag lasts 8-10 weeks with normal use. However, if there are pets in the house, the bag fills up faster.
Brushes and filters should be replaced as needed — the app will remind you when they need replacing.
Check the condition of the sensors on the underside of the device monthly and clean them if necessary.
Our measurements
Before starting the tests, we allowed the vacuum cleaner to explore the test site for a few minutes to create a map of the room and identify the location of obstacles, and then started a test cleaning.
The video below was shot from one point and covers the entire area being cleaned, with part of the footage being sped up 16 times.
As already mentioned, the vacuum cleaner first passes along the perimeter of the room, moving along the walls, and then treats the entire area with a snake.
During the first run (7 minutes 40 seconds), the robot collected 97.9% of the test garbage. The result is excellent! Unharvested amounts of rice remained only near the plastic barrier and in a small area near the wall. We later found out that the paper tape placed on the black baseboard to prevent the IR sensors from malfunctioning was incorrectly identified by the camera as an electrical wire. However, this is not a disadvantage — it is better if the robot shows increased caution than gets tangled in wires.
When restarted, the robot corrected the error and vacuumed the remaining area. As a result, the total amount of garbage collected increased to 99.2%.
The bulk of the remaining debris was located near the base (where the robot does not come close) and around our pipe obstacle.
The results of all stages are shown in the table.
| Interval | Duration | Collected waste, % | % (total) |
|---|---|---|---|
| I | 7:40 | 97.9 | 97.9 |
| II | 15:10 | 1.3 | 99.2 |
Depending on the selected mode, the noise level of the vacuum cleaner varies from 51 to 62 dBA. This is a typical level for such models, especially given the high suction power. At minimum power, the vacuum cleaner is unlikely to disturb neighbors even at night, and at maximum power it is not too noisy. However, the self-cleaning base emits more than 80 dBA, which will be audible even behind a closed door during the day and especially at night.
After cleaning is completed, the vacuum cleaner charges on the base in an average of 5.5 hours (maximum 6 hours). The base consumes about 12W while charging and 0.4W in standby mode.
Battery consumption during cleaning depends on the selected mode, especially on the suction strength. For example, to clean an area of 30 square meters (laminate and several small carpets), the combined mode will use about 24% of the charge, which will provide an average of 34 minutes of cleaning. Thus, the cleaning time in minutes is approximately equal to the area in square meters.
conclusions
Compared to the smaller Dreame L10s Ultra, the DreameBot L10s Pro Ultra we tested offers several significant improvements. Firstly, the clean and dirty water containers have been enlarged (4.5 liters versus 2 liters), making the base larger but reducing the need for frequent filling and emptying of containers.
The maximum suction power has also increased from 5.3 to 7.2 kPa, which improves the quality of cleaning, but slightly reduces the operating time without recharging (from 210 to 170 minutes). If the younger model was able to raise the mop when cleaning carpets and in rooms where the floor should not be wet, then the older model is now also equipped with a mop extension function, which allows you to better wipe the floor along walls and obstacles.
One notable difference is that the DreameBot L10s Pro Ultra is compatible with a plumbing kit. This, in theory, completely eliminates the need for the user to maintain the base, although garbage bags will still have to be changed manually and the dirty water container must be rinsed occasionally.
It is also worth emphasizing the increased volume of containers for clean and dirty water and the ability to wash the mop with heated water. While it does not improve cleaning performance significantly, warm water is definitely more effective than cold water, which deserves an extra bonus.
Otherwise, the model remains very similar to the younger one, with the same stylish design, excellent navigation and a convenient application for remote control, which makes it very attractive.
Pros:
- presence of a self-cleaning system
- excellent navigation and cartography
- built-in camera with video recording capability
- excellent cleaning quality
- low noise level when operating in minimum mode
- Compatible with water connection kit
Minuses:
- high noise level during operation of the self-cleaning system
- relatively high price