The Intel Z790 chipset has been out for quite some time, and this is one of the rare cases in recent years where a company's system chipset has lived this long, providing support for multiple generations of processors. With the release of the 12th generation of Core processors, 600 series chipsets appeared, the flagship of which was the Z690. With the release of the 13th generation of processors, the 700 series chipsets were introduced, with the exception of the H-series, where the H610 remained. The Z790 was distinguished by the redistribution of lanes of different versions of PCIe. When the 14th generation processors arrived in 2023, which were not much different from the 13th generation (again, only different types of cores were changed), virtually nothing changed in the system chipsets, so the Z790 remained the top chipset on Intel consumer platforms. supporting already three generations of processors.
With the release of each generation of processors, motherboard manufacturers usually present a whole range of products based on the corresponding system chipsets. Since the Z790 remains relevant from 2022, there are already many motherboard options on the market based on it. That is why we continue to study such products entering our market.
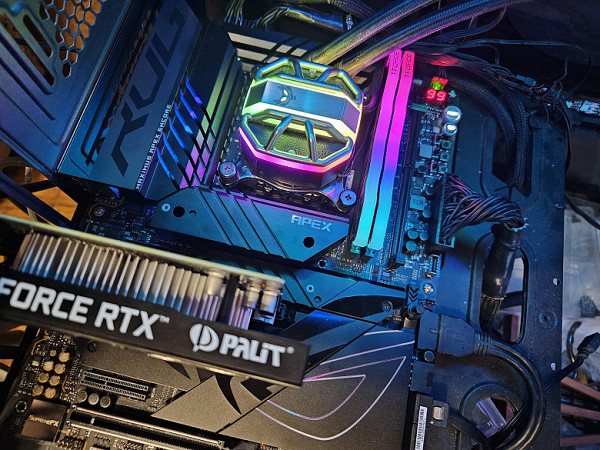
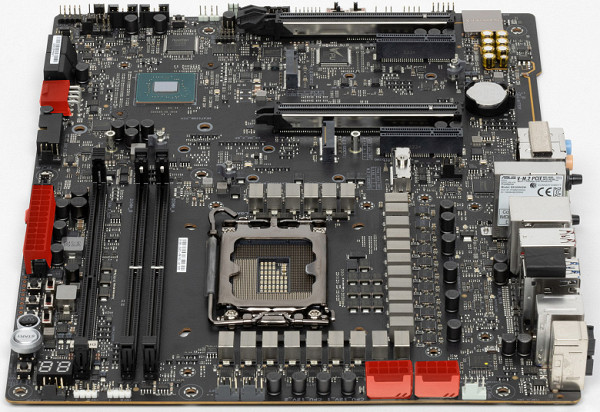
Today we will discuss the Asus ROG Maximus Z790 Apex Encore motherboard, which belongs to the top ROG sub-brand. This is a flagship model, aimed more at overclockers.
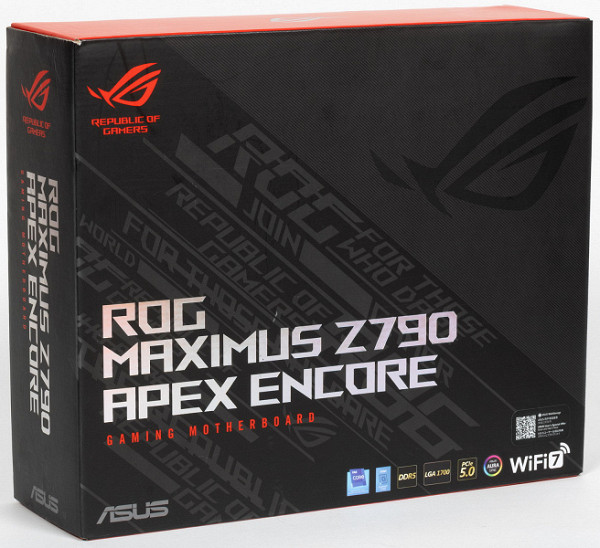
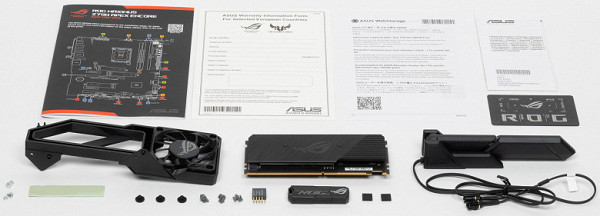
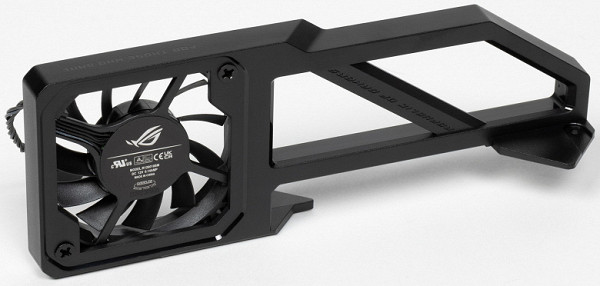
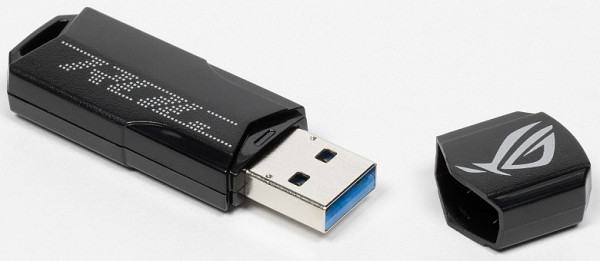
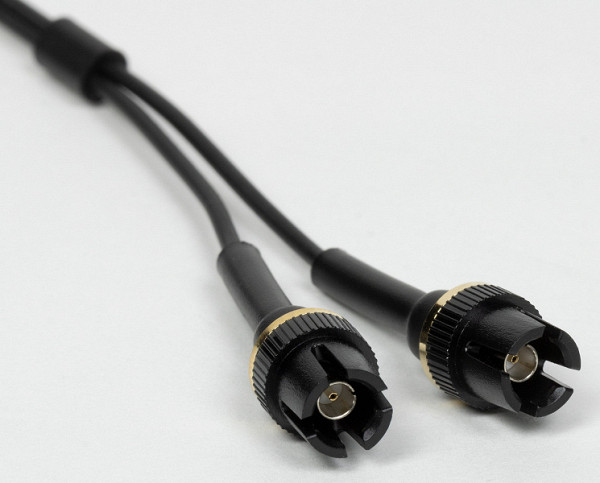
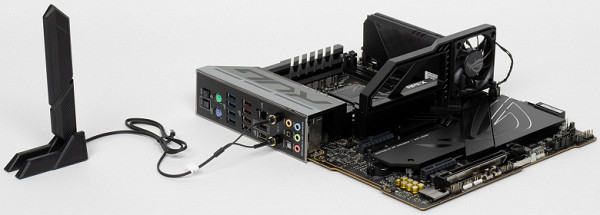
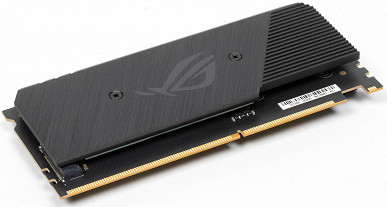
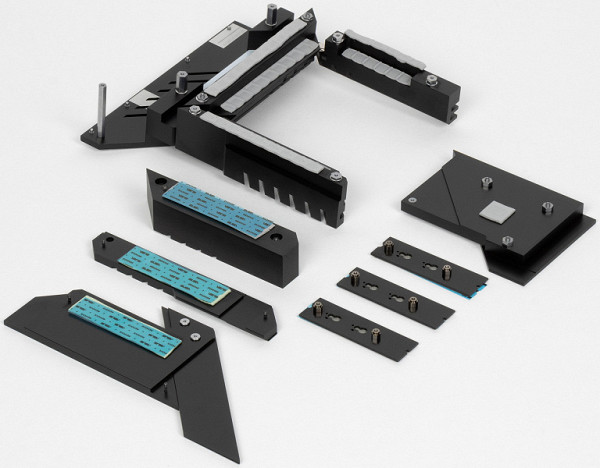
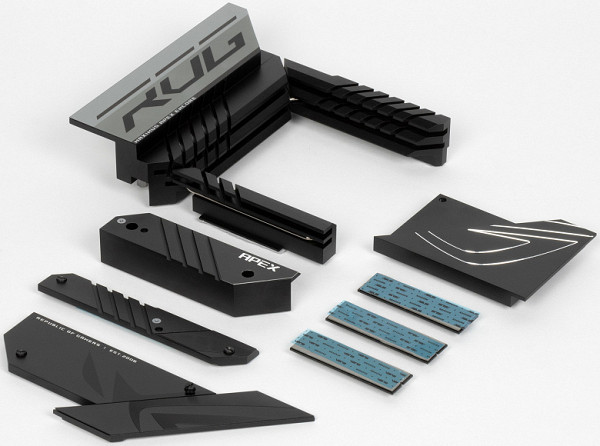
Asus ROG Maximus Z790 Apex Encore comes in the signature thick box of the ROG series. The kit includes traditional elements such as a user manual and SATA cables, as well as a number of additional accessories typical of flagship products. Among them are the antenna of the built-in Wi-Fi module, a proprietary DIMM.2 module with two slots for M.2 drives, spare racks with fasteners for M.2 slots, a proprietary adapter for the front panel, bonus stickers, a flash drive, a keychain, a stand with a fan for additional cooling of memory modules and a ROG club membership card. The kit does not include splitters for external lights, since the motherboard is already equipped with a sufficient number of connectors to connect them.
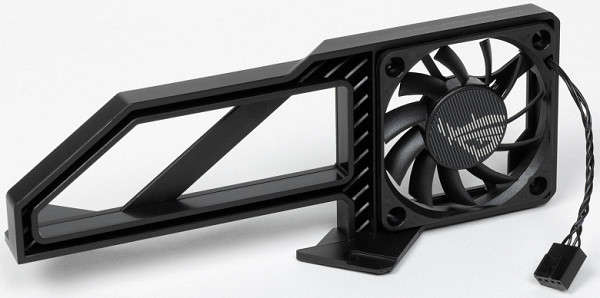
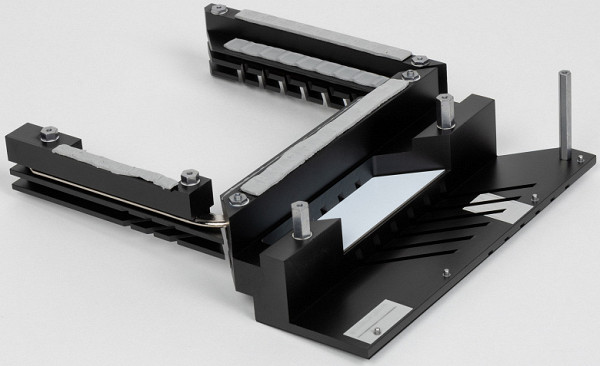
In the box you can find this kind of detail. This is a stand along with an additional fan for cooling the memory modules.
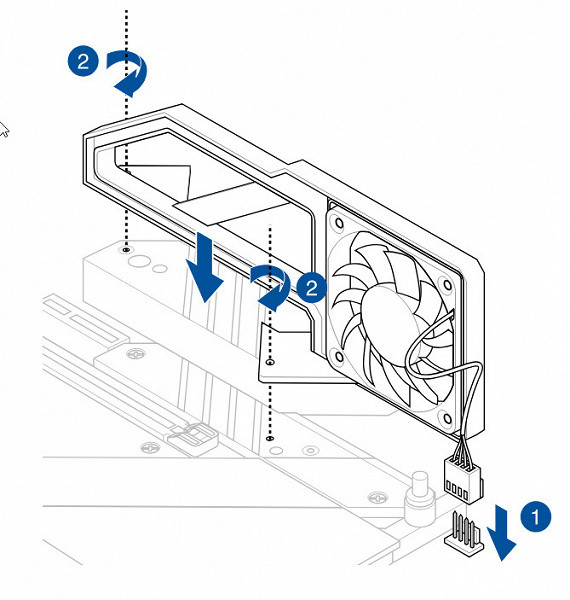
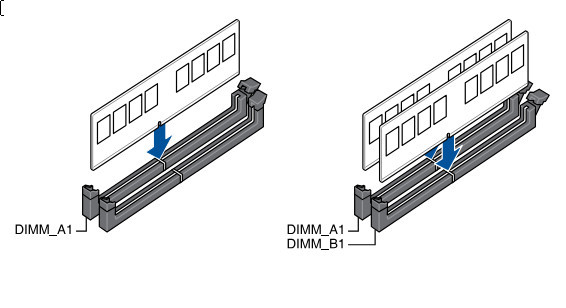
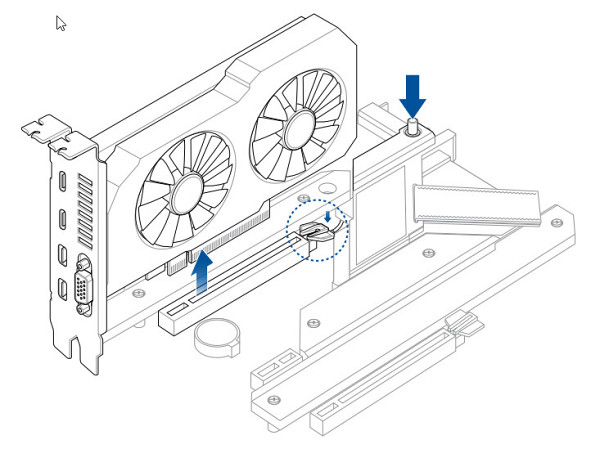
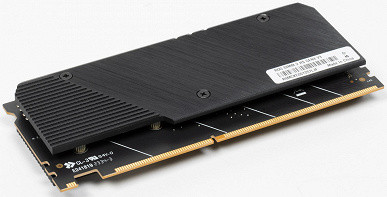
The installation scheme is simple
The software was found on the flash drive supplied with the board.
For optimal performance, you should download the latest drivers and software from the company's website.
The antenna of the built-in wireless module now has plugs instead of screw-on washers as before. Plastic holders securely hold these plugs in place.
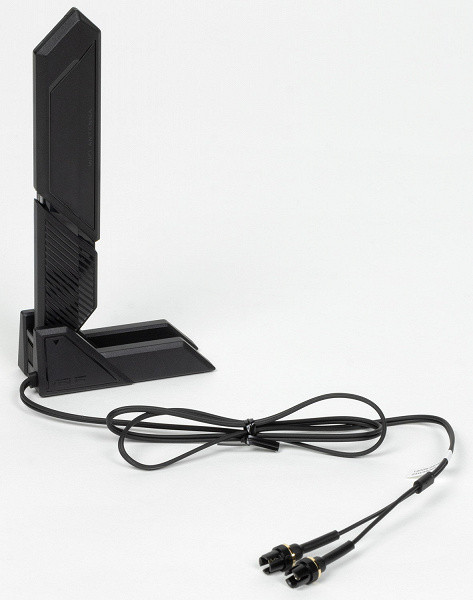
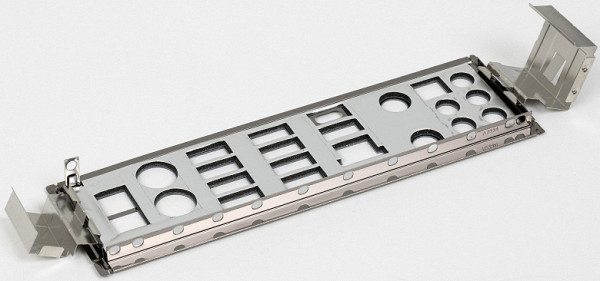
The “plug” for the rear panel with connectors is already mounted on the board itself.
Form factor
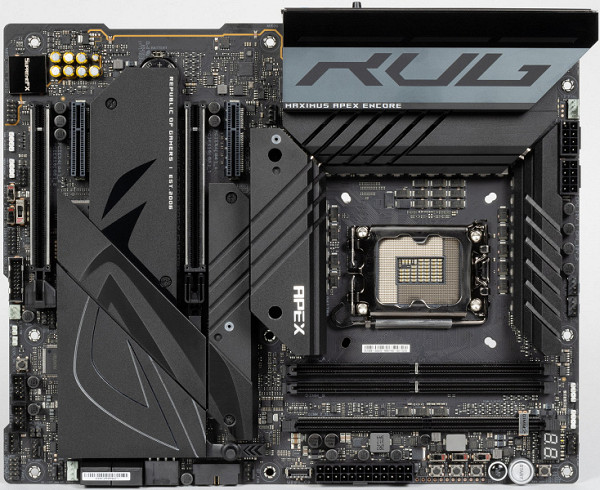
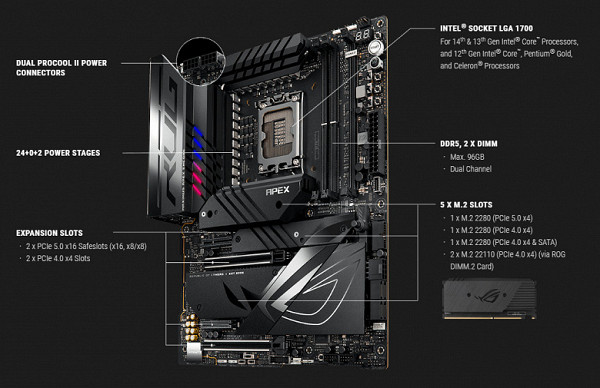
The ATX form factor typically measures up to 305x244mm, while E-ATX typically measures up to 305x330mm. The Asus ROG Maximus Z790 Apex Encore motherboard complies with the ATX standard with dimensions of 305x244 mm. It features 9 mounting holes for secure installation into the case, ensuring a stable fit and optimal compatibility with most cases on the market.
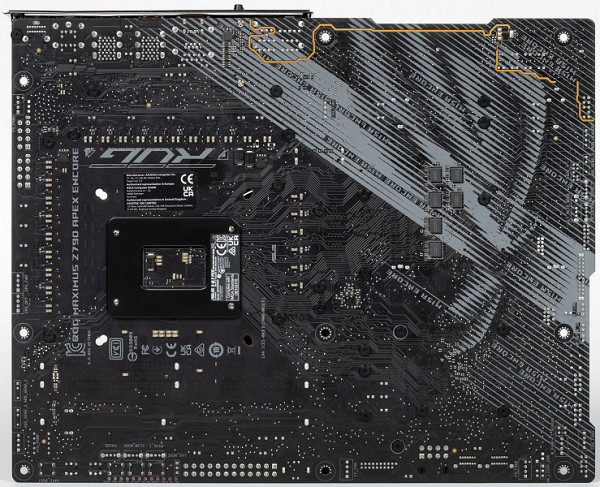
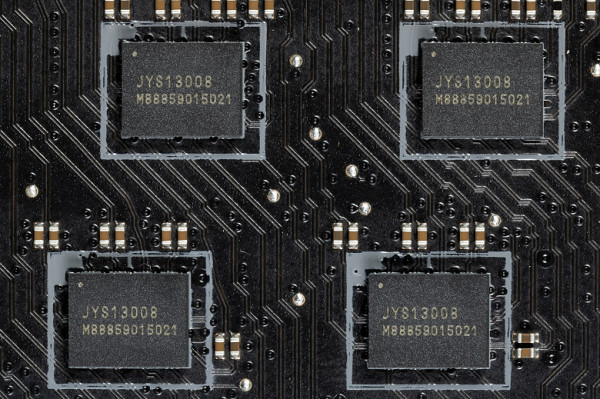
On the back side of the board there are several controllers and traditional logic elements. The textolite is processed with high quality: in places of soldering, the sharp ends are cut off and carefully polished. The protective plate (backplate) is missing.
Specifications
Traditional table with a list of functional features.
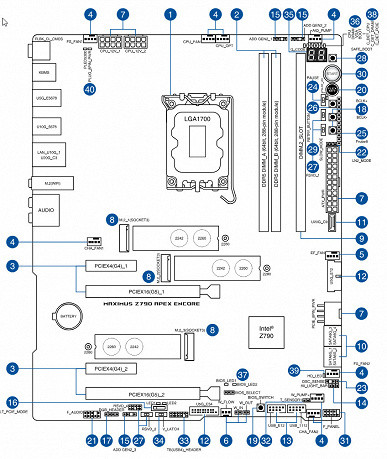
| Supported Processors | Intel Core 12/13/14th generation |
|---|---|
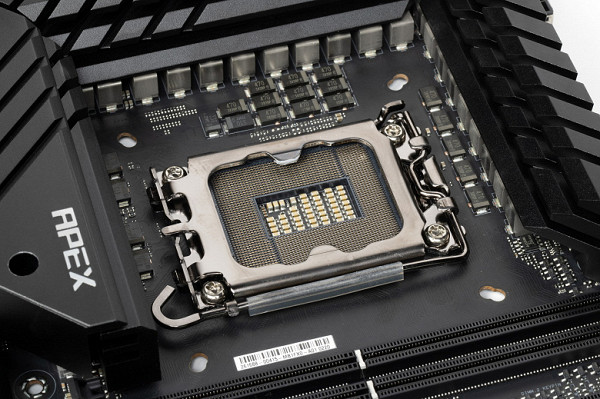
| Processor socket | LGA 1700 |
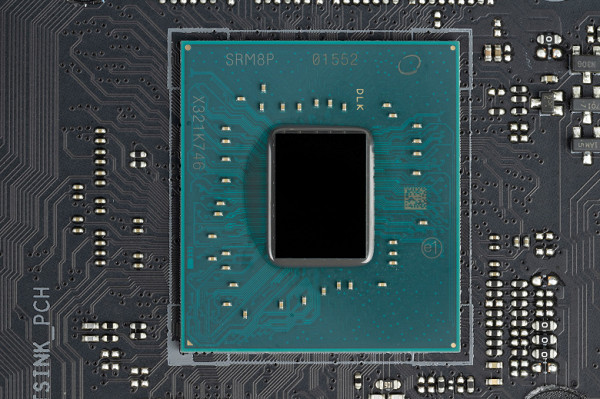
| Chipset | Intel Z790 |
| Memory | 2×DDR5, up to 8400MHz (XMP), up to 96GB (BIOS update possible with support up to 128GB), dual-channel |
| Audio subsystem | 1×Realtek ALC4080 (7.1) + Savitech SV3H712 operational amplifier |
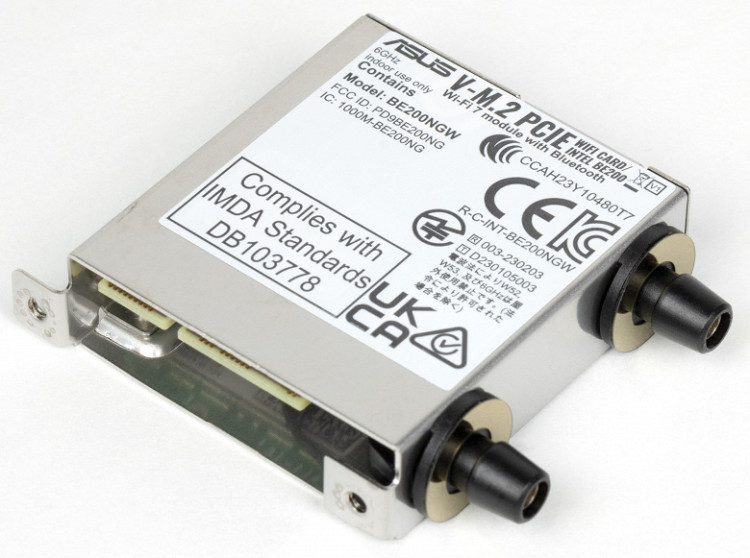
| Network controllers | 1×Intel I225-V Ethernet 2.5Gbps 1×Intel Dual Band Wireless BE200NGW (Wi-Fi 802.11a/b/g/n/ac/ax/be (2.4/5/6GHz) + Bluetooth 5.4) |
| Thunderbolt | No |
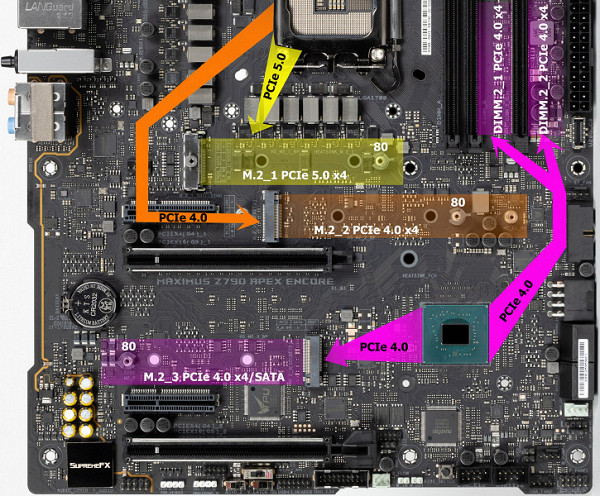
| Expansion slots | 2×PCIe 5.0 x16 (x16, x8+x8 modes) 2×PCIe 4.0 x4 (x4 mode) |
| Storage connectors | 4×SATA 6Gb/s (Z790) 1×M.2 (M.2_1, CPU, PCIe 5.0 x4 for 2242/2260/2280 devices) * 1×M.2 (M.2_2, CPU, PCIe 4.0 x4 for 2242/2260/2280 devices) 1×M.2 (M.2_3, Z790, PCIe 4.0 x4/SATA for 2242/2260/2280 devices) 2×M.2 (DIMM.2, Z790, PCIe 4.0 x4 for 2242/2260/2280/22110 devices) |
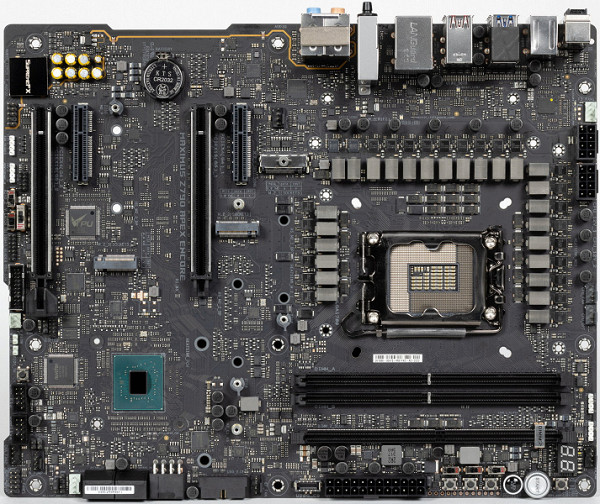
| USB ports | 4×USB 2.0: 2 x 4-port internal headers (GL850G) 4×USB 3.2 Gen1: 2 x 4-port internal headers (2 x ASM3142) 4×USB 3.2 Gen1: 4 x Type-A ports (ASM1074) 1×USB 3.2 Gen2x2: 1 x Type-C internal connector (Z790+IT8856) 1×USB 3.2 Gen2x2: 1 x Type-C port (Z790+IT8853) 5×USB 3.2 Gen2: 5 x Type-A ports (red) (Z790) |
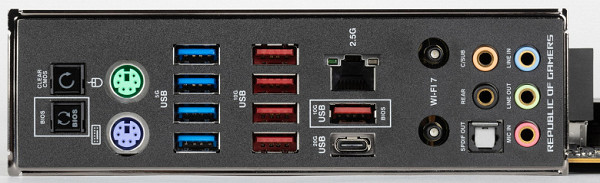
| Rear panel connectors | 1 × USB 3.2 Gen2x2 (Type-C) 5 × USB 3.2 Gen2 (Type-A) 4 × USB 3.2 Gen1 (Type-A) 1 × RJ-45 5 mini-jack audio ports 1 × S/PDIF (optical, output) 2 PS/2 keyboard and mouse ports 2 antenna ports CMOS reset button BIOS flashback button |
| Other internal elements | 24-pin ATX power connector 2 x 8-pin EPS12V power connectors 1 x 8-pin PCIe power connector 1 x M.2 (E-key) slot, occupied by a wireless network adapter 1 x USB 3.2 Gen2x2 Type-C port connector 2 x USB 3.2 Gen1 ports connectors 2 x USB 2.0 ports connectors 9 x 4-pin fan and water pump connectors 1 x non-addressable RGB strip connector 3 x addressable ARGB strip connectors 1 x audio connector for the front panel of the case 1 x OC Retry button 1 x PCIe version switch 1 x thermal sensor connector 1 x 80 Light Bar connector for disabling the Q-Code display 2 x BCLK (±) buttons for controlling the bus frequency 1 x BIOS version switch button 1 x LN2 mode switch connector 1 x Slow Mode switch 1 x Process Pause switch boot 1 button to enable safe boot mode 3 connectors for connecting proprietary Asus water cooling pumps 1 connector for connecting control from the front panel of the case 1 power button 1 reset button |
| Form factor | ATX (305×244 mm) |
* M.2_1 slot shares resources with PCIe x16 slots, details below
Main functionality: chipset, processor, memory

Scheme of operation of the chipset + processor combination.
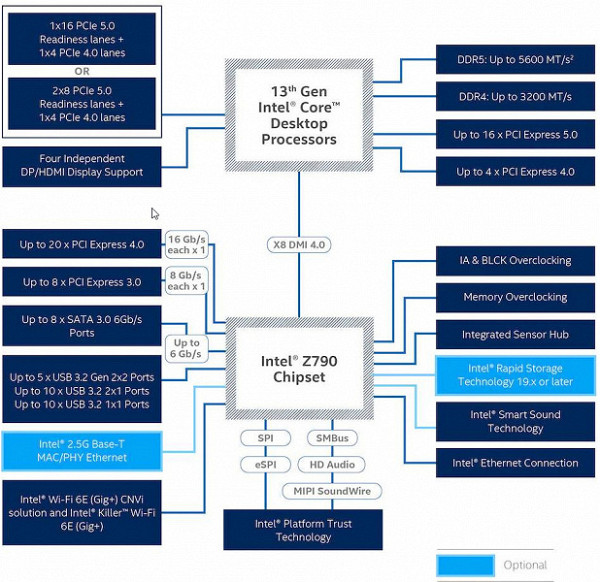
Formally, DDR5 memory up to 5600 MHz is supported, but motherboard manufacturers are actively advertising the possibility of using frequencies up to 8000 MHz and higher through XMP profiles. In particular, this board supports frequencies up to 8400 MHz.
14th, 13th and 12th generation Intel Core processors (LGA1700 socket compatible and supported by Z790) have 20 I/O lanes (16 PCIe 5.0 and 4 PCIe 4.0) but no USB or SATA ports. Interaction with the Z790 is carried out via Digital Media Interface 4.0 (DMI 4.0 x8). All PCIe lanes of the processor are directed to PCIe expansion slots and the M.2 port. Serial Peripheral Interface (SPI) is used to interface with the UEFI/BIOS system, and the Low Pin Count (LPC) bus is used to communicate with I/O devices that do not require high bandwidth (fan controllers, TPMs, older peripherals).
The Z790 chipset supports a total of 38 I/O lines, which can be distributed as follows:
- up to 14 USB ports (including up to 5 USB 3.2 Gen2x2 ports, 10 USB 3.2 Gen2 ports, up to 10 USB 3.2 Gen1 ports, up to 14 USB 2.0 ports; USB 2.0 lanes are also used to support 3.2 ports, and each USB 3.2 Gen2x2 port requires support from two USB 3.2 Gen2 ports);
- up to 8 SATA 6 Gb/s ports;
- up to 28 PCIe lanes (8 version 3.0 and 20 version 4.0).
Asus ROG Maximus Z790 Apex Encore supports 12/13/14th generation Intel Core processors made for the LGA1700 socket.
To install memory modules, the Asus board has two DIMM slots (if only 1 module is used, it should be installed in A1).
The board supports unbuffered DDR5 memory (non-ECC), and the maximum memory capacity is 96 GB (but a BIOS update is possible with support for a total capacity of 128 GB).
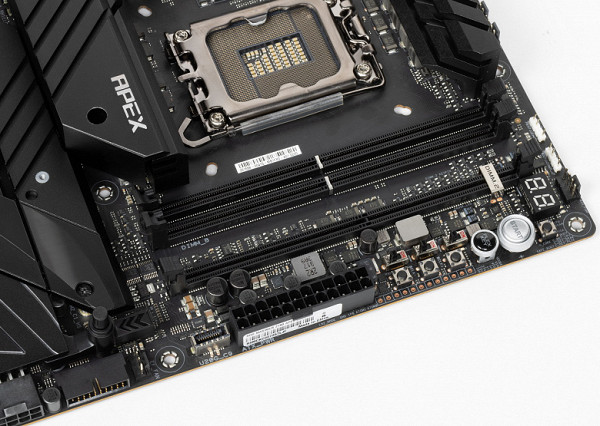
DIMM slots have metal inserts where the memory modules lock.
Peripheral functionality: PCIe, SATA, various additional devices
Above, we examined the potential capabilities of the Z790+Core tandem, and now let’s see what of this and how it is implemented in this motherboard.
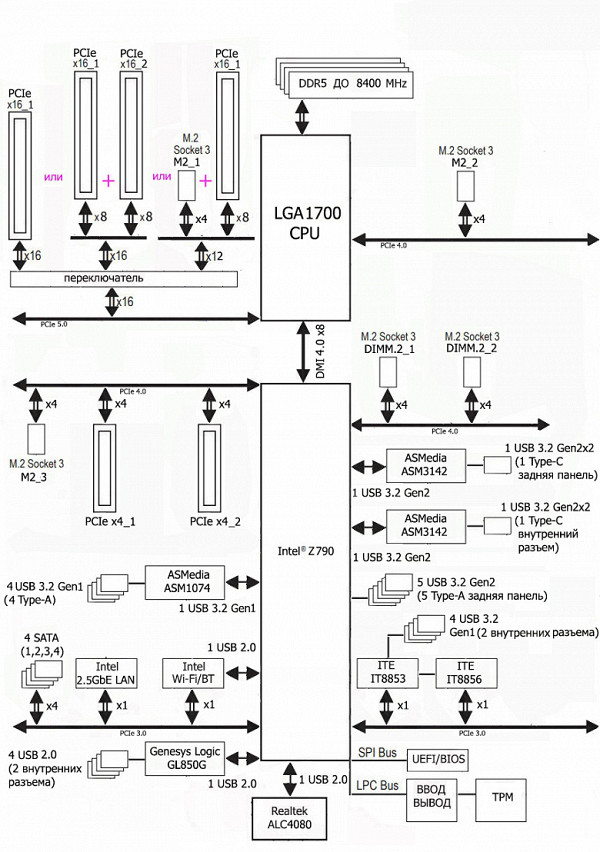
In addition to USB ports, which we will come to later, the Z790 chipset has 28 PCIe lanes. Let's count how many lanes are used to support (communicate) with a particular element (it should be taken into account that 28 lanes are not of a single version, but 20 PCIe 4.0 lanes and 8 PCIe 3.0 lanes):
- PCIe x4_1 slot ( 4 PCIe 4.0 lines);
- PCIe x4_2 slot ( 4 PCIe 4.0 lines);
- SATA_1/2/3/4 ports ( 4 PCIe 3.0 lines);
- M.2_3 slot ( 4 PCIe 4.0 lines);
- DIMM.2_1 slot ( 4 PCIe 4.0 lines);
- DIMM.2_2 slot ( 4 PCIe 4.0 lines);
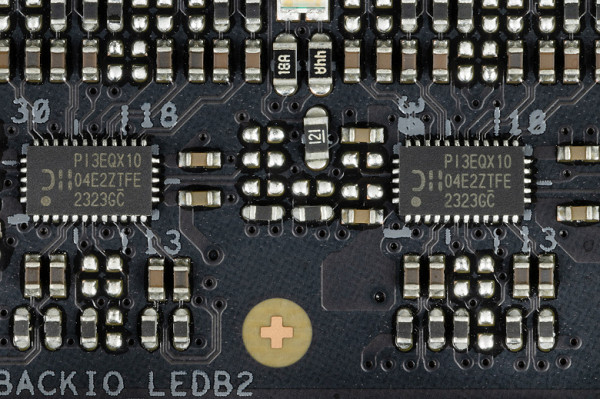
- ASMedia ASM3142 ( 1 PCIe 3.0 lane);
- ASMedia ASM3142 ( 1 PCIe 3.0 lane);
- Intel i225-V (Ethernet 2.5Gb/s) ( 1 PCIe 3.0 line);
- Intel BE200NGW WIFI/BT (Wireless) ( 1 PCIe 3.0 lane)
28 PCIe lines were occupied (20 PCIe 4.0 + 8 PCIe 3.0). In the Z790 chipset, communication with audio codecs newer than Realtek ALC1220 is via a USB port. Also, one USB 2.0 line is spent on BT support (if there is an M.2 slot (key E), on the Aura backlight controller, and other controllers use USB signal lines for their needs. More details on this below in the USB ports section.
Now let's look at how the processors work in this configuration. The 14/13/12th generation CPUs have only 20 PCIe lines, 4 of which are PCIe 4.0 and are allocated to the M.2 slot (M2_2). The remaining 16 PCIe 5.0 lines should be divided between two PCIe x16 slots (_1 and _2) and the M.2_1 slot. There are several switching options:
- PCIe x16_1 slot has 16 lanes, PCIe x16_2 and M.2_1 slots are disabled;
- PCIe x16_1 slot has 8 lanes , PCIe x16_2 slot has 8 lanes , M.2_1 slot is disabled;
- PCIe x16_1 slot has 8 lanes , PCIe x16_2 slot is disabled, M.2_1 slot has 4 lanes
It should be especially noted that if a video card is installed in PCIe x16_2 with an empty PCIe x16_1, both of them still receive 8 lines.
Now about PCIe slots in general.
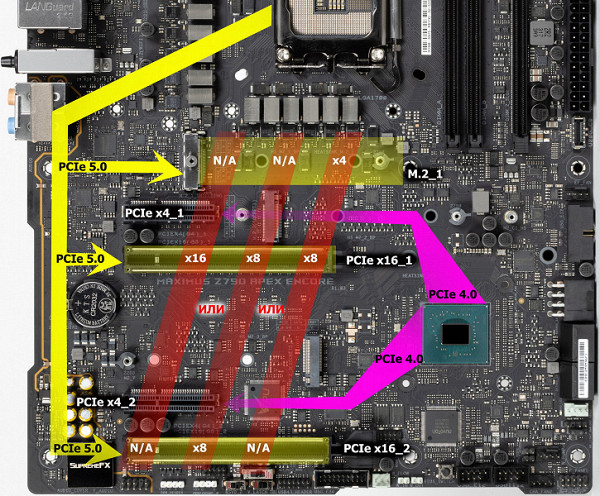
There are four slots in total on the board: two PCIe x16 (for video cards or other devices) and two PCIe x4. The first two PCIe x16 are connected to the CPU, as mentioned, and the remaining two PCIe x4 are connected to the Z790 chipset.
This motherboard redistributes PCIe 5.0 lines between slots, so Lerain multiplexers are used.
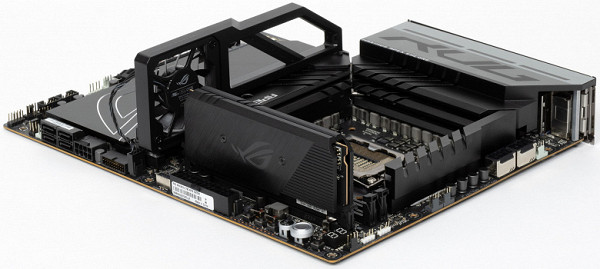
The first two PCIe x16 slots connected to the processor are equipped with stainless steel metal reinforcement, which increases their reliability. This is especially important when frequently changing video cards and when installing heavy top-level video cards, since the slot can more easily withstand bending loads. In addition, this protection reduces the impact of electromagnetic interference.
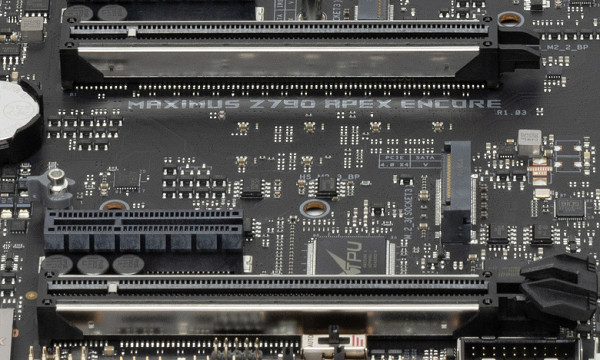
We again see some kind of convenient lever to release the latch on the first PCIe x16_1 slot.
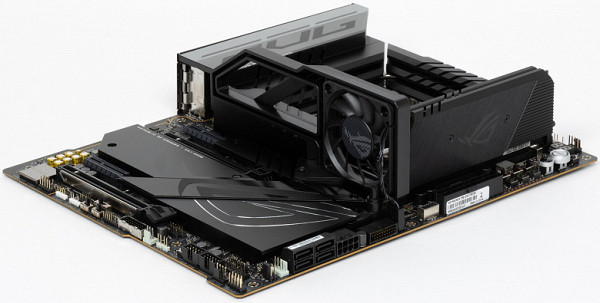
The motherboard allows you to mount a CO of any size.
To maintain stable frequencies on the PCIe bus (and for the needs of overclockers), there is an external clock generator.
Next up are storage devices.
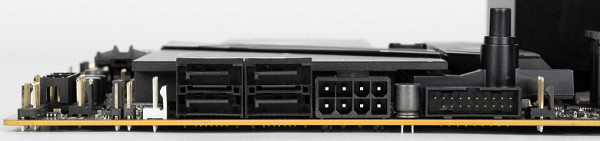
In total, the board has 4 Serial ATA 6 Gb/s connectors + 5 slots for drives in the M.2 form factor. All 4 SATA 1,2,3,4 ports are implemented via the Z790 chipset and support RAID creation.
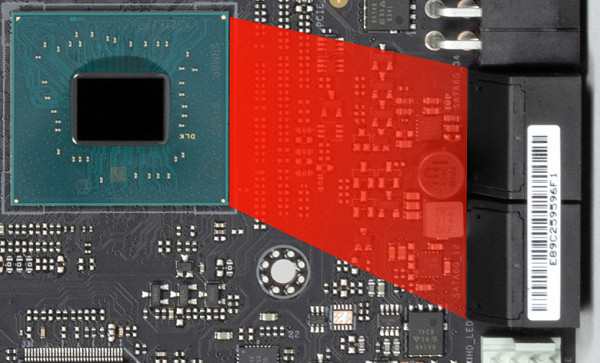
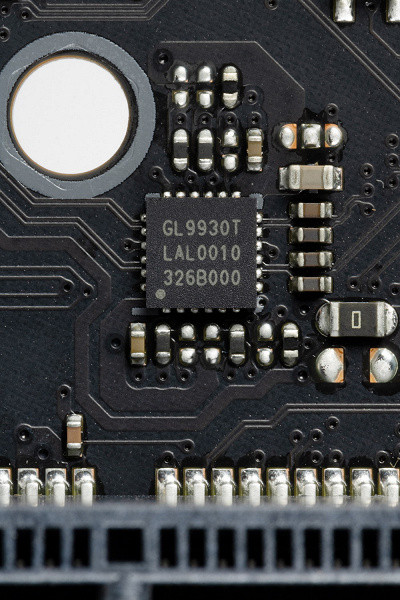
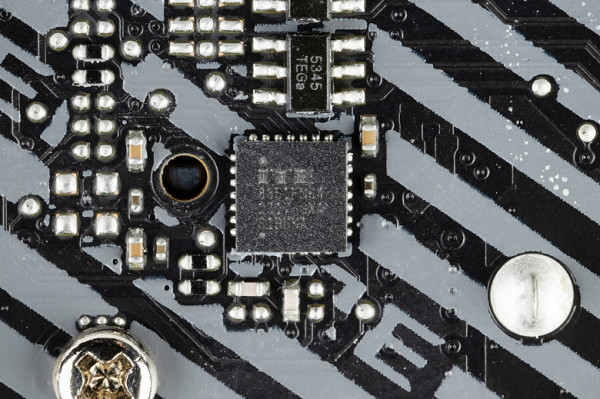
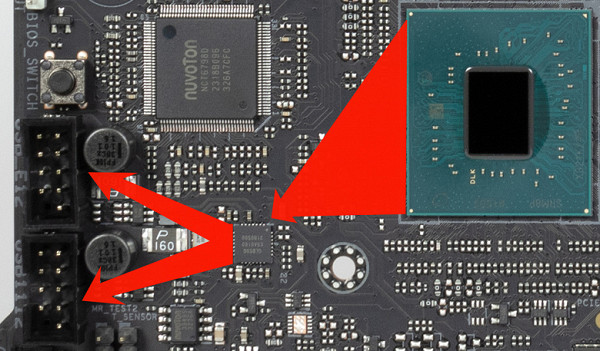
For SATA needs, there are PCIe 3.0 signal amplifiers (re-drivers) from Genesys Logic.
The motherboard has 5 slots of the M.2 form factor. The first two receive data from the CPU, with M.2_1 connected by PCIe 5.0 lines, and M.2_2 by PCIe 4.0.
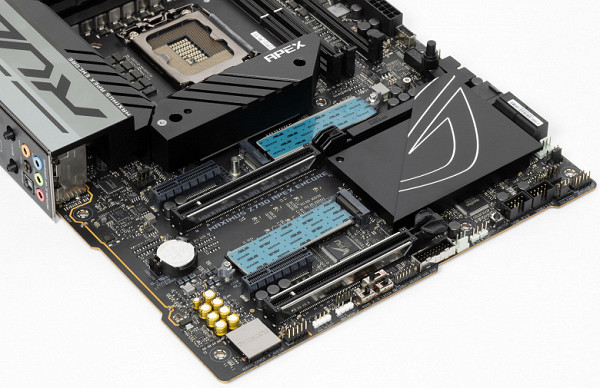
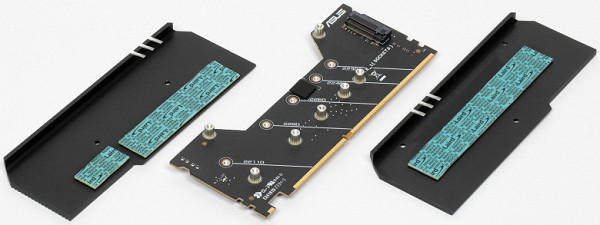
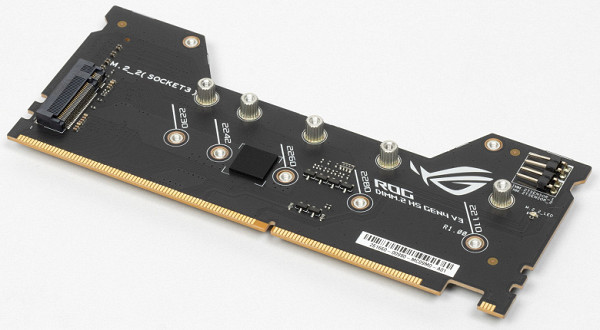
The remaining three M.2 slots receive data from the Z790 chipset. The M.2_3 slot is also located on the PCB itself, and the remaining two are located on the proprietary ROG DIMM.2 module, which accommodates two M.2 drives. DIMM.2 is installed in a special slot with a unique lock to prevent incorrect installation, and is located next to the memory module slots.
As mentioned, the M.2_1 slot shares resources with two PCIe slots, since the processor has only 16 PCIe 5.0 lanes. M.2_2 gets 4 dedicated PCIe 4.0 lanes, which are not shared with anything.
All four M.2 slots support modules with a PCIe interface, but the M.2_3 slot also allows you to install drives with a SATA interface.
Slots DIMM.2_1 and DIMM.2_2 support module sizes of 2242/2260/2280/22110, while the remaining slots allow module sizes up to 2280. All M.2 slots support RAID organization. The board has convenient twist locks for mounting M.2 drives on racks.
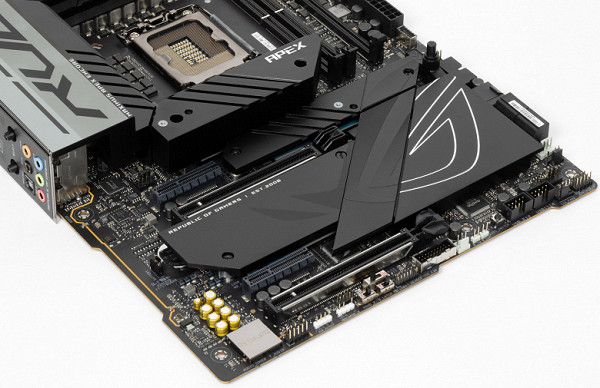
All M.2 slots are equipped with heatsinks. The top M.2_1 slot has a reinforced heatsink, while the rest of the M.2 slots on the board have more standard heatsinks. The DIMM.2_1 and DIMM.2_2 slots also come with heatsinks included with the ROG DIMM.2 module.
Peripheral functionality: USB ports, network interfaces, I/O
Now comes USB ports and other I/O. And let's start with the back panel, where most of them are located.
The Z790 chipset supports a maximum of 14 USB ports, including up to 10 USB 3.2 Gen1 ports, up to 10 USB 3.2 Gen2 ports, up to 5 USB 3.2 Gen2x2 ports, and/or up to 14 USB 2.0 ports.
There are a total of 19 USB ports on the motherboard:
- 2 USB 3.2 Gen2x2 ports, one of which is implemented using the Z790 and the ITE IT8856 controller
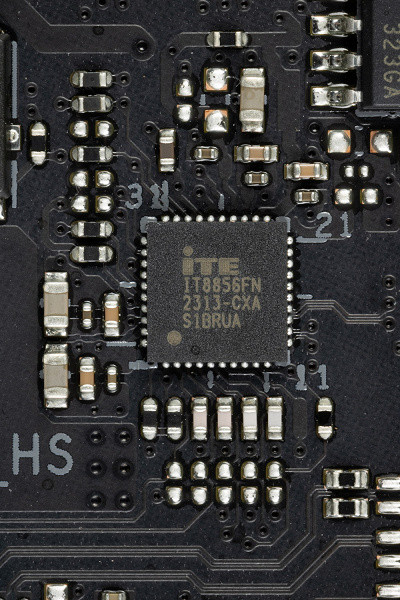
(it uses 1 USB 3.2 Gen2 line from the Z790) and is represented by an internal Type-C port
(to connect to the corresponding connector on the front panel of the case, the motherboard uses additional power (8-pin PCIe port) to implement fast charging of mobile devices (up to 60 W). The second USB 3.2 Gen2x2 port is implemented using the Z790 and the ITE IT8853 controller.
1 USB 3.2 Gen2 lane from the Z790 is used to implement a second USB 3.2 Gen2x2 port, which is presented on the rear panel as a Type-C port.
- There are a total of 5 USB 3.2 Gen2 ports on the rear panel, all implemented via the Z790 and represented by Type-A ports (red).
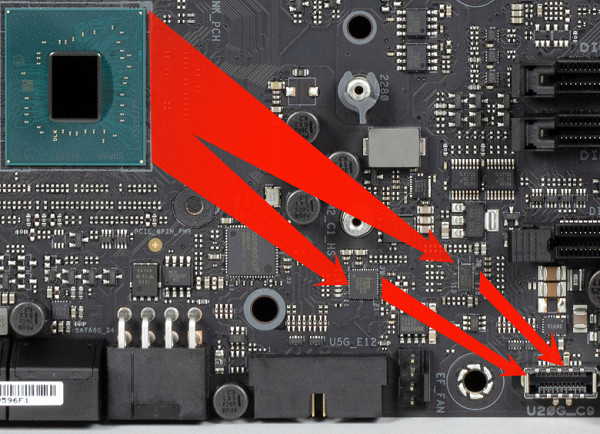
- Also on the rear panel there are 8 USB 3.2 Gen1 ports, 4 of which are implemented through two ASMedia ASM3142 controllers.
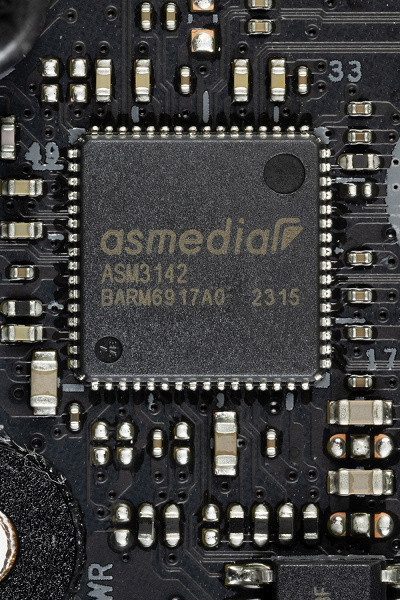
(each of them uses 1 PCIe 3.0 line from the Z790) and is represented by 2 internal connectors
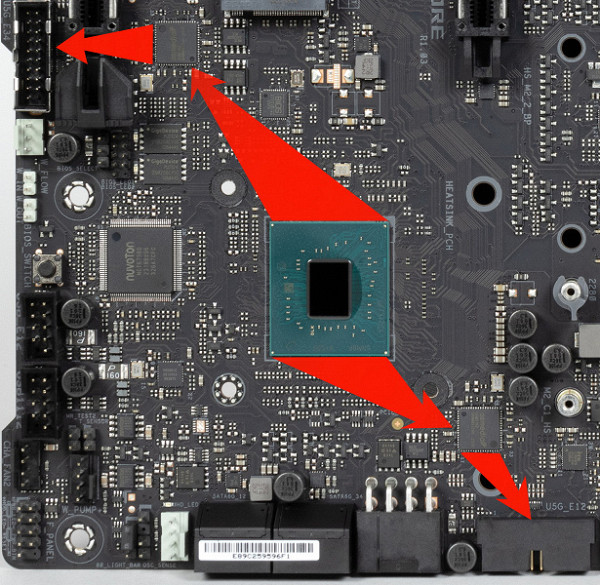
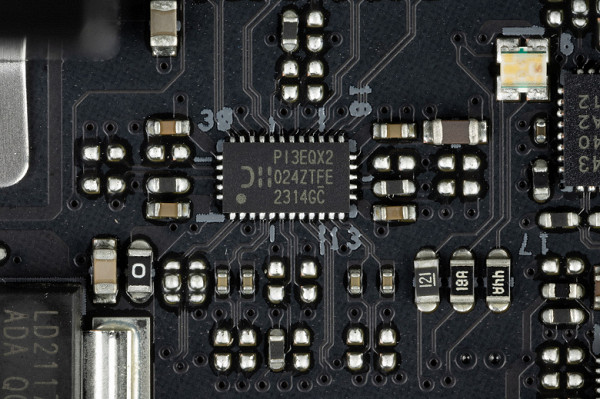
on the motherboard (each with 2 ports); 4 more are implemented via the ASMedia ASM1074 controller
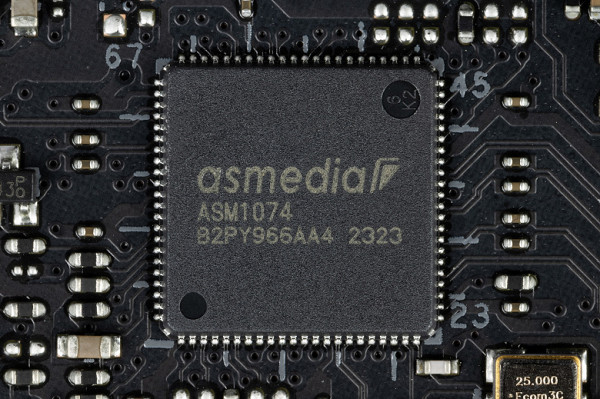
(it uses 1 USB 3.2 Gen2 line from the Z790) and is represented on the rear panel by Type-A ports (blue);
- 4 USB 2.0/1.1 ports: all implemented via Genesys Logic GL850G controller
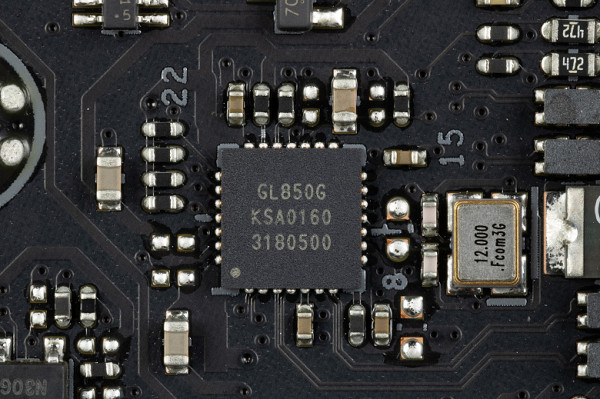
(it uses 1 USB 2.0 line from the Z790) and is represented by two internal connectors
- (each for 2 ports).
So we have 9 controllers using USB/PCIe lines from Z790:
- Two ASMedia ASM3142 (4 USB 3.2 Gen1 via 2 internal connectors) ( 2 PCIe 3.0 lines);
- ASMedia ASM1074 (4 USB 3.2 Gen1 via Type-A on the rear panel) ( 1 USB 3.2 Gen2 line );
- ITE IT8856 (support USB 3.2 Gen2x2 via internal Type-C) ( 1 USB 3.2 Gen2 line );
- ITE IT8853 (support USB 3.2 Gen2x2 via Type-C on the rear panel) ( 1 USB 3.2 Gen2 lane );
- Genesys Logic GL850G (4 USB 2.0 via 2 internal connectors) ( 1 USB 2.0 line );
- Audio ( 1 USB 2.0 line);
- Aura (backlight) ( 1 USB 2.0 line );
- Bluetooth (BE200) ( 1 USB 2.0 line).
So, the Z790 chipset implements high-speed USB ports:
- 2 dedicated USB 3.2 Gen2x2 (does not count, as they were obtained at the expense of other HSIO);
- + 5 dedicated USB 3.2 Gen2
- + 5 USB 3.2 Gen2 lanes to support other controllers
= 10 high-speed ports . Do not forget that each high-speed USB port is provided with a USB 2.0 port, that is, 10 USB 2.0 ports are also occupied. Plus 4 USB 2.0 ports to provide controllers. A total of 14 USB ports are implemented .
Well, and 28 PCIe lines allocated to support other peripherals.
In total, the Z790 in this case has 38 high-speed ports out of 38 .
All fast USB Type-C ports are equipped with re-drivers that provide stable voltage.

The internal Type-C port (USB 3.2 Gen2x2) is implemented through the previously mentioned controller from ITE and uses additional power (8-pin PCIe port) for fast charging of mobile devices (up to 60 W).
Now about the network aspects.
The motherboard is equipped with communication facilities well. There is a high-speed Intel I225-V Ethernet controller capable of operating according to the 2.5 Gbit/s standard.
The most modern comprehensive wireless adapter is installed on the Intel BE200NGW controller, which supports Wi-Fi 7 (802.11a/b/g/n/ac/ax/be) and Bluetooth 5.4. The adapter is located in the M.2 (E-key) slot, and the connectors for connecting external antennas are located on the rear panel of the motherboard.
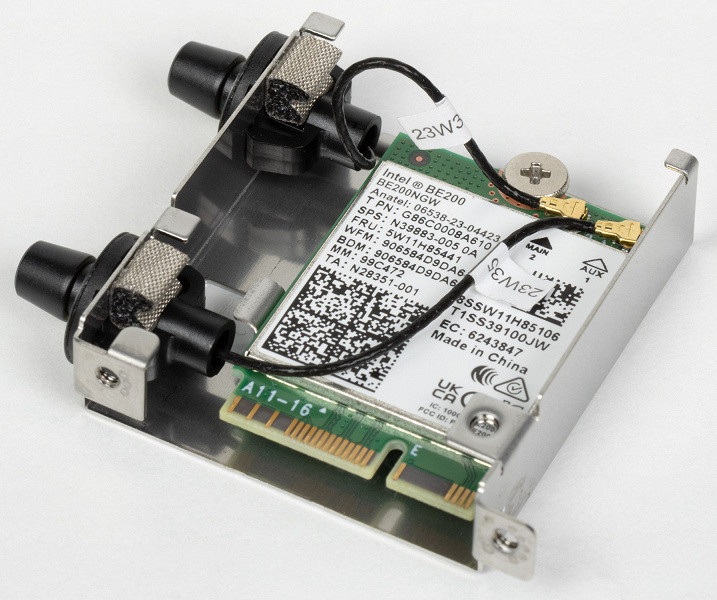
The plug, traditionally placed on the back panel, in this case is already put on and is shielded from the inside to reduce electromagnetic interference.
Audio subsystem
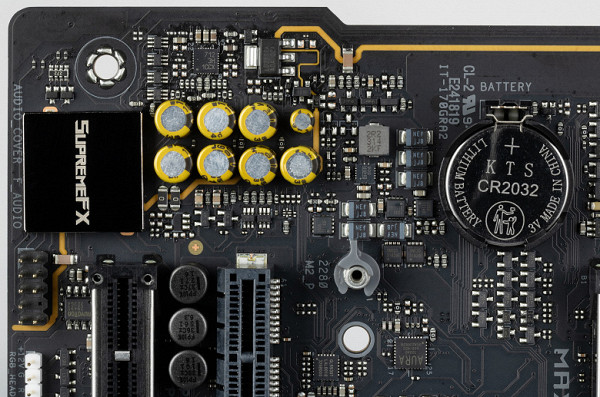
Previously, the popular audio codec on most modern motherboards was the Realtek ALC1220, which provides audio output of up to 7.1 channels with a resolution of up to 24 bit / 192 kHz. Currently, the ALC4080 codec from the same manufacturer Realtek with improved characteristics up to 32 bit / 384 kHz is found on top-level motherboards. According to Asus tradition, this codec is closed with a metal cap under the SupremeFX brand.
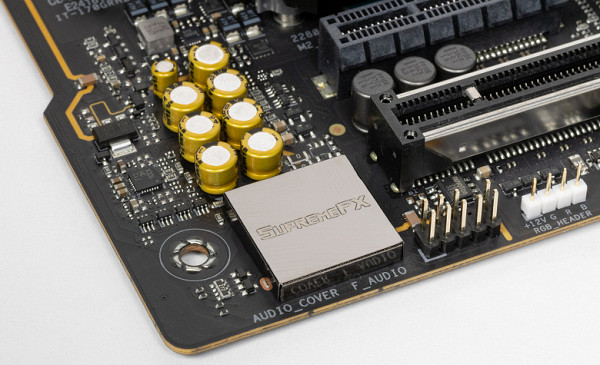
The circuit uses an SV3H712 operational amplifier from Savitech.
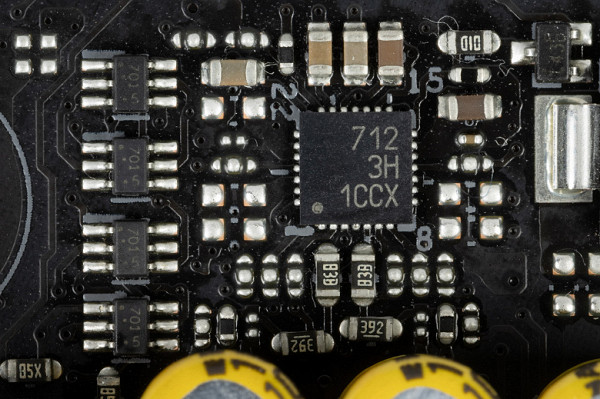
The audio circuits of the board use “audiophile” Nichicon Fine Gold capacitors.
The audio path is located on the corner part of the board and does not intersect with other elements. All audio connectors on the rear panel are gold-plated, as well as the usual color scheme.
Power, cooling
There are 4 connectors for powering the motherboard: in addition to the 24-pin ATX connector (located on the right side of the board, on the left in the photo), there are two 8-pin EPS12V connectors and one 8-pin PCIe connector. The latter is used to power the USB 3.2 Gen2x2 port, which supports fast charging of mobile devices up to 60W.
The processor power supply circuit is 24+2+0 (26 phases in total, 24 on VCore and 2 on VCCIO), the integrated graphics core is not used.
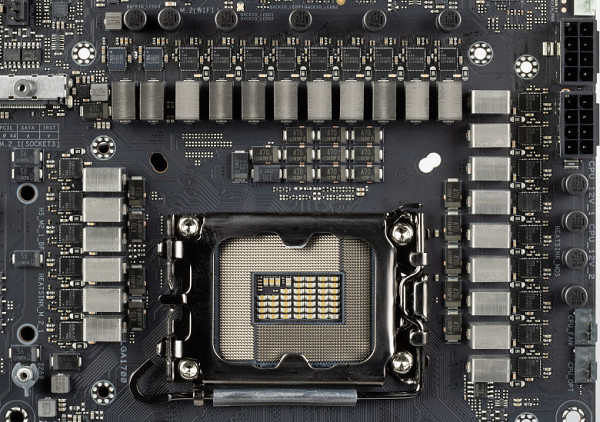
Each VCore phase channel has a superferrite choke and a Renesas 105A RAA22010540 MOSFET.
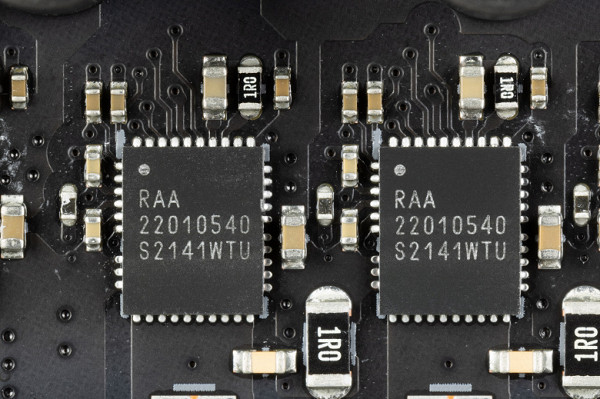
The circuit is controlled by the RAA229131 PWM controller from Renesas, designed for a maximum of 24 phases.
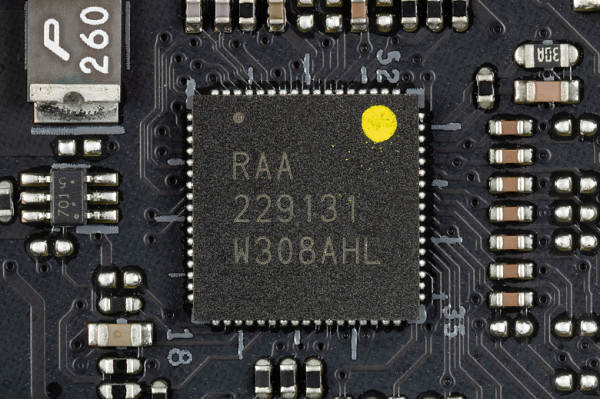
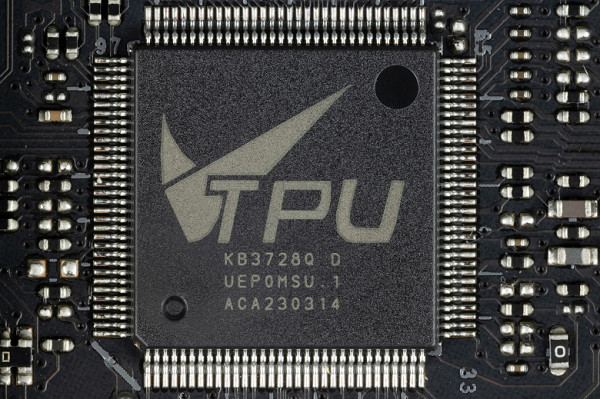
On almost all mid- and high-end motherboards you can find a proprietary digital TPU controller, which is responsible for intelligent control of power phases for PWM controllers. This controller can be configured and controlled via AI Suite software to ensure optimal power system performance.
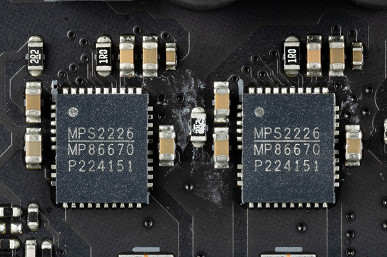
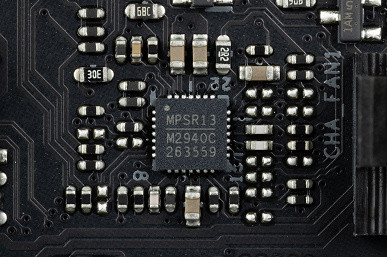
The VCCSA unit has its own separate two-phase power supply, controlled by an MP2940A PWM controller from Monolithic Power Systems.
Now about cooling.
All potentially very hot elements have their own heat sinks.
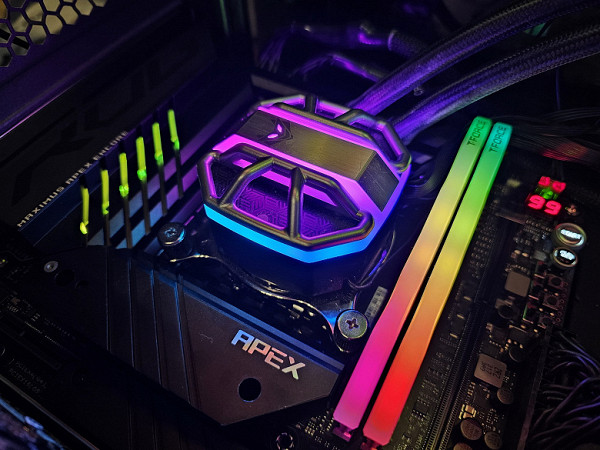
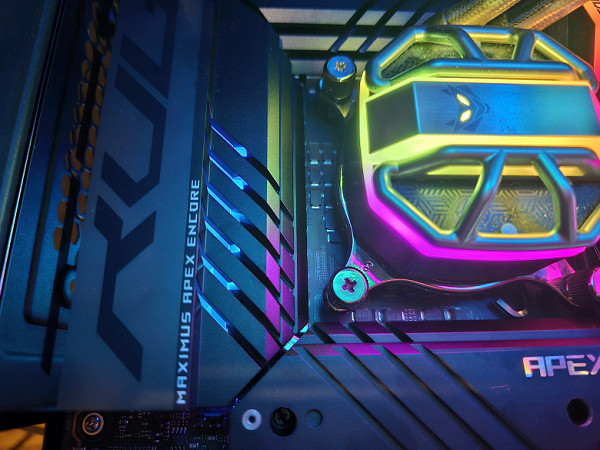
The chipset is cooled separately from the power converter system. The VRM section is equipped with three radiators, which are connected by a heat pipe at right angles.
The VRM heatsink running along the rear block of ports has a diffuser for backlight LEDs, which are installed on the PCB itself behind the block with power converters.
As mentioned earlier, all M.2 slots are equipped with their own heatsinks. The three M.2 slots located on the main PCB, in addition to the main heatsinks, also have thin heatsinks and thermal pads to cool the rear sides of the modules.

Let me remind you that in addition to the built-in cooling systems, this motherboard comes with an additional fan and mount for cooling the memory modules. The installation diagram for this device was presented earlier.
There is no backplate (protective plate) on the back of the motherboard.
Backlight
In this case, the lighting effects are very modest and are limited only to stripes on the casing above the rear block of ports. It is also worth mentioning 4 connectors for connecting external lighting, which can be controlled through the Armory Crate program.
Of course, if anyone doesn’t like this beauty, you can always turn off the backlight through the software (or through the customized FlexKey button).
Windows software
All software is available for download on the manufacturer's website asus.com.
Particularly noteworthy is the Armory Crate utility, which is a central manager for all Asus applications, ensuring their timely updates, managing Aura Sync lighting and other functions, as well as synchronizing the operation of Asus devices from the ROG series.
The Armory Crate installer is available in the UEFI BIOS and is offered for installation by default, so after Windows boots you may be prompted to install it.
You can also download Aura Creator to create your own lighting scenarios. With it, you can customize the lighting effects even when the motherboard is turned off, when power is supplied from the power supply. Of course, the program allows you to separately configure the ARGB and RGB connectors on the motherboard.
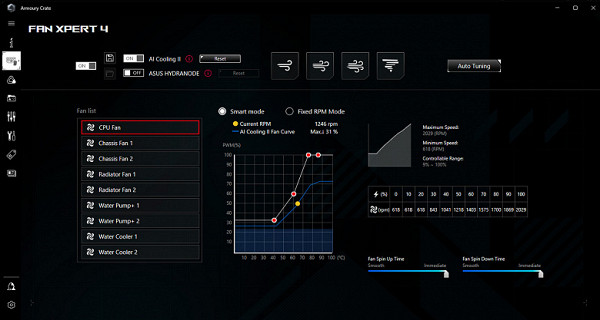
Armory Crate also includes motherboard fan control, previously performed by AI Suite, which is now integrated into Armory Crate under the name FanExpert.
The latest version of Armory Crate still has problems recognizing the newly installed motherboard. If the program was installed from scratch, it correctly recognizes the motherboard and loads the necessary scripts to service it. However, if you need to replace the motherboard with another Asus model, Armory Crate does not switch to the new board, saving old data and scripts, which leads to the utility not working correctly. To solve the problem, you have to completely uninstall the program, including clearing all folders and files, then install Armory Crate again to work correctly with the new motherboard.
In addition to the sound software, the manufacturer offers a special control panel, Sonic Studio III. This panel can be called either from Armory Crate or by installing a separate application.
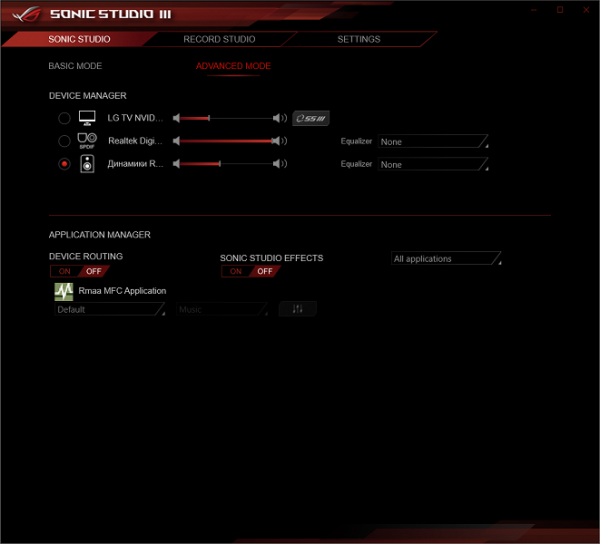
Here you can play around with fine settings, including equalizers
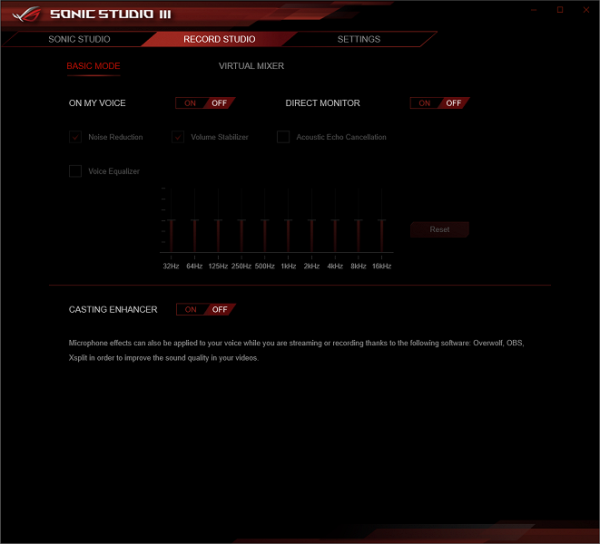
There are also special settings for signal reception
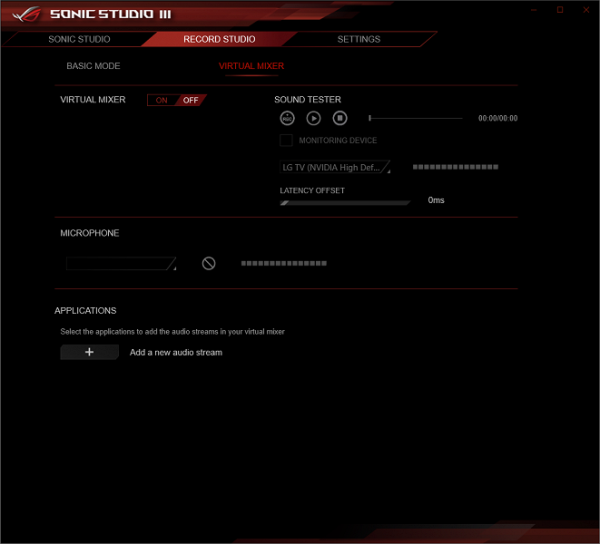
This program probably becomes even more interesting when using headphones, as it has special presets for creating surround sound.
In addition, when installing audio drivers, the DTS Sound Unbound utility is automatically added, which provides various surround sound options in games.
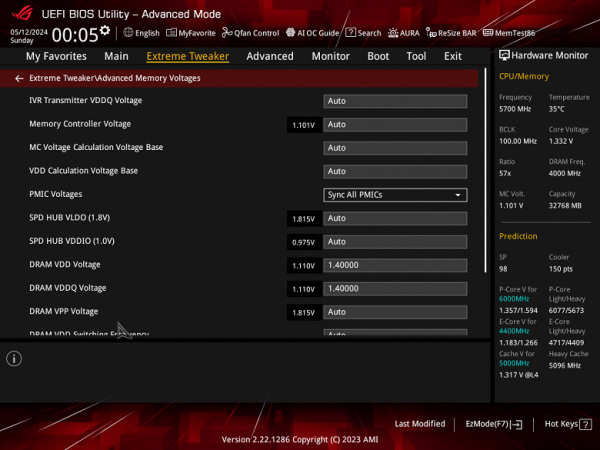
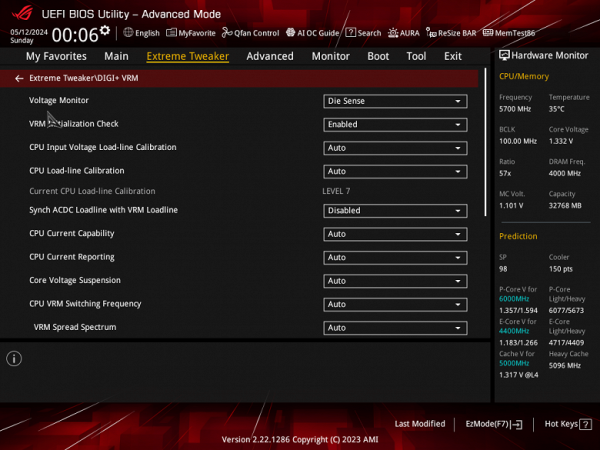
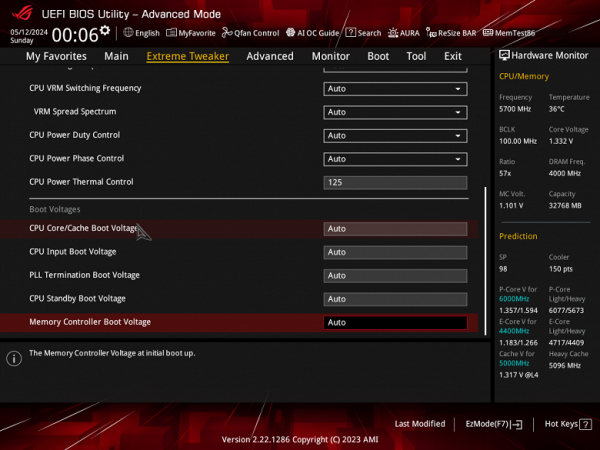
BIOS settings
All modern motherboards are equipped with UEFI (Unified Extensible Firmware Interface), which are in some ways miniature operating systems. To access their settings when you boot your computer, you usually need to press the Del or F2 key.
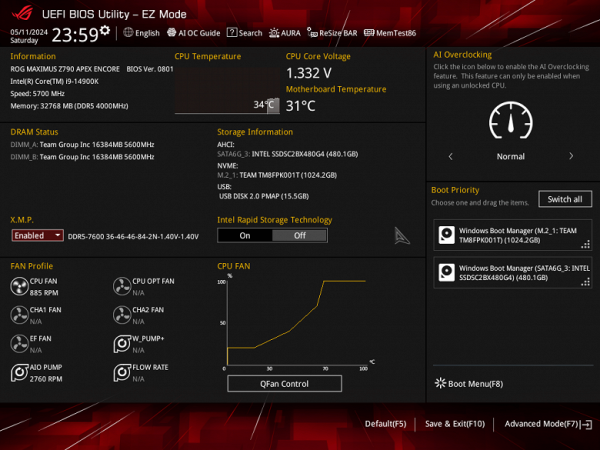
We get to the general “simple” menu, where you can change only the most basic settings, so press F7 and get to the “advanced” menu.
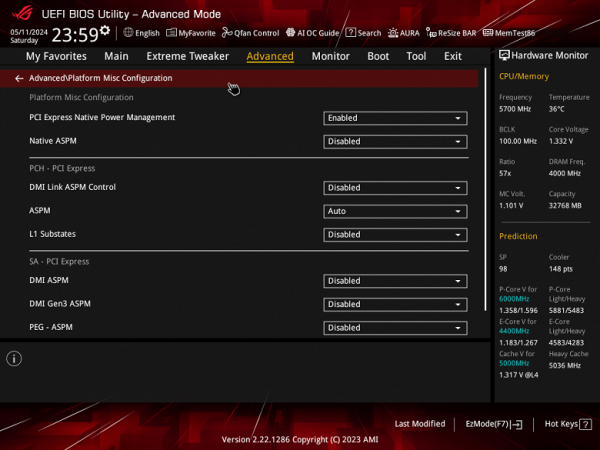
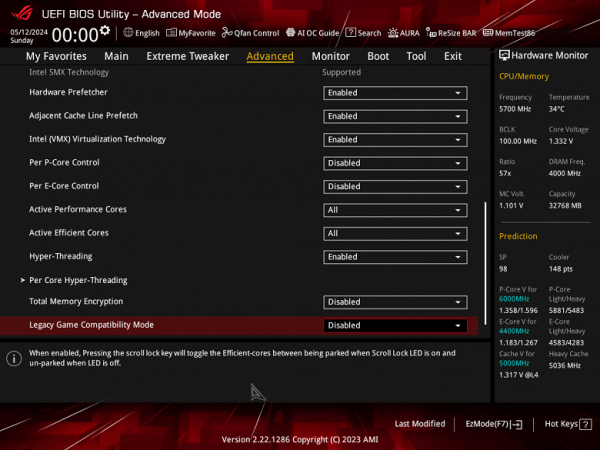

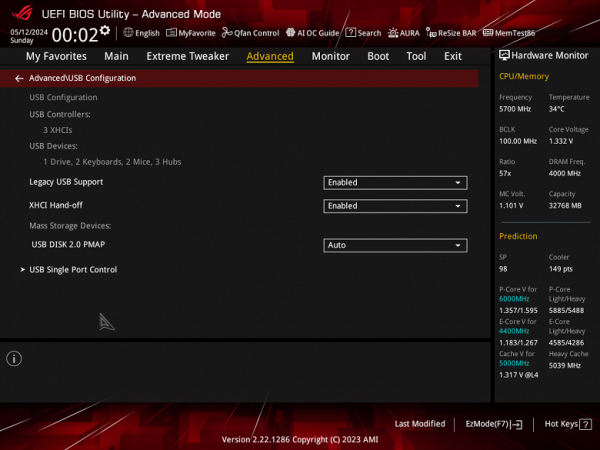
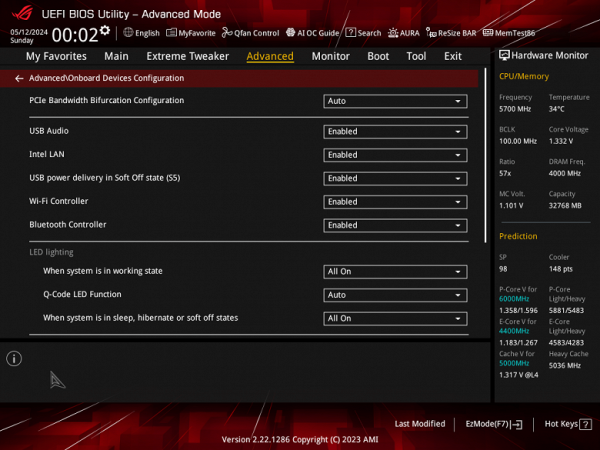
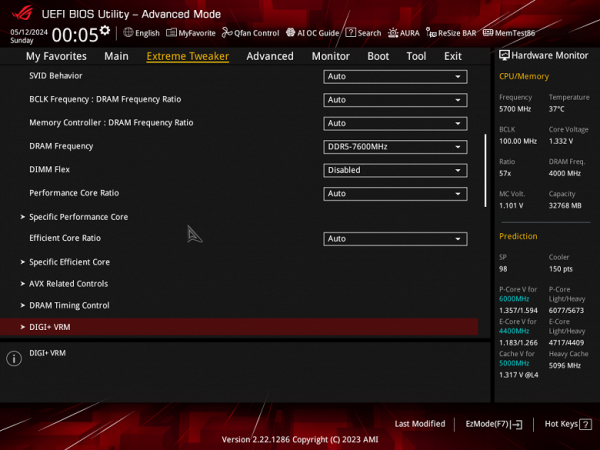
Peripheral management. There are many interesting positions where you can control each USB port. How to change the operating modes of PCIe and M.2 slots.
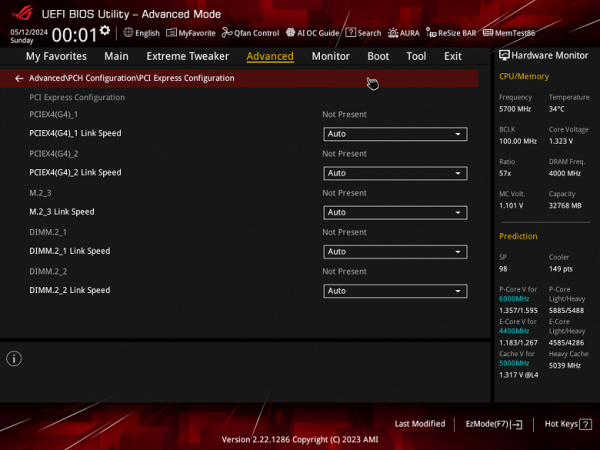
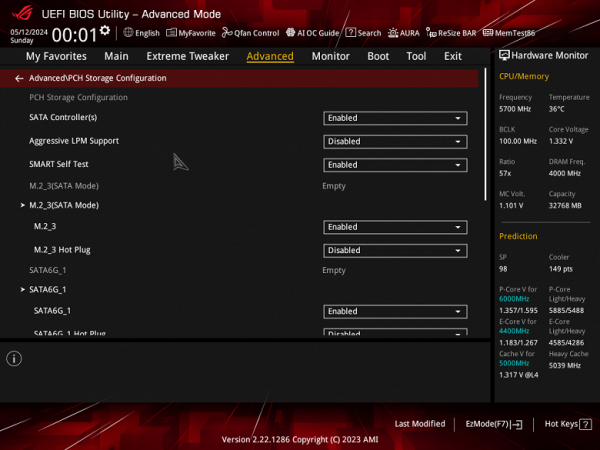
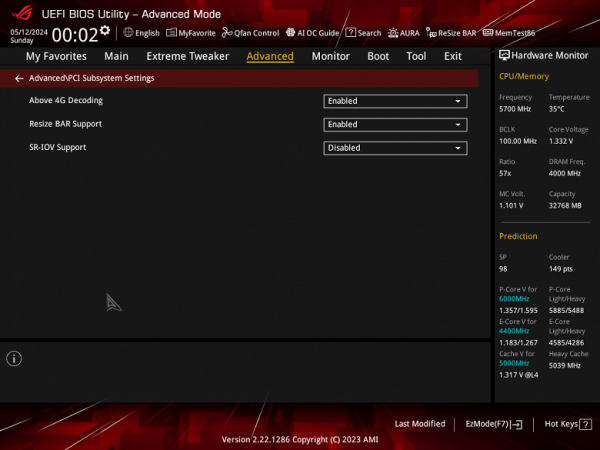
Particular attention should be paid in the section on managing M.2 and PCIe slots.
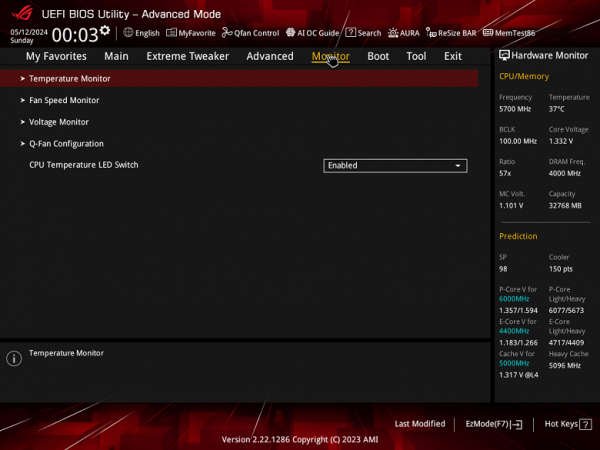
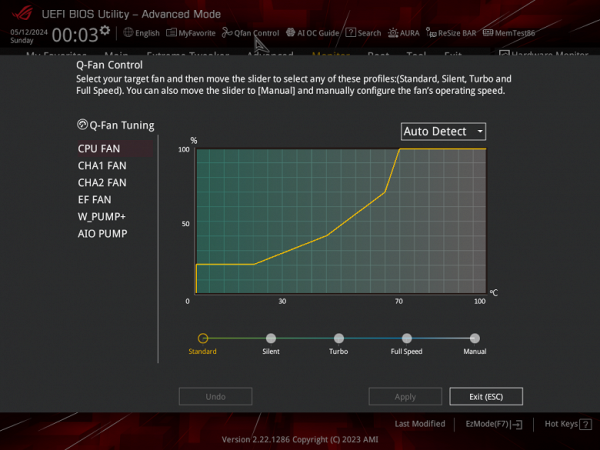
Monitoring and boot menu options are well known to everyone. There is also a Q-Fan utility for configuring the operation of fan sockets.

For overclocking, there are essentially standard options within the framework of what Core processors and DDR5 RAM support. We remember that there is an external clock generator, so you can flexibly change the frequency of the base bus.
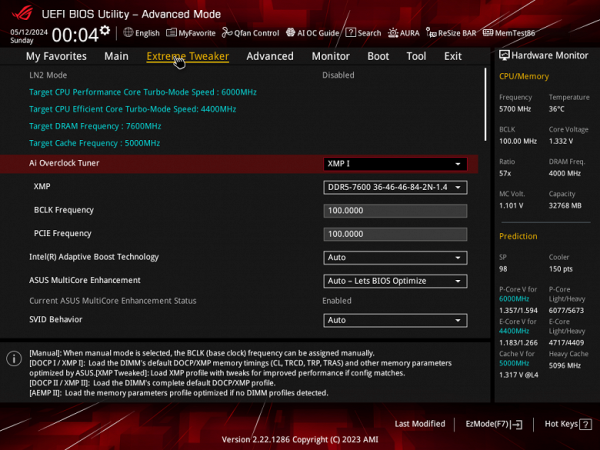
Therefore, in general, in addition to the standard functions, there are also many additional options available, which is typical for the line of flagship ROG products. However, it is worth considering that modern processors themselves already operate at significantly higher frequencies, using functions like Intel TurboBoost and the like.
Asus now has technology that automatically determines the maximum possible memory frequency. To do this, you need to select the appropriate mode in the overclocking section. Of course, Asus developers must know the characteristics of specific sets of memory modules in advance.

There is an opportunity to satisfy all types of users: overclockers who prefer a quiet system operation while leaving the processor to TurboBoost, and those who want to avoid interference from SpeedShift technology, which automatically reduces the processor frequency during periods of inactive use to save energy.
Particularly important is Multi-Core Enhancement (MCE), which removes restrictions on the processor's power consumption, allowing it to operate at maximum frequencies until thermal limitations arise. The default mode is Auto (control via BIOS settings), which means that if frequency synchronization is not set for all cores, then the maximum frequencies will change asynchronously. If it is important to stay within your TDP limit, it is recommended that you disable the MCE feature.
Performance (and overclocking)
Full configuration of the test system :
- Asus ROG Maximus Z790 Apex Encore motherboard;
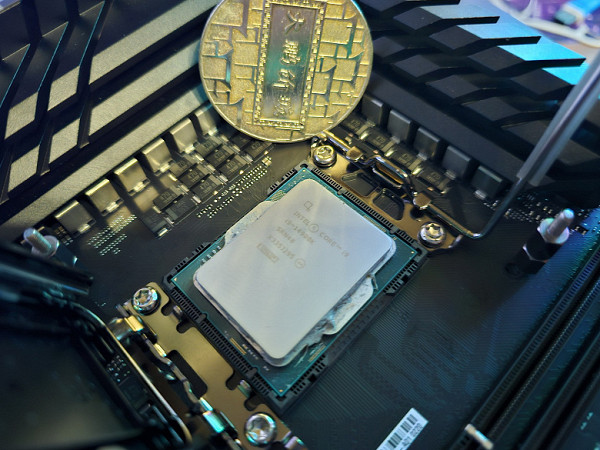
- Intel Core i9-14900K processor 4.5-5.8 GHz;
- TeamGroup T-Force Delta RGB 32GB (2×16) DDR5 (CL36-46-46-84) (XMP 7600 MHz) RAM;
- TeamGroup MP44L NVMe PCIe 4.0 1TB SSD drive;
- Palit GeForce RTX 3050 StormX graphics card ;
- Power supply Super Flower Leadex Platinum 2000W (2000 W);
- Sapphire Nitro+ S360-A AIO CPU Cooler;
- TV LG 55Nano956 (55″ 8K HDR);
- Asus ROG Strix Scope keyboard and Logitech mouse.
Software:
- Operating system Windows 11 Pro, 64-bit
- AIDA 64 Extreme
- 3DMark Time Spy CPU benchmark
- 3DMark Fire Strike Physics benchmark
- 3DMark Night Raid CPU benchmark
- HWInfo64
- OCCT v.13.0.0
- Adobe Premiere CS 2019
We launch everything in default mode (but activate MCE). Then we load it with tests.
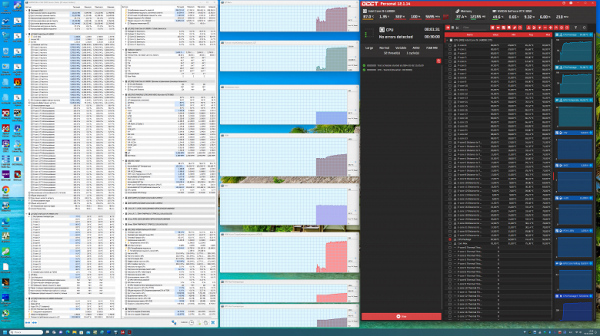
In a traditional setup with a powerful power supply and auto overclocking, we reached 5.7 GHz on all P cores and 4.4 GHz on all E cores. Let me remind you that P-cores are performance cores with two threads each, and E-cores are energy-efficient cores with one thread. All system parameters, including the thermal characteristics of components, were normal, despite the processor consuming more than 300 W. It should be noted that in this test the memory operated at standard SPD frequencies, while XMP was disabled.
Now let's run the same test, but with XMP enabled.
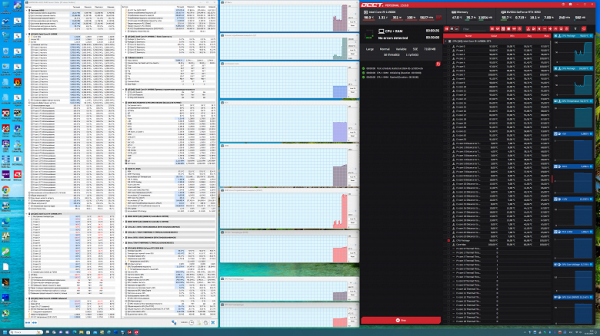
When both memory channels are loaded, all slots are occupied, and XMP mode is enabled, the load on the processor's memory controller increases significantly, which affects power consumption (reaching a record 350 W) and heating. In such conditions, auto-overclocking parameters may be insufficient, and a transition to more complex “overclocking games with settings” will be required.
However, it may be worth considering using the AI Optimized option built into the BIOS and based on artificial intelligence. This option offers optimized settings tailored to your specific system. AI can change processor and power system parameters to achieve optimal performance with minimal consumption and heat.
Before starting the stress test, we observed frequencies of up to 6.0 GHz on some P-cores of the processor. This frequency varies and is present in light tasks but not in stress tests. Under AI mode control, memory performance was returned to default values by disabling XMP. However, after running the stress test, the frequency returned to its original values (5.7/4.4 GHz). This demonstrates that the «smart» mode built into UEFI is effective under light loads when the processor is not loaded more than 60-70%.
Further experiments with overclocking settings in the BIOS were interrupted, as they require significant time, which is beyond the scope of this review.
It is important to note that testing took place under significant stress load on the processor. Even high-load applications cannot load all cores 100% for a long time. Overall, the power supply system on the motherboard performed well, and the processor has significant automatic overclocking potential.
conclusions
The Asus ROG Maximus Z790 Apex Encore motherboard belongs to the top ROG series and is designed for 12/13/14th generation Intel Core processors, designed for overclockers and gamers. It is equipped with only two slots for memory modules, which helps achieve maximum operating speeds. Among the 19 USB ports, 8 USB 3.2 Gen2 and two USB 3.2 Gen2×2 stand out, including internal Type-C for fast charging of mobile devices.
The board offers 4 PCIe x16 slots, two of which receive 16 PCIe 5.0 lanes from the processor, and the rest operate in x4 mode. In addition, there are 5 M.2 slots, including two connected to the processor (one via PCIe 5.0, the other via PCIe 4.0) and three to the Z790 chipset (via PCIe 4.0, including the ROG DIMM.2 module).
The board also has 4 SATA ports and 9 fan headers. The processor power system is powerful, capable of ensuring stable operation and overclocking. Cooling effectively covers all hot components, including drives in M.2 slots with thermal pads on both sides.
Network capabilities include a 2.5 Gbps wired controller and Wi-Fi 7/Bluetooth 5.4 wireless. The board supports various RGB devices and is equipped with an improved Realtek ALC4080 audio codec. BIOS Setup provides many settings for overclocking and system management.
The package includes an additional fan for cooling the memory, which makes this board an ideal choice for enthusiasts and demanding users focused on high performance and system stability.