
We recently reviewed the VL-1000G5-MOD power supply, and now it's time to test the Formula Air Power G5 EX case.
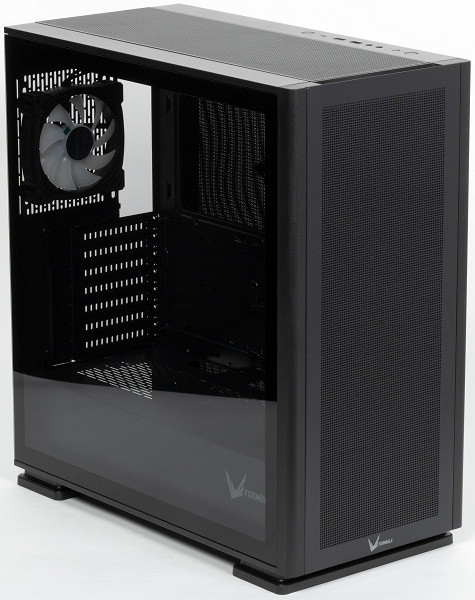
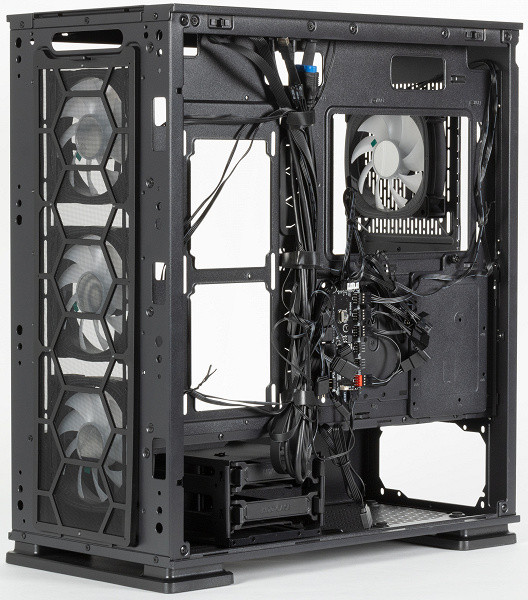
This case looks like a regular black box with a left glass panel, but the manufacturer also offers it in white. Upon closer inspection, it becomes clear that there are four backlit fans installed inside, controlled by a built-in controller, and there are replaceable dust filters. The case is a little heavier and larger than you might expect, but it looks much more solid than the usual budget options.
The box is made of unpainted cardboard with a simple black and white lettering, all components are packed in one bag. However, we found a lack of operating instructions, both in the kit and on the manufacturer’s website. Instead, only an A4 sheet with a limited list of technical characteristics is provided. Although this may not be a problem for an experienced user, for a beginner the instructions would be very helpful.
Layout
The layout solutions of this model follow modern trends in case design. In this case, the developers abandoned the compartment for 5.25″ format devices. Instead, the 3.5″ drive bay is placed closer to the front of the case, but its size is reduced to two drives. This compartment can be easily removed by simply unscrewing the screws on the side of the legs.
The case is a classic tower solution with a vertical placement of the E-ATX format board and a bottom location of the power supply. The ability to install a full-size motherboard up to 330mm in length makes this model especially attractive, given that this option is rarely found in budget cases.
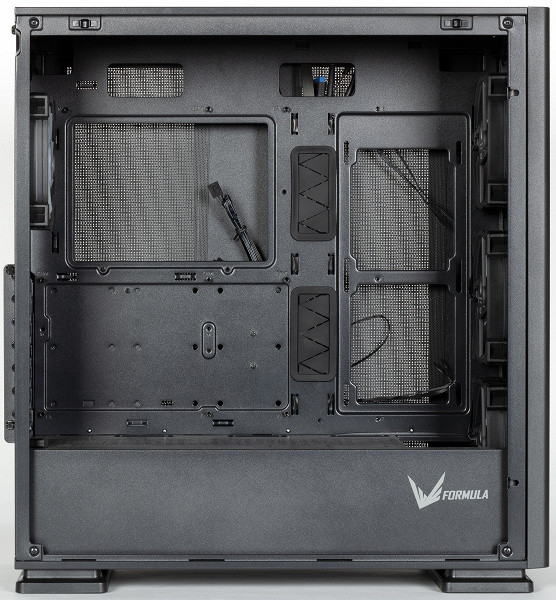
The casing, which covers the installation area of the power supply on the left side, not only gives the case an aesthetic appearance, but also provides additional rigidity, which is important for fixing the motherboard from the bottom side.
On the back side of the base of the case there are compartments for installing drives. However, the lack of storage space for externally accessible drives may be a drawback for certain users.
Backlight system
The case has an extensive lighting system with control based on a standard controller.
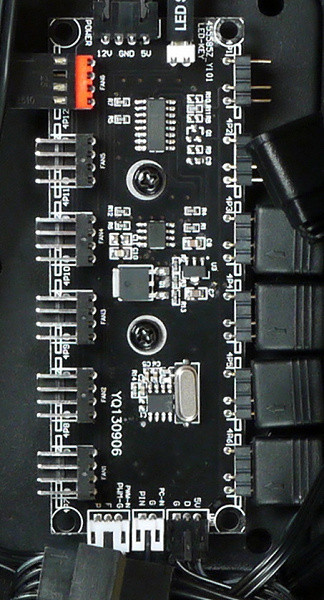
Four fans with individually addressable LEDs are used for lighting. They connect to the built-in controller using standard three-pin ARGB connectors.
Cooling system
The case fan controller has many functions: in addition to controlling the backlight, it is also designed to regulate the rotation speed of four PWM fans (with four-pin connectors).
However, in our instance we encountered a problem: the controller was unable to control the fan speed, despite all our attempts to change the PWM signal at the input or the supply voltage on the connector intended for connection to the motherboard (and the controller has two different connectors for this ). We hope that this is only a defect in a specific instance.
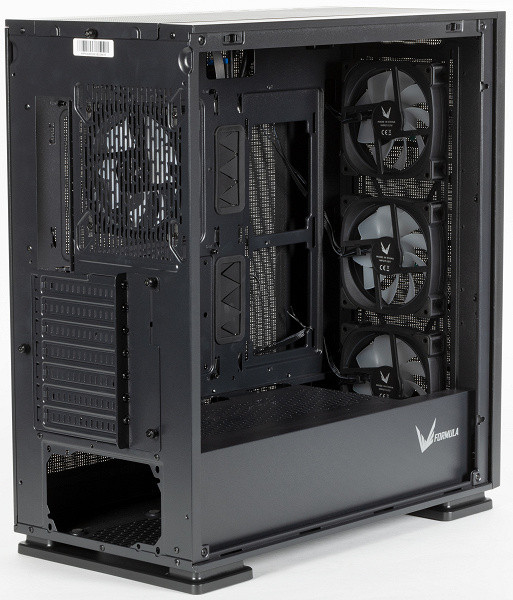
The case provides the ability to install a significant number of fans of standard sizes 120 or 140 mm. They can be placed in the front, top, back and right. The package already includes four standard size 120 mm fans: one on the rear panel and three on the front. Each fan has two connectors: a standard four-pin connector for connecting to the motherboard with PWM control, and a three-pin 1x4 connector for backlight control.
The case also has the ability to install three radiators: up to 420 mm in the front, up to 360 mm on the top and 120 mm in the rear.

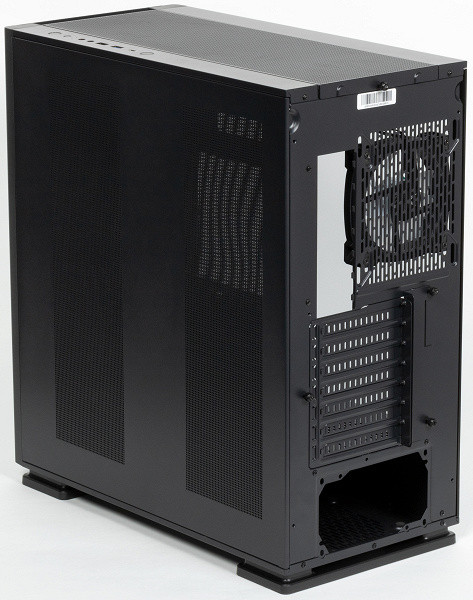
It is important to note that all vents have filters, but not all are easily accessible for maintenance.
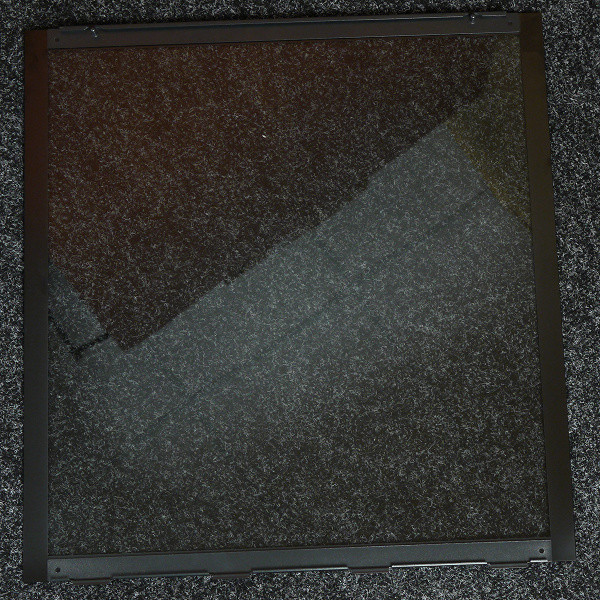
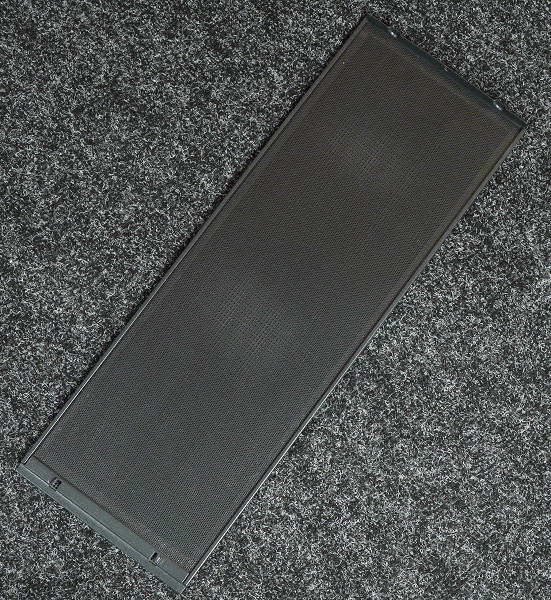
There are two filters at the front: a large-mesh filter made of durable plastic material, mounted on a removable frame on the front panel, and a fine-mesh synthetic filter located on the front wall of the case under the front panel. The last filter is fixed at the bottom with hooks and at the top with two magnets; it can be washed completely, but to do this you must first remove the front panel.
Doubts arise regarding the effectiveness of such a constructive solution. Most of the dust will probably accumulate between the two filters, turning into a kind of felt over time. In addition, the front panel will most likely become actively clogged due to the metal grille. However, if you remove the coarse mesh filter, the second filter can be easily cleaned with a vacuum cleaner with a crevice tool, without additional disassembly.
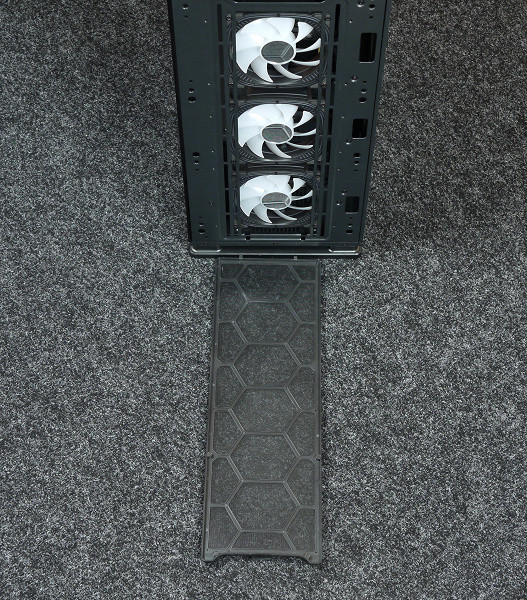
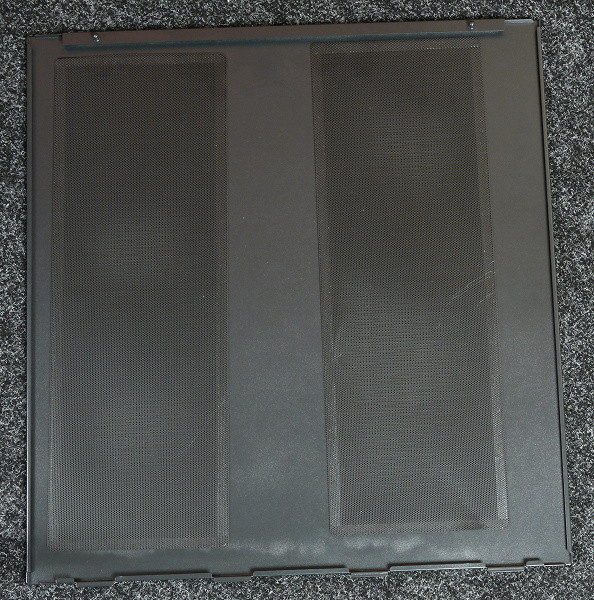
There is also a top filter installed inside the removable top panel under the grille. It is made of durable plastic material.
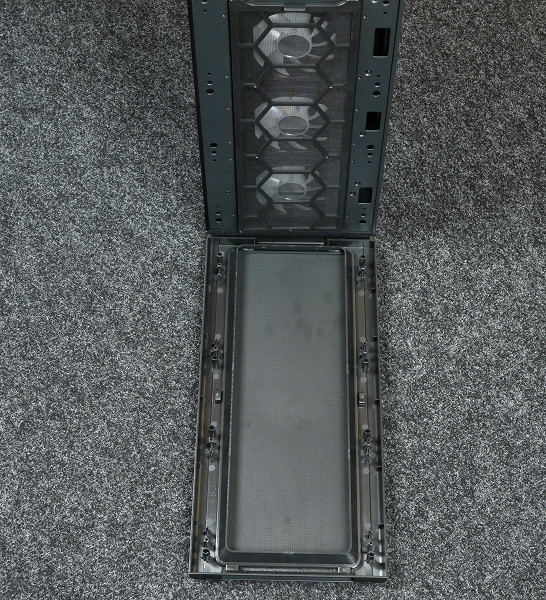
The filter at the bottom of the housing is the most inconvenient to use. It is also made of durable plastic material, but has no frame, making it difficult to remove and especially put back on for several reasons. First of all, the small petals under which the filter needs to be inserted make it difficult to perform this operation: if with short square filters this task was solved relatively easily, then with this filter, due to its large size, it becomes much more difficult. The filter is difficult to insert on one side, but can pop out on the other. In addition, to perform any operations on the bottom filter, the housing must be turned over, as this is almost impossible to do by touch.
I’ll add my thoughts about the legs of the housing, which partially overlap the installation site of the lower filter. Here, it would certainly be better to use another solution, for example a filter on the frame, which could be pulled out from the front or back along the guides. Or the option “like everyone else”: leave only the hole and filter in the area of the power supply.
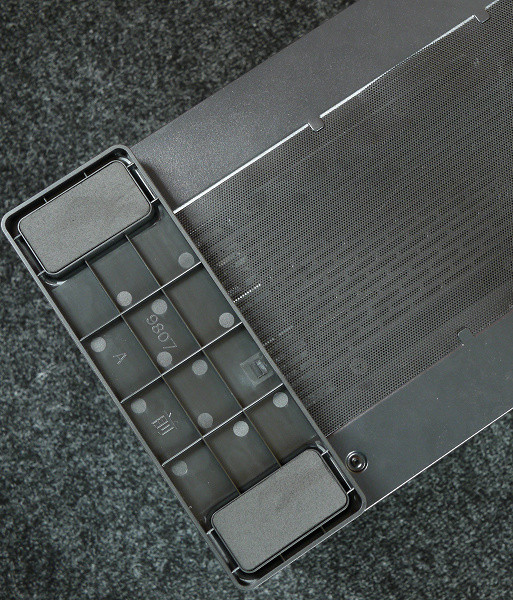
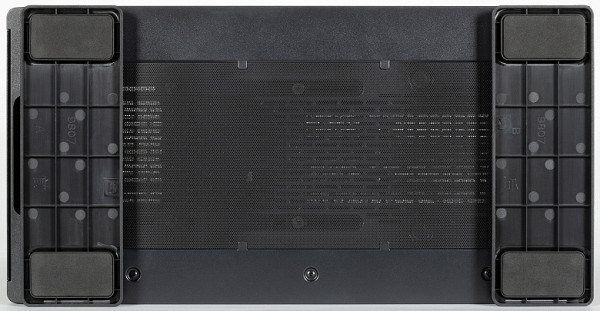
There are also filters made of plastic sheets on the right wall, but they are made with a magnetic frame, which ensures easy fixation of the filter in its seat.
In general, the case has dust protection, and it is quite good, but some technical solutions raise questions and can lead to difficulties in maintenance. It is worth noting that the plus is that all filters and grilles can be washed with water, since they are removable and do not have electrical connections.
Design
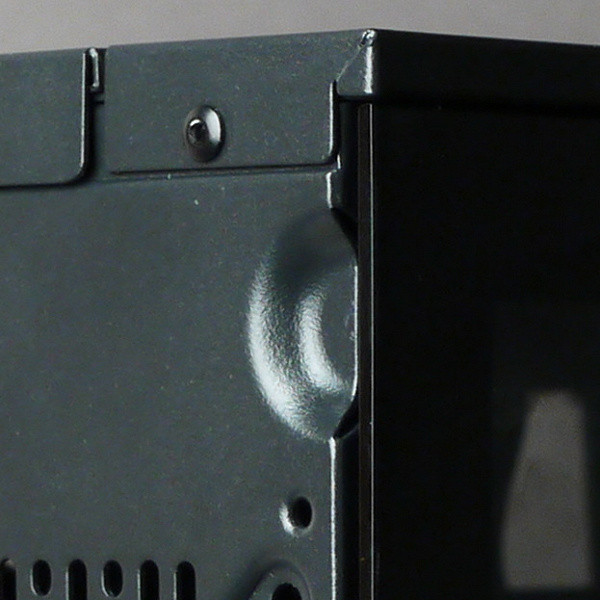
The side left panel is made of tempered glass with steel overlays. The fastening system is implemented according to the guillotine type principle: the panel is put on from top to bottom and snaps into place using hooks, which ensures its reliable fastening.
The right wall is completely steel, its fastening system is similar.
The top wall is also steel and removable; it is fixed with hooks at the front and one screw at the back.
The chassis of the case remains within the budget segment, but is of sufficient quality. Improvements are noticeable, aimed at increasing structural rigidity through the use of specially formed parts, as well as increasing ease of assembly.
The body weight is 9.3 kg, of which the glass wall weighs 1.5 kg, which is quite noticeable.
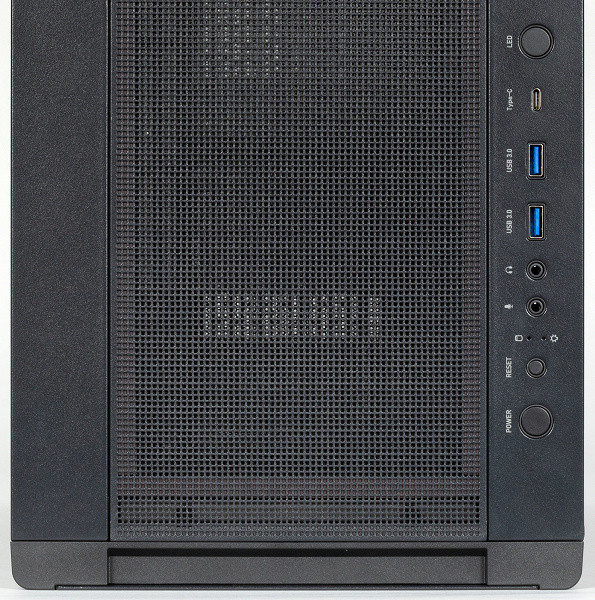
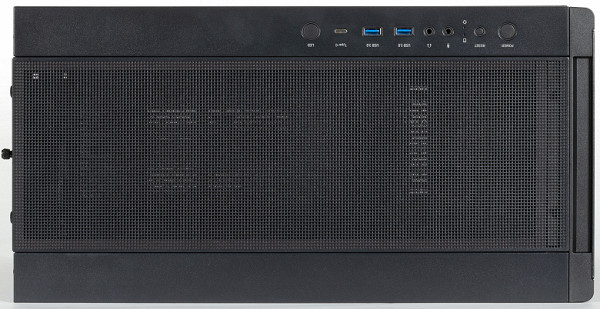
On the top panel along the right wall of the case there are interface connectors and control buttons. There are two USB3 Gen1 (USB 3.0) ports, one USB3 Gen2 (USB 3.1) Type-C port, microphone and headphone jacks, as well as power, panel control and reset buttons. It is important to note that the number of USB connectors exceeds the standard for budget models, which provides a higher level of this case. However, for some users, two USB Type A ports may not be enough to easily connect peripherals. At the same time, the connector for the audio device could be combined, which would make the interface even more convenient.
The front panel consists of two parts: a plastic base, which is attached to the chassis of the case using regular latches, and a metal front part. The front panel is secured using spherical spacer elements, which are inserted into the corresponding mounting holes.
The housing is based on two plastic support elements with foam inserts (EVA).
Drives
A double removable cage is provided for installing full-size hard drives. The discs are installed into the basket through plastic frames, where they are secured with pins and screws. These frames are universal and can be used to install 2.5-inch bottom-mount drives.
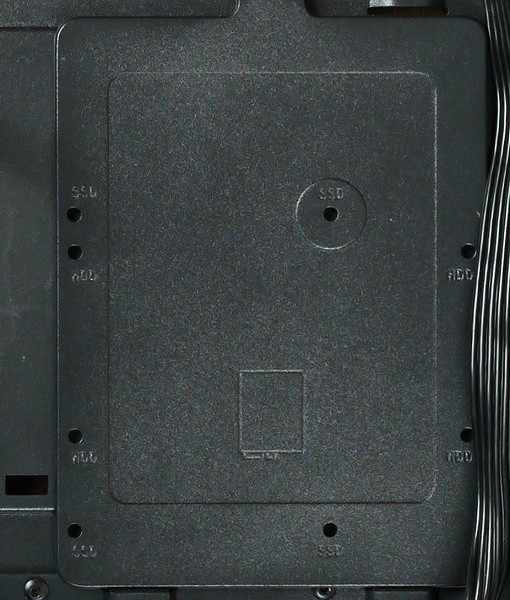
Another place to install 2.5/3.5-inch drives is provided on the mounting plate located on the back of the motherboard base, closer to the rear panel. The plate is secured using hooks and a thumbscrew. The disk is secured using screws that are tightened from the bottom of the drive.
Thus, the case can accommodate up to three 2.5- or 3.5-inch drives, which is a relatively small number for a full-size case.
Assembling the system unit
The tempered glass wall is secured using spherical spacers at the top and hooks at the bottom. To remove it, you need to slightly tilt it to the side, overcoming the force of the spacer elements. There is a special stamping on the back wall that facilitates this operation, allowing you to rest your finger against the wall. This technical solution turns out to be very successful and easy to use.
The steel wall has a similar mounting system to the glass wall, but is slightly less rigid, especially due to the larger ventilation holes. In general, both walls are easy to remove and install back.
If required, the top wall can also be removed by removing the thumbscrew from the rear panel. Below it is the upper wall of the chassis with mounting holes for the cooling system. Sometimes a little force may be required to remove the top wall, but no special tools are required.
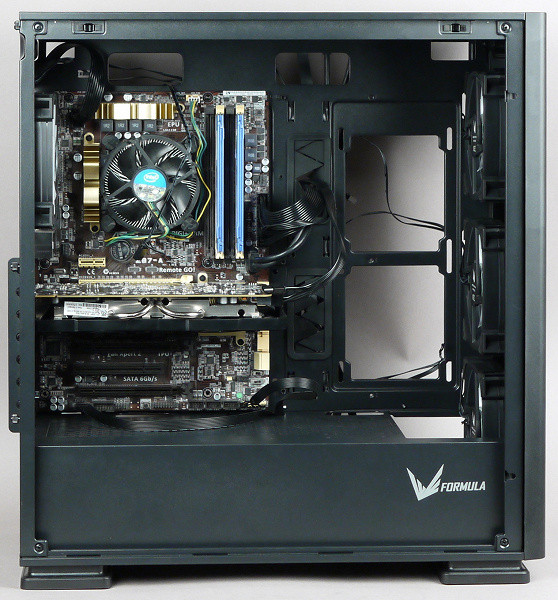
All racks for mounting the motherboard are pre-installed by the manufacturer, taking into account the dimensions of the ATX board with a width of 244 mm. If the board is up to 244 mm wide, no additional screwing in of the stands is required. For a board with a width of 330 mm, additional stands must be screwed in.
The order in which the PC is assembled in this case is not particularly important, since the components are spaced apart and do not interfere with each other. However, it is recommended to start by installing the power supply and routing the wires.
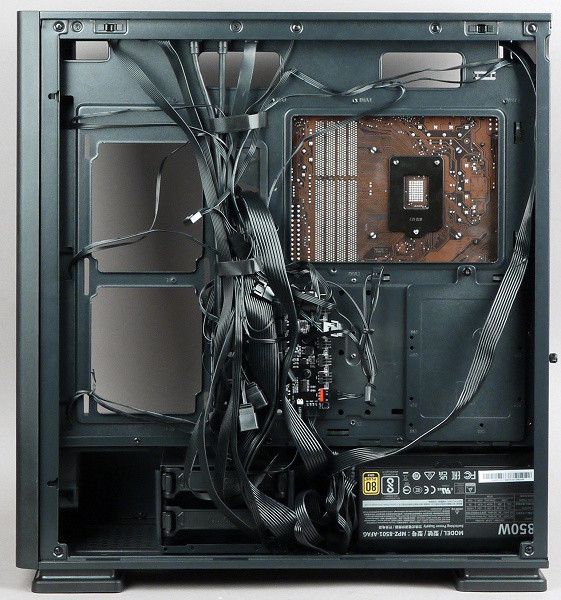
The power supply is installed on the right side and secured with four screws. The case supports standard power supply sizes, although no maximum length is specified. The distance between the rear panel of the case and the front drive cage is about 230 mm in its stock position, but you can remove the cage and move it closer to the front panel. For ease of wiring, it is recommended to choose a power supply with a length of no more than 160 mm, or better yet, 140 mm.
The case allows you to install a processor cooler up to 185 mm in height, and the distance from the base for the motherboard to the opposite wall is about 200 mm.
The depth of the compartment for routing wires is about 21 mm at the rear wall. For their installation, loops are provided for attaching ties or other similar devices.
Next, you can install the necessary expansion cards, for example, a video card, which can reach a length of up to 435 mm, but ease of assembly recommends not exceeding the size of 300 mm.

The fastening system for expansion cards involves the use of screws on the outside of the case with individual fixation, as well as an additional common clamping frame, which makes the process of installing or dismantling the expansion card more labor-intensive. All expansion card blanks are reusable and secured with screws.
The buttons and connectors of the front (in this case, top) panel are connected as standard: USB and audio are connected through monolithic multi-pin connectors, and all others are connected through single-pin and two-pin connectors.
Acoustic ergonomics
Since our case sample had a faulty standard controller, we decided to measure the noise level of the cooling system by changing the fan supply voltage in the range from 5 to 12 volts. We use this measurement method for ordinary cases that do not have their own controllers.
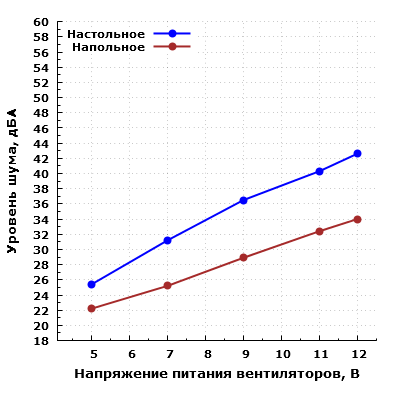
The noise level in the standard cooling system ranges from 25 to 43 dBA when using a microphone in the near field.
Powering the fans at 5V keeps noise levels low, especially when using a near-field microphone. As the supply voltage increases, the noise level increases: in the range from 7 to 11 V it ranges from medium (31 dBA) to high (41 dBA), which corresponds to typical values for residential premises during the daytime.
When installing the case at a greater distance from the user, for example, on the floor under a table, the noise becomes minimally noticeable when the fans are powered from 5 V and average when powered from 12 V, which also corresponds to the typical noise level for residential premises during the daytime.
Thus, the chassis noise level can vary from low to high depending on the fan mode, which provides good flexibility in tuning.
Results
The Formula Air Power G5 EX case gave me mixed impressions. Although it uses quality materials and has an impressive weight, its design remains relatively budget-friendly. It comes with a variety of dust filters, but their quality and ease of maintenance could be better. In addition, there are no additional elements that would facilitate the assembly of the system, with the exception of convenient stampings for removing the side panels.
The range of places for installing drives, although somewhat modest, does not correspond to the declared characteristics and is even inferior to some more compact models. Perhaps, at present, the need to install a large number of disks is not so high, but being able to create your own file storage remains relevant.
Overall, the Formula Air Power G5 EX is a simple model with larger dimensions and thicker steel. The option without the controller and fans will likely be available at a lower price and may have a better chance of attracting buyers.